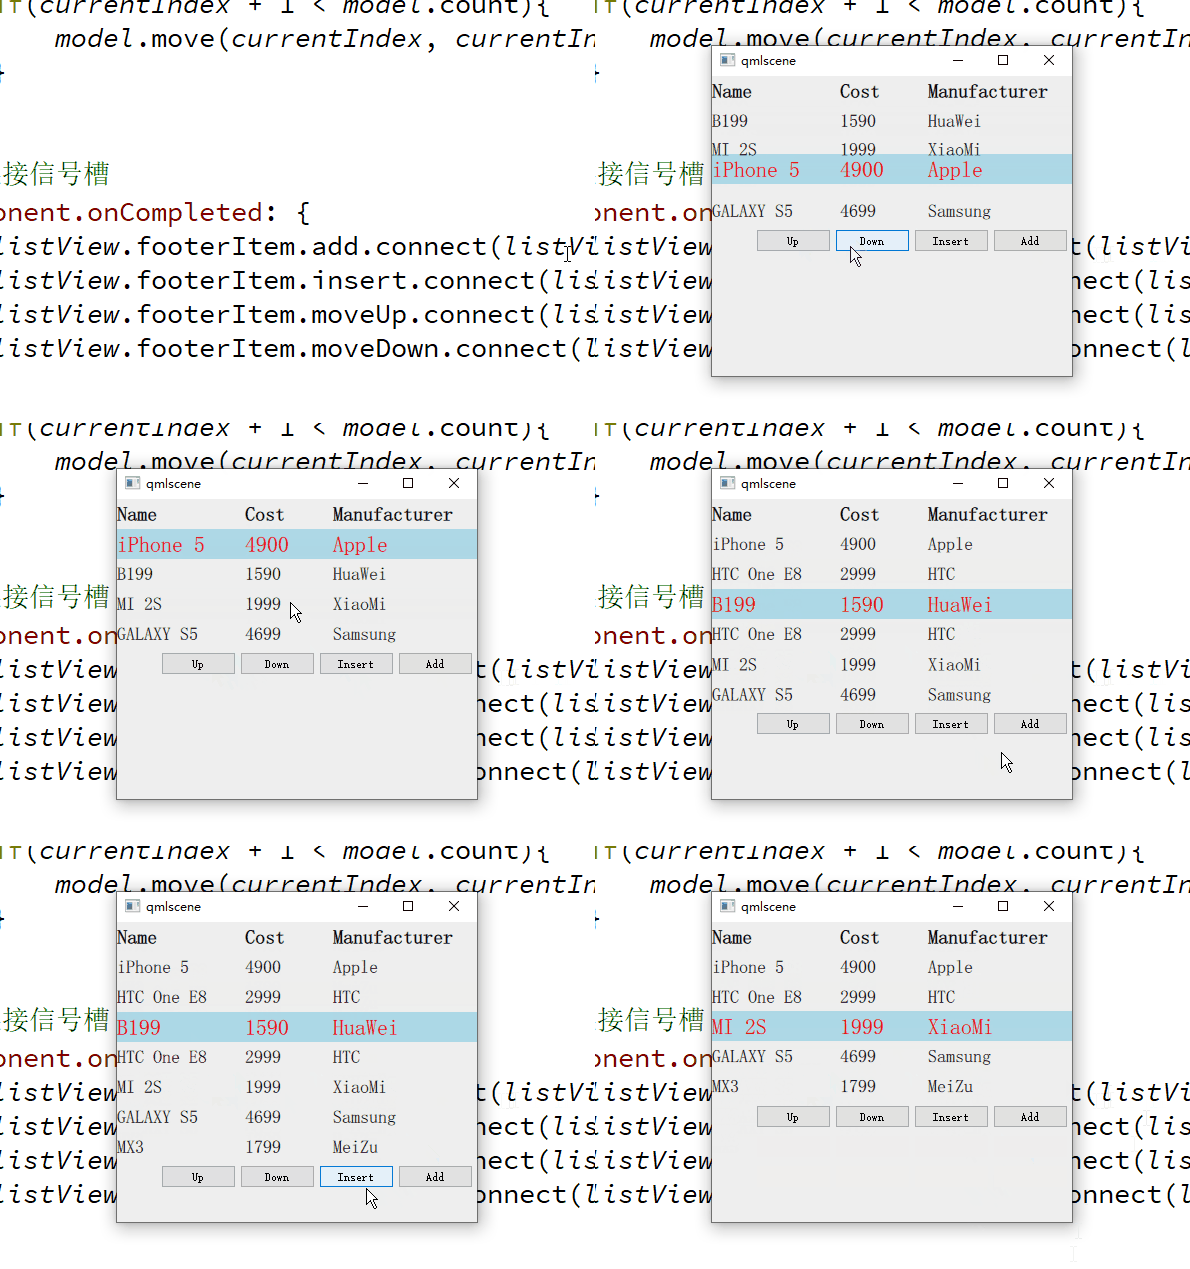
ListView 提供了 add、remove、move、populate、displaced 幾種場景的過渡動畫效果,你 可以通過設置相應的屬性來改變特定場景對應的過渡動畫。這些場景對應的屬性,類型都是 Transition,—個場景也可能有多個屬性,比如新增 Item 會觸發 add 過渡動畫,同時也可能引 起其他 Item 的位置變化,進而觸發 addDisplaced 或 displaced 過渡動畫。
效果

初始化 動畫
ListView 第一次初始化使用 populate 動畫:
// 在ListView第一次實例化或者因Model變化而需要創建Item時應用
populate: Transition {
    NumberAnimation {
        property: "opacity"
        from: 0
        to: 1.0
        duration: 1000
    }
}
這將產生一個漸顯效果。
add 動畫
add 屬性指定向 ListView 新增一個 Item 時針對該 Item 應用的過渡動畫。其設置了一個 ParallelAnimation,內含一個變換透明度的動畫和一個變換 y 位置的動畫。
// add過渡動畫(新增Item觸發)
add: Transition {
    ParallelAnimation{
        NumberAnimation {
            property: "opacity"
            from: 0
            to: 1.0
            duration: 1000
        }
        NumberAnimation {
            properties: "x,y"
            from: 0
            duration: 1000
        }
    }
}
最終的效果是,新增 Item 從 ListView 上方漸現、緩緩下落到特定位置。 需要注意的是,盡量不要在 add 動畫中改變 Item 的高度,因為這樣會引起它下面的其他 Item 被重新布局進而錯放位置,也會帶來性能上的損耗。
displaced 動畫
我點擊 “Insert” 按鈕時,新增 Item 下方的那些被迫移位的 Item,沒有明顯的動畫效果。 這是因為 displaced 屬性默認為 null,ListView 沒有提供默認的移位動畫。
displaced 屬性用於指定通用的、由於 Model 變化導致 Item 被迫移位時的動畫效果,而相應 的 addDisplaced、moveDisplaced、removeDisplaced 則用於指定由特定的 add、move、remove 操作引起的移位動畫。如果你同時指定了 displaced 和 xxxDisplaced,那 xxxDisplaced生效;如果你只指定 displaced,那只要有移位發生,displaced 動畫就會被應用。
// 用於指定通用的、由於Model變化導致Item被迫移位時的動畫效果
displaced: Transition {
    SpringAnimation {
        property: "y"
        spring: 3
        damping: 0.1
        epsilon: 0.25
    }
}
再運行看看,點擊 “Insert” 按鈕,會發現位於新增 Item 下方的那些 Item 會向下移動,來回彈幾次才平靜下來。
remove 動畫
remove 屬性指定將一個 Item 從 ListView 中移除時應用的過渡動畫。當動畫開始執行時, Item 已經被移除,此時任何對該 Item 的引用都是非法的。移除一個 Item 可能會導致其他 Item 移位,此時會觸發 removeDisplaced 或 displaced 過渡動畫。給 ListView 指定 remove 動畫如下:
// remove過渡動畫(移除Item觸發)
remove: Transition {
    SequentialAnimation{
        NumberAnimation {
            properties: "y"
            to: 0
            duration: 600
        }
        NumberAnimation {
            property: "opacity"
            to: 0
            duration: 400
        }
    }
}
再運行看看,雙擊一個 Item,它會先移動到 ListView 頂部,然后再慢慢變得看不見。
move 動畫
move 屬性指定移動一個 Item 時要應用的過渡動畫。
// move過渡動畫(移動Item觸發)
move: Transition {
    NumberAnimation {
        property: "y"
        duration: 700
        easing.type: Easing.InQuart
    }
}
上移 + 下移
我們以之前的示例為基礎,構造一個專門演示動畫效果的示例,phone_list_animation. qml。我給 footer 添加了 Up 和 Down 按鈕,還增加了 moveUp 和 moveDown 信號,連接到 ListView 新增的 moveUp() 和 moveDown() 方法上。新的 footer 組件定義如下:
// 定義footer
Component {
    id: footerView

    Item{
        id: footerRootItem
        width: parent.width
        height: 30

        // 自定義信號
        signal add()
        signal insert()
        signal moveUp()
        signal moveDown()

        // 新增按鈕
        Button {
            id: addOne
            anchors.right: parent.right
            anchors.rightMargin: 4
            anchors.verticalCenter: parent.verticalCenter
            text: "Add"
            onClicked: footerRootItem.add()
        }

        // 插入按鈕
        Button {
            id: insertOne
            anchors.right: addOne.left
            anchors.rightMargin: 4
            anchors.verticalCenter: parent.verticalCenter
            text: "Insert"
            onClicked: footerRootItem.insert()
        }

        // 下移按鈕
        Button {
            id: moveDown;
            anchors.right: insertOne.left
            anchors.rightMargin: 4
            anchors.verticalCenter: parent.verticalCenter
            text: "Down"
            onClicked: footerRootItem.moveDown()
        }

        // 上移按鈕
        Button {
            id: moveUp;
            anchors.right: moveDown.left
            anchors.rightMargin: 4
            anchors.verticalCenter: parent.verticalCenter
            text: "Up"
            onClicked: footerRootItem.moveUp()
        }
    }
}
ListView 新增 moveUp() 和 moveDown() 方法,計算當前 Item 的索引,調用 model 的 move() 方法讓當前 Item 下移一個位置。給 move 屬性設置了一個 Transition 對象。新的 ListView 聲明如下:
    // 定義ListView
    ListView {
        id: listView
        anchors.fill: parent
        interactive: false

        delegate: phoneDelegate
        model: phoneModel.createObject(listView)
        header: headerView
        footer: footerView
        focus: true
        highlight: Rectangle{
            color: "lightblue"
        }

        // 在ListView第一次實例化或者因Model變化而需要創建Item時應用
        populate: Transition {
            NumberAnimation {
                property: "opacity"
                from: 0
                to: 1.0
                duration: 1000
            }
        }

        // add過渡動畫(新增Item觸發)
        add: Transition {
            ParallelAnimation{
                NumberAnimation {
                    property: "opacity"
                    from: 0
                    to: 1.0
                    duration: 1000
                }
                NumberAnimation {
                    properties: "x,y"
                    from: 0
                    duration: 1000
                }
            }
        }

        // 用於指定通用的、由於Model變化導致Item被迫移位時的動畫效果
        displaced: Transition {
            SpringAnimation {
                property: "y"
                spring: 3
                damping: 0.1
                epsilon: 0.25
            }
        }

        // remove過渡動畫(移除Item觸發)
        remove: Transition {
            SequentialAnimation{
                NumberAnimation {
                    properties: "y"
                    to: 0
                    duration: 600
                }
                NumberAnimation {
                    property: "opacity"
                    to: 0
                    duration: 400
                }
            }
        }

        // move過渡動畫(移動Item觸發)
        move: Transition {
            NumberAnimation {
                property: "y"
                duration: 700
                easing.type: Easing.InQuart
            }
        }

        // 新增函數
        function addOne() {
            model.append(
                        {
                            "name": "MX3",
                            "cost": "1799",
                            "manufacturer": "MeiZu"
                        }
            )
        }

        // 插入函數
        function insertOne() {
            model.insert( Math.round(Math.random() * model.count),
                        {
                            "name": "HTC One E8",
                            "cost": "2999",
                            "manufacturer": "HTC"
                        }
            )
        }

        // 上移函數
        function moveUp() {
            if(currentIndex - 1 >= 0){
                model.move(currentIndex, currentIndex - 1, 1)
            }
        }

        // 下移函數
        function moveDown() {
            if(currentIndex + 1 < model.count){
                model.move(currentIndex, currentIndex + 1, 1)
            }
        }

        // 連接信號槽
        Component.onCompleted: {
            listView.footerItem.add.connect(listView.addOne)
            listView.footerItem.insert.connect(listView.insertOne)
            listView.footerItem.moveUp.connect(listView.moveUp)
            listView.footerItem.moveDown.connect(listView.moveDown)
        }
    }
}
現在可以執行 “qmlscenephone_list_animation.qml” 看看效果了。
下載鏈接
全部代碼下載鏈接:https://github.com/confidentFeng/QML_Demo/tree/master/ListViewPhone
參考:
《Qt Quick核心編程》第13章
