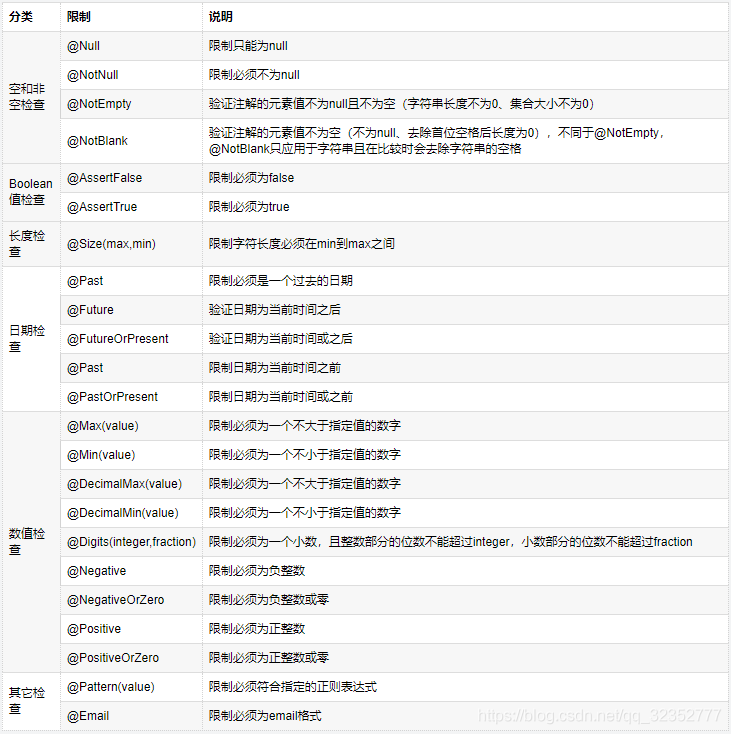
在springboot驗證中,通常我們對前端傳來的數據要進行驗證,因此我們可以使用@Validated進行驗證,拋出的異常方便我們判斷和管理
首先我們進行@Validated驗證,如果需要驗證郵箱等判斷,需要在maven中添加依賴
maven
<dependency>
            <groupId>org.springframework.boot</groupId>
            <artifactId>spring-boot-starter-validation</artifactId>
</dependency>
參數解析
使用方法
首先我們創建一個實體類
package com.example.studentspringbootmybatisplus.entity;

import lombok.Data;

import org.springframework.stereotype.Component;
import org.springframework.validation.annotation.Validated;

import javax.validation.constraints.Email;

@Component   // 將實體類注入到bean中
@Data   // lombok
@Validated
public class Student {
    private String age;
    private String name;
    @Email    // @Email代表此字段必須要email格式
    private String email;
}
接口編寫
為了演示,直接將功能編寫在Controller內運行,對入參的接口加上@Validated即可對入參對象進行數字驗證
package com.example.studentspringbootmybatisplus.controller;

import com.example.studentspringbootmybatisplus.entity.Student;
import org.springframework.validation.annotation.Validated;
import org.springframework.web.bind.annotation.RequestMapping;
import org.springframework.web.bind.annotation.RestController;


@RestController
@RequestMapping("/demo")
public class StudentController {

    @RequestMapping("/student")    // 對Student類進行數字驗證,在入參student的時候,會對里面入參的值進行數字驗證
    public void getStudent(@Validated Student student){
        System.out.println(student);
    }
}
傳值測試
為了方便,我這邊直接使用Postman接口工具進行調用接口傳值測試
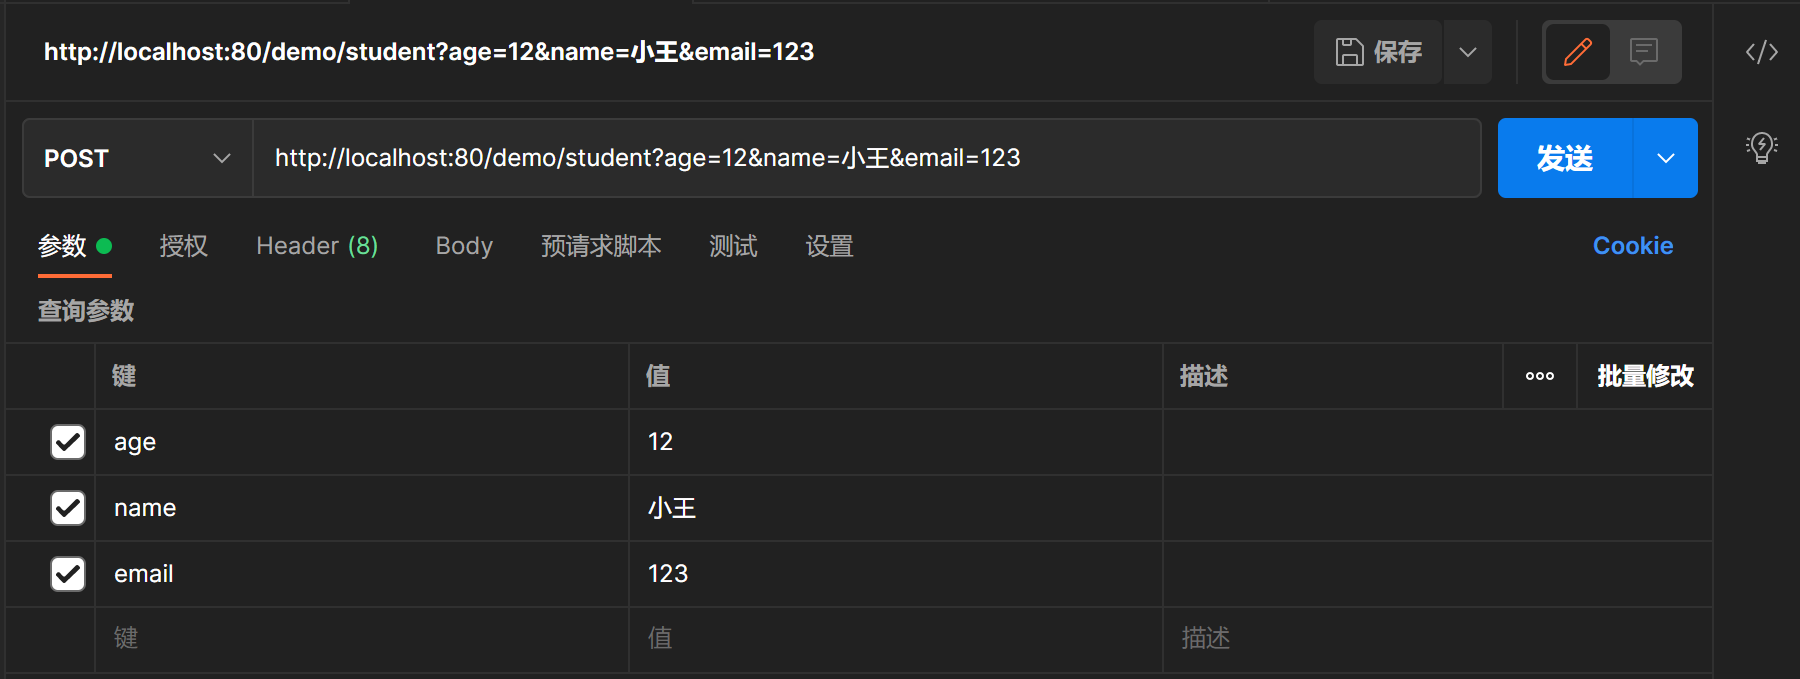
傳值錯誤-idea控制台輸出
Field error in object 'student' on field 'email': rejected value [123]; codes [Email.student.email,Email.email,Email.java.lang.String,Email]; arguments [org.springframework.context.support.DefaultMessageSourceResolvable: codes [student.email,email]; arguments []; default message [email],[Ljavax.validation.constraints.Pattern$Flag;@3bd56c2c,.*]; default message [不是一個合法的電子郵件地址]]
傳值正確-idea控制台輸出
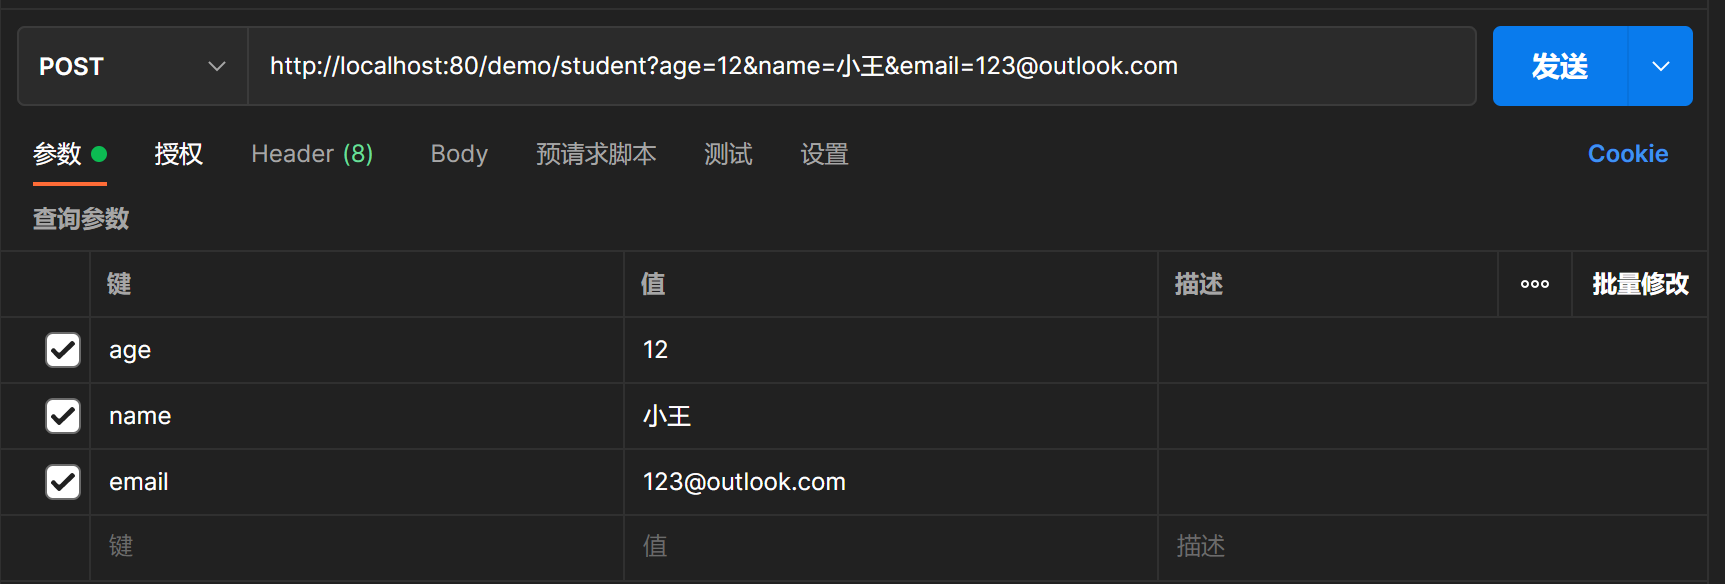
Student(age=12, name=小王, email=123@outlook.com)