notion是用來記錄筆記的,hugo是我用來作為github博客自動構建發布的
我目前設置了一個github action是:當我的博客倉庫hugo分支有push事件時,自動構建文章發布到master分支,並且發布到博客園。
但是會有這樣的不便:在notion中寫了一篇筆記或文章,想要發布到github靜態博客上,發現需要先將文章轉化成markdown,圖片需要上傳到圖床,然后貼入markdown,然后再推送到github,等待action自動構建靜態博客
既然我使用notion記錄筆記,何不繼續All-in-one,將notion作為我的博客發布工具。
只需要在 notion 中建立一個用於博客發布的 database,然后寫完筆記后填入這個 database,再使用一些手段觸發 CI 即可完成博客文章的發布
工具介紹
說干就干,寫了兩個工具
notiontomd 是用來notion中的某個page轉化為markdown的庫,當然,當前支持的block是有限的,詳細信息可以查看該倉庫
notion_to_github_blog則是一個github action模板,用來自動從指定格式的database中拉取需要更新發布的文章,然后利用 notiontomd 轉化為markdown,然后推送到github倉庫,再觸發另外的github aciton進行博客靜態文件構建
使用
怎么建倉怎么自動從某分支拉取推到github pages所在分支我就不展開說明了,感興趣的可以去網上搜索相關資料,本文所關注的流程是從notion database到博客源文件
基礎環境
本文所涉及到的例子環境可以前往我的博客倉庫 https://github.com/akkuman/akkuman.github.io 進行查看
-
hugo分支用來存放博客源文件,其中有一個github action的功能是push時觸發,然后自動構建推送到master分支
-
master分支用來存放hugo構建之后生成的站點靜態文件
-
博客相關的圖片我會推送到 https://github.com/akkuman/pic 倉庫
-
hugo作為主分支,master設置為github pages分支(原因后面描述)
workflows編寫
要使用該action,首先你需要在 notion 中創建一個 database,這個 database 需要有幾個字段,字段名如下:
-
Name (title): 文章標題
-
Article (text): 文章鏈接
-
MDFilename (text): 創建的 markdown 文件名
-
Category (select): 文章分類
-
Tags (multi_select): 文章標簽
-
IsPublish (checkbox): 文章是否發布
-
NeedUpdate (checkbox): 文章是否有更新
-
CreateAt (Created time): 創建時間
-
UpdateAt (Last edited time): 更新時間
默認當 IsPublish 未勾選或 NeedUpdate 勾選的項目才會觸發流程,即 IsPublish=false || NeedUpdate=true 時觸發
樣例如下

然后你需要在你存放博客源文件的倉庫進行一些設置,放置上workflows
下面以我的github博客倉庫 akkuman/akkuman.github.io 為例進行說明
我們創建一個workflows: akkuman/akkuman.github.io/.github/workflows/xxx.yml
name: Notion To Blog

on:
  issues:
    types: [opened]

jobs:
  notion-to-blog:
    if: ${{ github.event.issue.user.login == github.actor && contains(github.event.issue.title, 'notion-ci') }}
    runs-on: ubuntu-latest

    steps:
    - uses: actions/checkout@v2
      with:
        # Workflows are only triggered when commits (and tags I think, but it would need to be tested) are created pushed using a Personal Access Token (PAT).
        # ref: https://github.com/EndBug/add-and-commit/issues/311#issuecomment-948749635
        token: ${{ secrets.CHECKOUT_TOKEN }}

    - name: Markdown From Notion
      uses: akkuman/notion_to_github_blog@master
      with:
        notion_token: ${{ secrets.NOTION_TOKEN }}
        notion_database_id: ${{ secrets.NOTION_DATABASE_ID }}
        img_store_type: github
        img_store_path_prefix: notionimg
        # img_store_url_path_prefix: ${{ secrets.IMG_STORE_URL_PATH_PREFIX }}
        # Actions run as an user, but when they are running in a fork there are potential security problems, so they are degraded to "read-only"
        # ref: https://github.com/actions/first-interaction/issues/10#issuecomment-546628432
        # ref: https://docs.github.com/en/actions/security-guides/automatic-token-authentication#permissions-for-the-github_token
        # so you should set another token
        img_store_github_token: ${{ secrets.CHECKOUT_TOKEN }}
        img_store_github_repo: akkuman/pic
        img_store_github_branch: master
        # md_store_path_prefix: ${{ secrets.MD_STORE_PATH_PREFIX }}

    - name: push to github
      uses: EndBug/add-and-commit@v7
      with:
        branch: hugo
        message: 'Notion CI'
字段解釋:
-
notion_token: notion申請的app的api token
-
notion_database_id: notion中需要作為博客發布的database的id,這是一個uuid,可以通過Share->Copy link獲取,注意需要把其中的id轉化為uuid的格式,比如 Copy link出來為
https://www.notion.so/akkuman/7bf568e946b946189b2b4af0c61b9e78?v=c45b5e45e96541f4bf81994ab4af1a6e,則notion_database_id為7bf568e9-46b9-4618-9b2b-4af0c61b9e78,並且你所要發布的文章以及該database都需要invite我們上面申請的app(為了token能夠獲取到內容) -
img_store_type: notion中提取出來的圖片保存到哪,可選 local 或者 github,local代表保存到源倉庫,github代表保存到另一個github倉庫(圖床)中去,默認為
local -
img_store_path_prefix: 圖片保存的路徑前綴,默認為
static/notionimg -
img_store_url_path_prefix: 當
img_store_type=local時需要,設置在markdown圖片鏈接中的前綴,和上面的img_store_path_prefix不相同,比如img_store_path_prefix='static/notionimg' img_store_url_path_prefix:='/notionimg/'的情況下,則圖片保存路徑為 './static/notionimg/{img_md5}{img_ext}', 而在markdown文件中的體現為 -
img_store_github_token: 當
img_store_type=github時需要,設置保存圖片到github圖床所使用的token(secrets.GITHUB_TOKEN只有讀權限,所以需要另外使用) -
img_store_github_repo: 當
img_store_type=github時需要,你把哪個倉庫當作github圖床 -
img_store_github_branch: 當
img_store_type=github時需要,你把哪個github圖床倉庫的哪一個分支當作圖床 -
md_store_path_prefix: 最后生成的markdown文件保存在哪,默認是當前倉庫目錄的
content/posts目錄下
其中需要關注的是
-
token: ${{ secrets.CHECKOUT_TOKEN }}是為了后面的push to github推送后能夠觸發另外一個action流程,否則無法觸發,其中的CHECKOUT_TOKEN為你創建的 Personal Access Token,具體可以查看我上面的注釋 -
on: issues: types: [opened]的主要作用是當打開或提交一個issue時觸發該action -
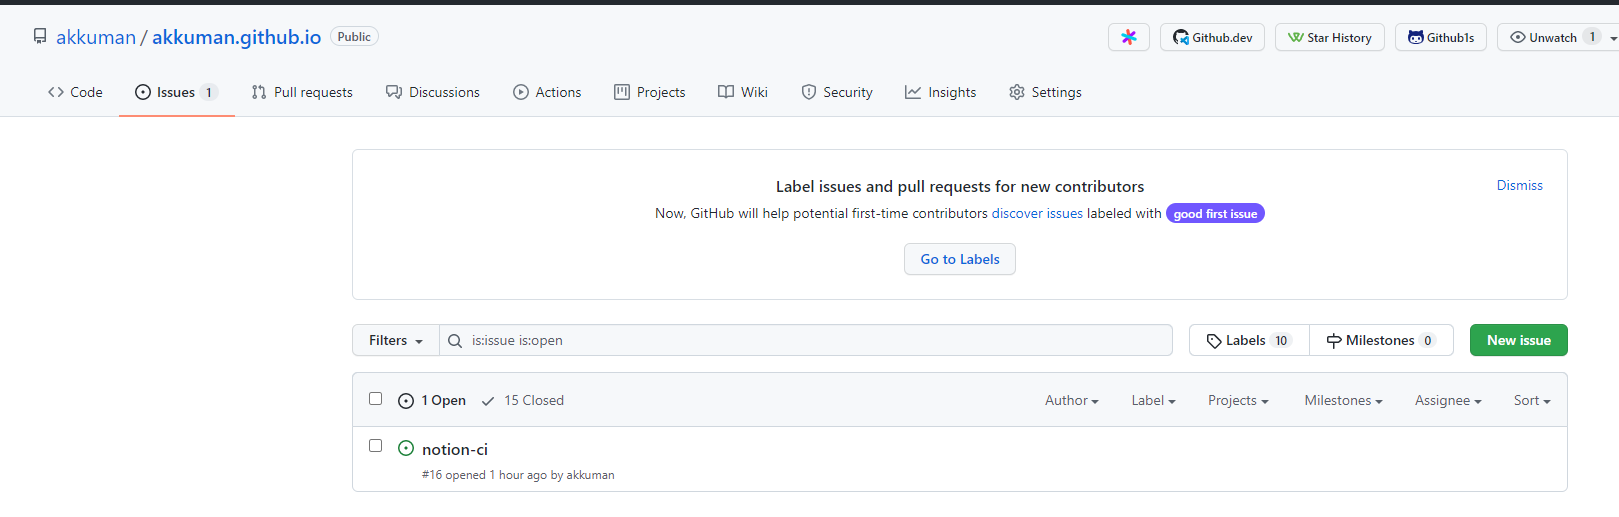
if: ${{ github.event.issue.user.login == github.actor && contains(github.event.issue.title, 'notion-ci') }}的主要作用是:當提交issue的人是你自己,並且issue標題包含 notion-ci 時進行action流程
注意: 只有當workflows在主分支時,使用 issues 作為觸發條件才會生效,所以我個人是將 hugo 作為主分支,將 master 作為 Github Pages 分支
測試
首先申請一個token,在 https://www.notion.so/my-integrations 點擊 + New integration ,然后配置好你想要的app名稱,以及設置到的工作區,這里我取的名稱是 api
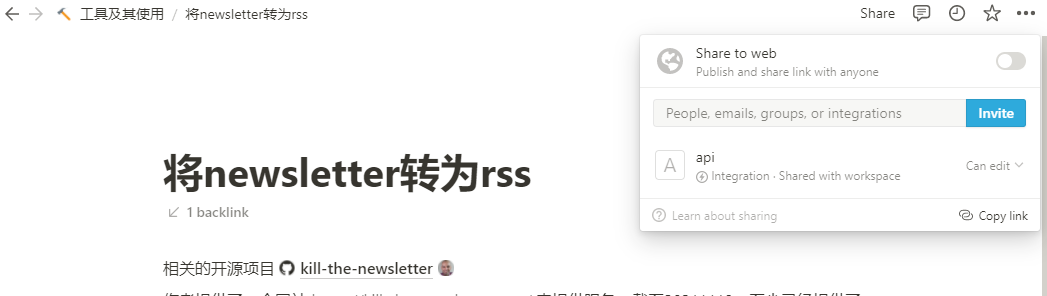
然后我們需要把指定的databse以及所需要發布的文章都集成我們申請的app
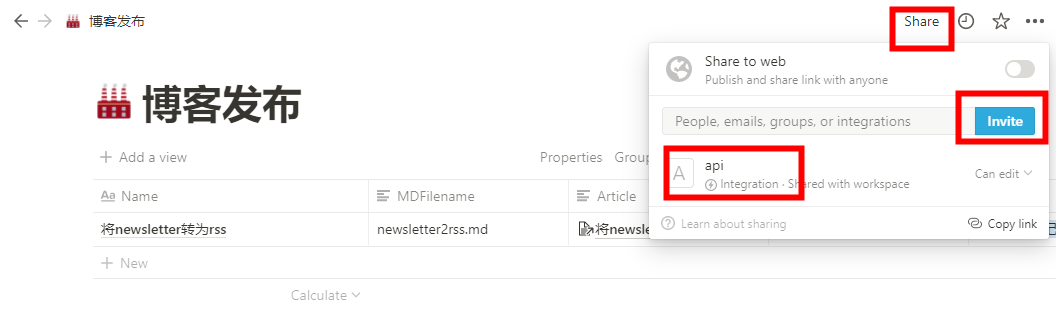
以及需要發布的文章
注意:database中的Article列,按下 @ 號來搜索選擇文章
github配置好相關的 Secrets ,
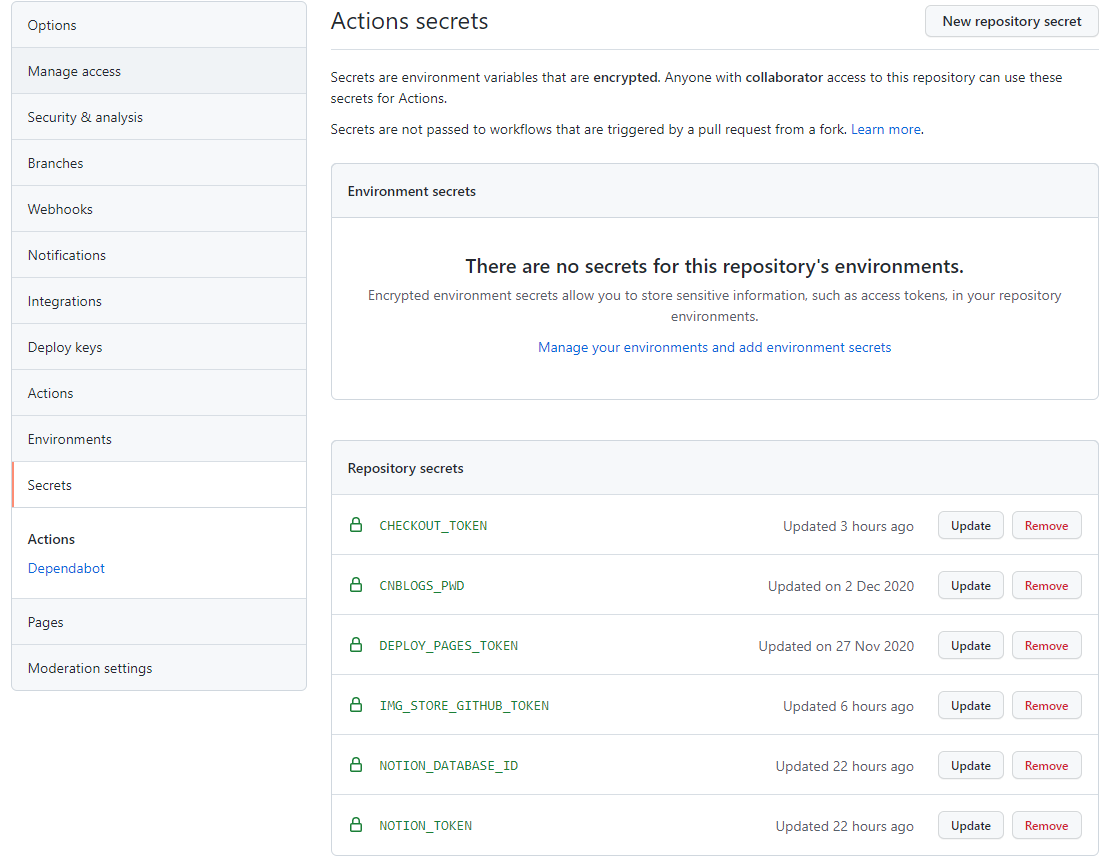
我們在倉庫中提交一個標題包含 notion-ci 的issue,即可觸發workflows
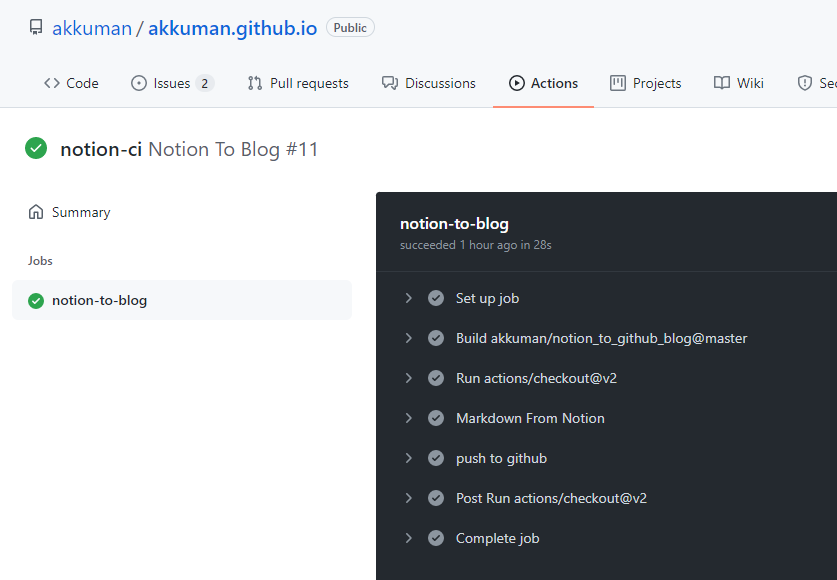
全自動整個流程
平台調研
根據官方文章 Connect your tools to Notion with the API 中所提到的,我們可以得到一些可以用於notion的自動化集成平台,對比了一下,automate.io 應該是最實惠的平台,免費用戶每個月可以觸發300次,一般而言,對於博客來說夠了
自動化集成
在 https://automate.io/app/signup 注冊好賬號后,打開 Add an Issue in GitHub on a New Database Item in Notion ,在database添加條目時在指定的github倉庫添加一條issue
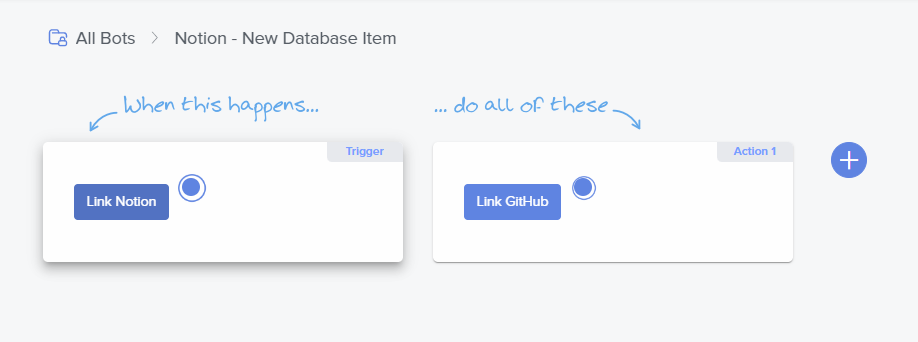
首先點選 Link Notion ,一路下一步,出現下面的頁面時,點選我們的databse
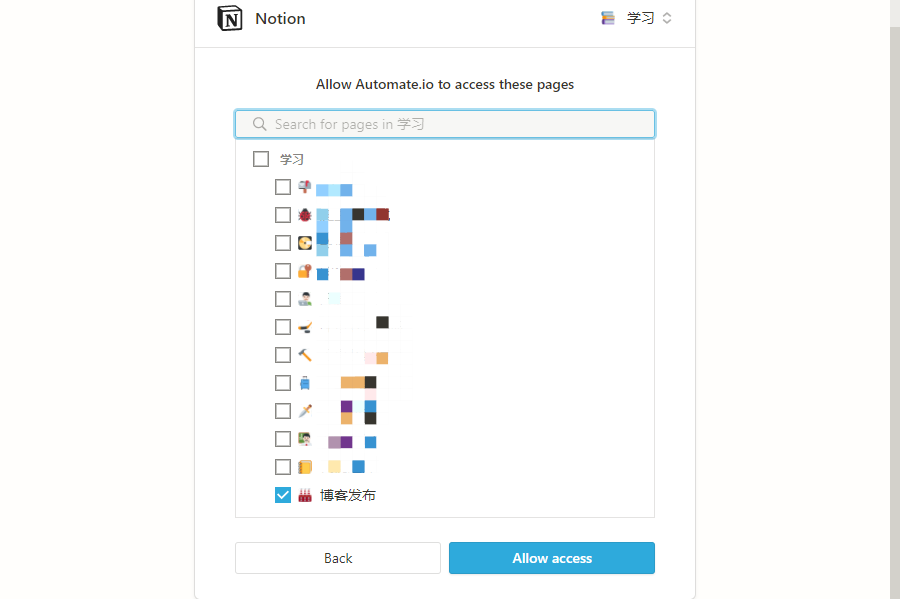
然后確認后點選我們的database
然后繼續 Link Github 授予github權限(注意,這個應用所需的權限較大)
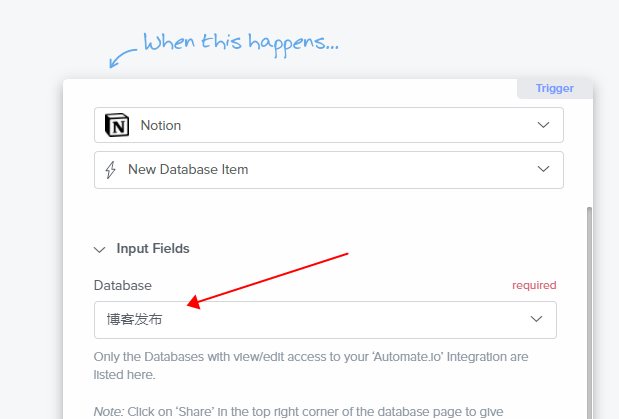
然后配置一下相關屬性
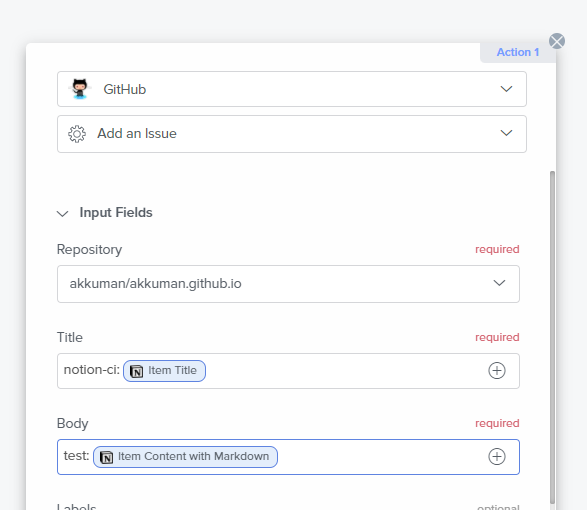
注意選好相關倉庫,以及 Title 中需要包含 notion-ci
確認就好了,當然,有一些缺陷,免費的是每五分鍾檢查一次,等不及的話,你還是可以手動提交issue觸發
現在嘗試在database中使用右上角的 New 新增一個條目,查看會有什么變化
注意:所有涉及到的文章,都需要invite我們先前創建的app,否則github action無法讀取到