解決了什么問題?
快速ci cd ;
團隊協作效率更高,更快的集成,更快的交付;走gitops模式;

主流的CICD過程:

teamcity的架構:

安裝方式
docker的方式安裝快速
安裝server端
mkdir -p /data/teamcity_server/datadir  /data/teamcity/logs


docker run -it --name teamcity-server \
-v /data/teamcity_server/datadir:/data/teamcity_server/datadir \
-v /data/teamcity_server/logs:/opt/teamcity/logs \
-p 8111:8111 \
jetbrains/teamcity-server:EAP
然后得到訪問的url,后面安裝客戶端的時候需要用到。
比如這里是: http://172.31.12.168:8111
數據庫選擇選用默認的hsqldb,這里只要掛載的目錄不丟,重新安裝之后數據也是存在的;
安裝client端
mkdir -p /data/teamcity_agent/conf
chmod -R 777 /data/teamcity_agent/conf

docker run -it -e SERVER_URL="http://172.31.12.168:8111"  \
    -v /data/teamcity_agent/conf:/data/teamcity_agent/conf  \
    jetbrains/teamcity-agent:EAP
可以安裝多個;
但是專業版本的限定了3個,所以為了后期的遍歷,最多不超過3個客戶端吧!
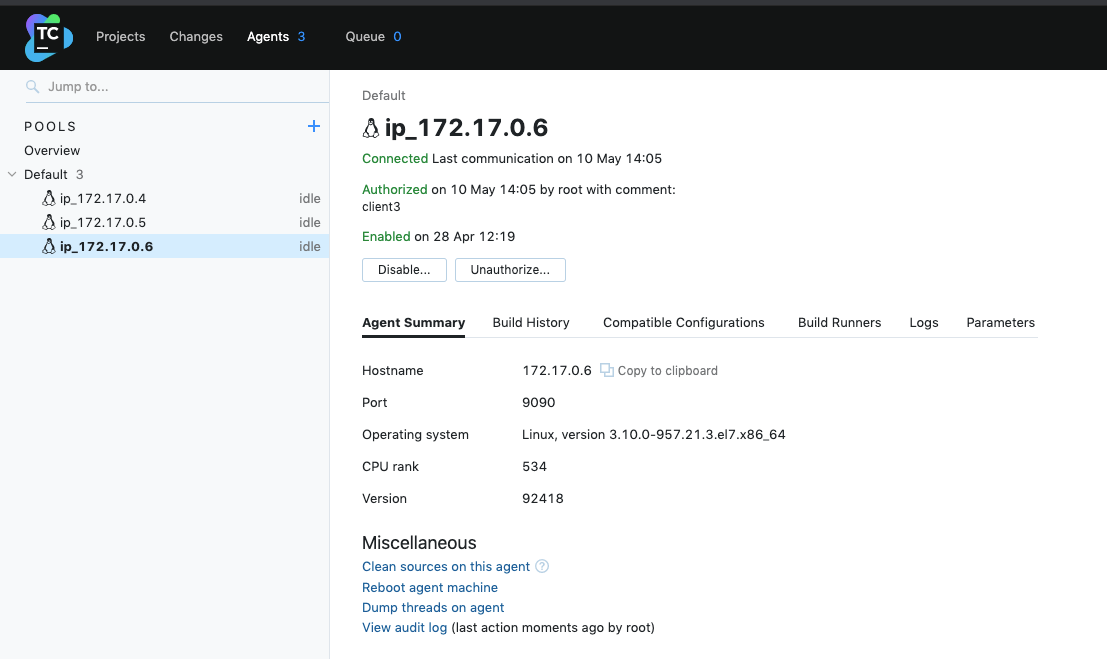
安裝完畢之后需要在server端對agent進行授權才能使用。

直接備注即可加入到客戶端池。

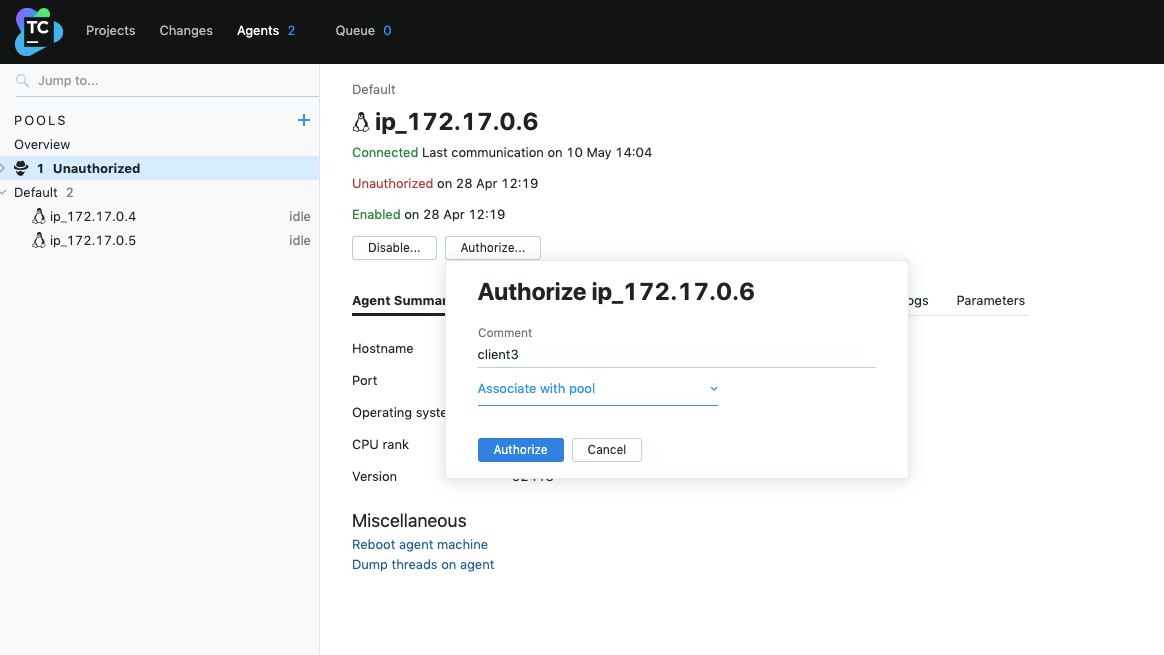
然后即可加入到服務端的客戶端池子。構建的任務的執行即可按照並行度為3進行執行。
也可以物理化部署,不會有docker內核的問題。

這個位置可以下載物理版本的客戶端安裝包。結合文檔修改配置參數即可;
主要修改的是服務端server的地址和客戶端的應用名稱;
位置:/data/team_agent4/conf/buildAgent.properties

啟動指令: ./bin/agent.sh start
然后在服務端授權即可使用。
使用初體驗
一個后端工程的CI和CD過程:
下面是實踐過程:

創建工程

然后貼入你的 gitlab或者github倉庫地址;
填寫一個有只讀權限的賬號和密碼。

配置CICD構成腳本
1 后端打jar包

2 打后端docker鏡像

3 前端npm打包

4 前端鏡像制作

5 推送前端和后端鏡像到鏡像倉庫

6 發布到k8s環境

7 發動釘釘通知到項目群

整體的kotlin代碼
package _Self.buildTypes

import jetbrains.buildServer.configs.kotlin.v2019_2.*
import jetbrains.buildServer.configs.kotlin.v2019_2.buildSteps.MavenBuildStep
import jetbrains.buildServer.configs.kotlin.v2019_2.buildSteps.dockerCommand
import jetbrains.buildServer.configs.kotlin.v2019_2.buildSteps.maven
import jetbrains.buildServer.configs.kotlin.v2019_2.buildSteps.nodeJS
import jetbrains.buildServer.configs.kotlin.v2019_2.buildSteps.script
import jetbrains.buildServer.configs.kotlin.v2019_2.triggers.vcs

object Build : BuildType({
    name = "appBuild"
    description = "構建"

    allowExternalStatus = true
    artifactRules = "app-tp/start/target/app-tp.jar => app-tp.jar"
    publishArtifacts = PublishMode.SUCCESSFUL

    vcs {
        root(HttpGitlabH3yunComHermesSystemAppTpGitRefsHeadsMaster)

        showDependenciesChanges = true
    }

    steps {
        maven {
            name = "打jar包"
            goals = "clean install -Dmaven.test.skip=true -U"
            pomLocation = "app-tp/pom.xml"
            runnerArgs = "-Dmaven.test.failure.ignore=true"
            workingDir = "app-tp"
            userSettingsSelection = "我的nexus配置"
            localRepoScope = MavenBuildStep.RepositoryScope.MAVEN_DEFAULT
            isIncremental = true
            jdkHome = "%env.JDK_18%"
            dockerImagePlatform = MavenBuildStep.ImagePlatform.Linux
            dockerPull = true
        }
        dockerCommand {
            name = "制作后端docker鏡像"
            commandType = build {
                source = file {
                    path = "app-tp/app.Dockerfile"
                }
                namesAndTags = "registry.cn-shenzhen.aliyuncs.com/cloudpivot/app-tp:tptest"
                commandArgs = "--pull"
            }
        }
        nodeJS {
            name = "前端npm打包"
            shellScript = """
                cd front-tp
                npm install
                npm run build
            """.trimIndent()
            dockerPull = true
        }
        dockerCommand {
            name = "制作前端docker鏡像"
            commandType = build {
                source = file {
                    path = "front-tp/front.Dockerfile"
                }
                namesAndTags = "registry.cn-shenzhen.aliyuncs.com/cloudpivot/front-tp:tptest"
                commandArgs = "--pull"
            }
        }
        script {
            name = "登錄推送到遠程鏡像倉庫"
            scriptContent = """
                docker login -u="aaaa" -p xxxxyun registry.cn-shenzhen.aliyuncs.com

                echo "推送到遠程倉庫"
                docker push registry.cn-shenzhen.aliyuncs.com/cloudpivot/app-tp:tptest
                docker push registry.cn-shenzhen.aliyuncs.com/cloudpivot/front-tp:tptest

                echo "刪除本地鏡像===節約磁盤空間===="
                docker images | grep app-tp | awk '{print ${'$'}3 }' | xargs docker rmi
                docker images | grep front-tp | awk '{print ${'$'}3 }' | xargs docker rmi
            """.trimIndent()
        }
        script {
            name = "更新k8s環境"
            scriptContent = """
                cd %system.teamcity.build.checkoutDir%
                cd deploy
                sh app_tp_deploy.sh
                sh front_tp_deploy.sh
            """.trimIndent()
        }
        script {
            name = "推送釘釘通知到項目群"
            scriptContent = """
                url='https://oapi.dingtalk.com/robot/send?access_token=b0dc2aee487a842dd5648566ade86xxxxxxx'
                programe=技術管理平台
                server=tptest.cloudpivot.cn
                content=%teamcity.build.branch%
                buildInfo=%vcsroot.useAlternates%

                function sendDingtalk(){
                    curl ${'$'}{1} \
                       -H 'Content-Type: application/json' \
                       -d "
                      {\"msgtype\": \"text\",
                        \"text\": {
                            \"content\": \"消息內容:項目-${'$'}{2},域名-${'$'}{3},分支-${'$'}{4} 更新內容-${'$'}{5}\"
                         },
                         \"isAtAll\": true,
                      }"
                }

                sendDingtalk ${'$'}{url} ${'$'}{programe} ${'$'}{server} ${'$'}{content} ${'$'}{content} ${'$'}{buildInfo}
            """.trimIndent()
        }
    }

    triggers {
        vcs {
            branchFilter = "+:refs/heads/test"
        }
    }
})
小結
teamcity專業版本限制3個執行客戶端,100個構建配置,適合小型團隊;
用戶體驗比較好,界面比較好看。
自動檢測代碼變化,進行構建;(可以大大提高CI效率)

比如推送了一個修改到某個分支,直接就發布到了集成測試環境了。

pk
(開發完畢一個功能,然后合並到集成測試分支,再到CICD系統點發布,碰到問題再驚起一灘鷗鷺)
更優雅。
釘釘消息通知
拉一個釘釘群,增加一個機器人:


完整之后,即可拿到通知token:
https://oapi.dingtalk.com/robot/send?access_token=c30f5008258474da14e65d3141536953b79df3bf3ab64f33a583e83165b19665
准備的shell腳本:
url='https://oapi.dingtalk.com/robot/send?access_token=c30f5008258474da14e65d3141536953b79df3bf3ab64f33a583e83165b19665'
programe=技術管理平台
server=tptest.cloudpivot.cn
content='程序中斷'

function sendDingtalk(){
    curl ${1} \
       -H 'Content-Type: application/json' \
       -d "
      {\"msgtype\": \"text\",
        \"text\": {
            \"content\": \"消息內容:項目-${2},服務地址-${3},更新內容-${4}\"
         },
         \"isAtAll\": true,
      }"
}

sendDingtalk ${url} ${programe} ${server} ${content}
實際例子:
url='https://oapi.dingtalk.com/robot/send?access_token=b0dc2aee487a842dd5648566ade86e2217dac868c0ffdcab5138cb7eab163978'
programe=技術管理平台
server=tptest.cloudpivot.cn
content=%teamcity.build.branch%
buildInfo=%vcsroot.useAlternates%

function sendDingtalk(){
    curl ${1} \
       -H 'Content-Type: application/json' \
       -d "
      {\"msgtype\": \"text\",
        \"text\": {
            \"content\": \"消息內容:項目-${2},域名-${3},分支-${4} 更新內容-${5}\"
         },
         \"isAtAll\": true,
      }"
}

sendDingtalk ${url} ${programe} ${server} ${content} ${content} ${buildInfo}
通知效果截圖:

材料
使用手冊: (必看英文材料)
https://www.jetbrains.com/help/teamcity/2021.1/configure-and-run-your-first-build.html
teamcity之旅 (必看中文材料)
https://developer.aliyun.com/article/738443
騰訊雲搭建teamcity過程:(特權容器解決docker agent無法打鏡像的問題)
https://blog.csdn.net/sD7O95O/article/details/88264986
釘釘機器人通知文檔:
https://ding-doc.dingtalk.com/doc#/serverapi2/qf2nxq
程序啟動之后通過shell通知到釘釘群:
https://blog.csdn.net/weixin_37836950/article/details/107924910
原創不易,關注誠可貴,轉發價更高!轉載請注明出處,讓我們互通有無,共同進步,歡迎溝通交流。