本教程為新手學習python教程
廢話少說,下面開始python教程
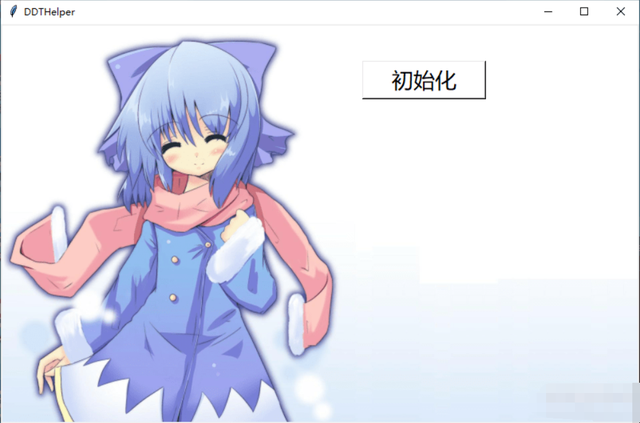
我們先用tkinter搭建好腳本的基本界面


import tkinter as tk#[size=3]首先導入tkinter,需要事先用pip安裝進python里(方法自行百度)[/size] def init_window(): global cs,wd wd = tk.Tk() cs = tk.Canvas(wd, width = 800, height = 500, bg = 'white') wd.minsize(800, 500) # 最小尺寸 wd.maxsize(800, 500)#最大尺寸,使最大化失效 wd.title('DDTHelper') pic = tk.PhotoImage(file="pic.png")#設置背景圖片,最好是800*500和png格式的 cs.create_image(400,250,image = pic) cs.pack() bt = tk.Button(wd, text='初始化', bg=('white'), font=('微軟雅黑',20), width=155, height=48, command=BT_onCreat) bt.pack() cs.create_window(530,70, width=155, height=48, window=bt) wd.mainloop() def BT_onCreat(): print("初始化。。。") #入口,這行代碼需要一直都待在腳本的最底下 #設置字典 hwnd_title = dict() init_window()(不過在圖片上疊加控件其實有更好的方案,使控件的背景為透明的,但是那篇文章的代碼運行不來)
運行效果
現在我們為點擊 初始化 按鈕添加一些事項
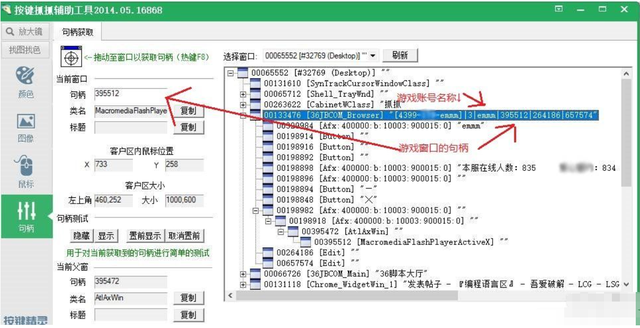
讓他在被點擊的時候識別當前的游戲窗口
(因為我用的是36jb大廳登錄的游戲,抓取句柄的時候可以根據他的title來區別游戲窗口)
這里我偷了個懶,利用該登錄器游戲窗口的title來獲取
更改上面的導入庫和 BT_onCreat()方法
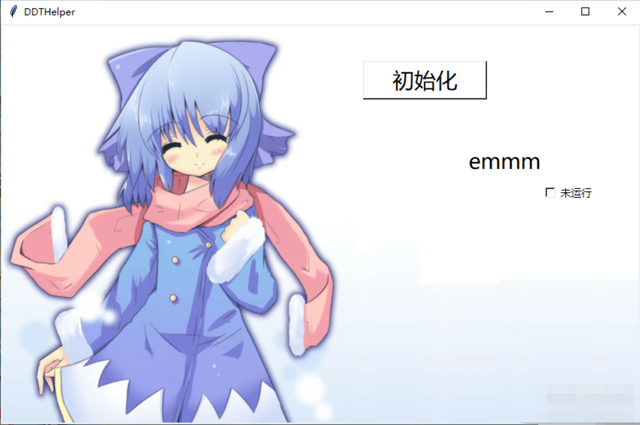
import win32com.client as wc,win32gui as wg,threading as xc,time,tkinter as tk,win32api as wa,win32con as wn#需要事先用pip安裝pywin32插件進python里(方法自行百度) def init_window(): global cs,wd wd = tk.Tk() cs = tk.Canvas(wd, width = 800, height = 500, bg = 'white') wd.minsize(800, 500) # 最小尺寸 wd.maxsize(800, 500)#最大尺寸,使最大化失效 wd.title('DDTHelper') pic = tk.PhotoImage(file="pic.png")#設置背景圖片,最好是800*500和png格式的 cs.create_image(400,250,image = pic) cs.pack() bt = tk.Button(wd, text='初始化', bg=('white'), font=('微軟雅黑',20), width=155, height=48, command=BT_onCreat) bt.pack() cs.create_window(530,70, width=155, height=48, window=bt) wd.mainloop() def BT_onCreat(): global is_run,Znum,t1,t2,t3 Znum = 0#當前已經登陸的游戲賬號數量 wg.EnumWindows(get_all_hwnd, 0) for h,t in hwnd_title.items(): if "4399" in t:#根據title里包含的 4399 來提取游戲窗口 hwnd = t.split("|")[3] name = t.split("|")[2] print("賬號:" + name + "句柄:" + hwnd) Znum = Znum + 1 hwnd = int(hwnd)#將句柄轉化為int,因為句柄是從標題獲取的string,導致了類型錯誤,我就是被這個坑了好久。。 if Znum==1:#為每一個游戲界面創建一個單獨的操作線程,為了方便用global傳遞,沒有用exec。 t1 = xc.Thread(target=Con,args=(hwnd,name,Znum)) elif Znum==2: t2 = xc.Thread(target=Con,args=(hwnd,name,Znum)) elif Znum==3: t3 = xc.Thread(target=Con,args=(hwnd,name,Znum)) init_control(Znum,name) #下面再添加幾個方法進去 #獲取句柄用的 def get_all_hwnd(hwnd,mouse): if wg.IsWindow(hwnd) and wg.IsWindowEnabled(hwnd) and wg.IsWindowVisible(hwnd): hwnd_title.update({hwnd:wg.GetWindowText(hwnd)}) #為每一個線程創建一個對應的控件來控制線程的運行 def init_control(Znum,name): global cs,wd,v1,v2,v3,tx1,t2,tx2,t3,tx3,txn1,txn2,txn3 if Znum==1: v1=tk.IntVar() tx1=tk.StringVar() txn1=tk.StringVar() elif Znum==2: v2=tk.IntVar() tx2=tk.StringVar() txn2=tk.StringVar() elif Znum==3: v3=tk.IntVar() tx3=tk.StringVar() txn3=tk.StringVar() exec('tx{}.set("未運行")'.format(Znum)) exec('lb{} = tk.Label(wd,text="{}",bg=("#ffffff"),font=("微軟雅黑",20))'.format(Znum,name)) exec('lbn{} = tk.Label(wd,textvariable=txn{},bg=("#ffffff"),font=("微軟雅黑",10))'.format(Znum,Znum)) exec('cb{} = tk.Checkbutton(wd,textvariable=tx{},bg=("#ffffff"),font=("微軟雅黑",10),variable = v{}, height=5,width = 0,command=BT_onRun{})'.format(Znum,Znum,Znum,Znum)) exec('cb{}.pack()'.format(Znum)) exec('lb{}.pack()'.format(Znum)) exec('lbn{}.pack()'.format(Znum)) Ytmp=Znum*100 Ytmp=Ytmp+70 exec('cs.create_window(630,{},width=0,height=0,window=lb{})'.format(Ytmp,Znum)) Ytmp=Ytmp+40 exec('cs.create_window(630,{},width=35,height=25,window=lbn{})'.format(Ytmp,Znum)) exec('cs.create_window(710,{},width=70,height=25,window=cb{})'.format(Ytmp,Znum)) #線程方法 def Con(hwnd,name,xc): print("啟動成功") #多選框點擊事件 def BT_onRun1(): global v1,tx1,t1,ct1 if v1.get()==1:#判斷是否被選中 ct1=0 tx1.set('正運行') t1.start() else: ct1=1#用來控制線程終止 tx1.set('未運行') def BT_onRun2(): global v2,tx2,ct2 if v2.get()==1:#判斷是否被選中 ct2=0 tx2.set('正運行') t2.start() else: ct2 = 1 tx2.set('未運行') def BT_onRun3(): global v3,tx3,ct3 if v3.get()==1:#判斷是否被選中 ct3=0 tx3.set('正運行') t3.start() else: ct3=1 tx3.set('未運行') #入口,這行代碼需要一直都待在腳本的最底下 #設置字典 hwnd_title = dict() init_window()運行后,點擊初始化的效果

可以看到,當只有一個游戲窗口的時候,腳本就自動識別出了該游戲窗口。(目前最多識別3個,且不能二次點擊初始化,否則會報錯。聽說用exce動態封裝線程時可以用dict來接收,而目前二次識別也有了大致方案)
並在勾選 未運行 旁邊的 框框 時,運行對應的線程。
接下來就要到腳本的線程模塊了,而有過py基礎的人都知道,py的線程是沒有stopThread的
但我們將要實現如何控制腳本執行游戲操作的線程,讓它收放自如
下面教程開始
因為接下來的腳本是精簡過的,和上次帖子略有不同,以這次帖子為准
我們先像上個帖子一樣搭建好一個界面的代碼,以此作為平台
import win32com.client as wc,win32gui as wg,threading as xc,time,tkinter as tk,win32api as wa,win32con as wn,multiprocessing as jc def init_window(): global cs,wd wd = tk.Tk() cs = tk.Canvas(wd, width = 800, height = 500, bg = 'white') wd.minsize(800, 500) # 最小尺寸 wd.maxsize(800, 500) wd.title('DDTHelper') pic = tk.PhotoImage(file="pic.png") cs.create_image(400,250,image = pic) cs.pack() bt = tk.Button(wd, text='初始化', bg=('white'), font=('微軟雅黑',20), width=155, height=48, command=BT_onCreat) bt.pack() cs.create_window(530,70, width=155, height=48, window=bt) wd.mainloop() def init_control(Znum,name): global v1,v2,v3,tx1,t2,tx2,t3,tx3,txn1,txn2,txn3 if Znum==1: v1=tk.IntVar() tx1=tk.StringVar() #txn1=tk.StringVar() elif Znum==2: v2=tk.IntVar() tx2=tk.StringVar() #txn2=tk.StringVar() elif Znum==3: v3=tk.IntVar() tx3=tk.StringVar() #txn3=tk.StringVar() exec('tx{}.set("未運行")'.format(Znum)) exec('lb{} = tk.Label(wd,text="{}",bg=("#ffffff"),font=("微軟雅黑",20))'.format(Znum,name)) #exec('lbn{} = tk.Label(wd,textvariable=txn{},bg=("#ffffff"),font=("微軟雅黑",10))'.format(Znum,Znum)) exec('cb{} = tk.Checkbutton(wd,textvariable=tx{},bg=("#ffffff"),font=("微軟雅黑",10),variable = v{}, height=5,width = 0,command=BT_onRun{})'.format(Znum,Znum,Znum,Znum)) exec('cb{}.pack()'.format(Znum)) exec('lb{}.pack()'.format(Znum)) #exec('lbn{}.pack()'.format(Znum)) Ytmp=Znum*100 Ytmp=Ytmp+70 exec('cs.create_window(630,{},width=0,height=0,window=lb{})'.format(Ytmp,Znum)) Ytmp=Ytmp+40 #exec('cs.create_window(630,{},width=35,height=25,window=lbn{})'.format(Ytmp,Znum)) exec('cs.create_window(710,{},width=70,height=25,window=cb{})'.format(Ytmp,Znum)) def BT_onCreat(): global Znum,D1,D2,D3,conT Znum = 0 wg.EnumWindows(get_all_hwnd, 0) conT=jc.Manager().Array("i",[3,0,0,0])#用來控制進程 #lock = jc.Lock()#用來給進程運行順序排序,防止顯示錯亂,打包成exe時可以去除(如果出現錯誤 windos 什么的就改成lock = jc.Manager.Lock() 這樣就可以了,或者刪掉Manager) #lock不穩定,棄用 for h,t in hwnd_title.items(): if "4399" in t: hwnd = t.split("|")[3] name = t.split("|")[2] print("賬號:" + name + "句柄:" + hwnd) Znum = Znum + 1 hwnd = int(hwnd) init_control(Znum,name) if Znum==1: D1 = jc.Manager().Array("i",[1,hwnd]) elif Znum==2: D2 = jc.Manager().Array("i",[2,hwnd]) elif Znum==3: D3 = jc.Manager().Array("i",[3,hwnd]) def get_all_hwnd(hwnd,mouse): if wg.IsWindow(hwnd) and wg.IsWindowEnabled(hwnd) and wg.IsWindowVisible(hwnd): hwnd_title.update({hwnd:wg.GetWindowText(hwnd)}) def Con(data,conT): #l.acquire()#鎖 #try: print("運行成功") #finally: #l.release() def onRunMan(Znum): if onRunMan2(Znum) == 1: conT[Znum]=0 exec('p{} = jc.Process(target=Con,args=(D{},conT))'.format(Znum,Znum)) exec('p{}.daemon=True'.format(Znum)) exec('tx{}.set("運行中")'.format(Znum)) exec('p{}.start()'.format(Znum)) else: conT[Znum]=1 exec('tx{}.set("未運行")'.format(Znum)) def onRunMan2(Znum): if Znum ==1: return v1.get() elif Znum == 2: return v2.get() elif Znum ==3: return v3.get() def BT_onRun1(): onRunMan(1) def BT_onRun2(): onRunMan(2) def BT_onRun3(): onRunMan(3) if __name__ == '__main__': hwnd_title = dict() init_window()
成功識別后,我們勾上運行的鈎子
成功的話會在終端顯示 成功運行
這次我在onCreat方法里封裝需要發送給進程的數據
然后在onRunMain中動態拼裝進程並啟動它
再讓產生的子進程來生成守護線程,讓守護線程去操控游戲
然后子進程循環檢測我們是不是發出了停止命令,如果線程檢測到我們發出了停止的命令
自身的代碼就執行完了,然后帶動他產生的守護線程也被kill掉了。
這樣就可以實現多線程的隨時停止了

代碼還巧妙借用了exec指令的“特性”:輸出變量只能在該方法內可見,一旦該方法被重啟,變量就沒了
也就是說,如果我們直接用 p1 = jc.Process(target=Con,args=(D1,conT))來產生進程
那么在進程結束后,需要用 del p1來清除掉進程的“屍體”,然后再重新創建它
設置的Con方法代碼,讓它會自己生產守護線程
def Con(hwnd,Znum,conT,l): #設置守護線程 time.sleep(1) exec('t{} = xc.Thread(target=RunMain,args=(hwnd,Znum))'.format(Znum))#依靠Znum(游戲賬號分配到的id)來動態生成不同的線程 exec('t{}.setDaemon(True)'.format(Znum)) exec('t{}.start()'.format(Znum)) while True:#開始接收我們是否發出了停止的命令 if conT[Znum] == 0: time.sleep(1) else: break print('進程' + str(Znum) +':已退出')再補充它生產出的子線程所執行的方法(不可用)
def RunMain(hwnd,Znum): RM=0#運行次數,因為用多進程后無法向用戶節目輸出,所以已棄用 hdc=wg.GetWindowDC(int(hwnd))#獲取目標頁游(flash)的hdc,用來獲取指定坐標的顏色 while True: while str(wg.GetPixel(hdc,919,280))!=str(10248996):#檢測游戲角色是否處在房間界面(初始需要用戶手動將游戲角色進入房間界面),用於檢測游戲角色是否退出了副本回到了游戲房間 print("房間") doClick(hwnd,5,5) time.sleep(1) if Chose_FB(hwnd,hdc) == 1:#查看當前兩個副本中又那個副本開放,其實這個設計並不合理,如果當前沒副本開放就出bug了,不過我只會在有副本開放才會運行這個腳本對吧-,- FB_MS(hwnd,hdc)#啟動1號副本方案 else: FB_JD(hwnd,hdc)#二號副本方案 RM = RM + 1當然,,現在由於主題和篇幅原因,我就不補充副本的流程方法了, 但這樣可能會導致運行時報錯
我們可以將它刪減成
def RunMain(hwnd,Znum): white True: print("我在運行") time.sleep(1)這樣在勾選運行的時候,
終端就會不停地顯示 我在運行
直到我們把運行的鈎子取消后,就不會再顯示了(線程被kill掉了)
熟悉按鍵精靈的大佬們都應該用過一個叫大漠的插件
但先講不依賴大漠的情況下,用微軟官方的指令來實現腳本的操作
import win32com.client as wc,win32gui as wg,threading as xc,time,tkinter as tk,win32api as wa,win32con as wn,multiprocessing as jc def init_window(): global cs,wd wd = tk.Tk() cs = tk.Canvas(wd, width = 800, height = 500, bg = 'white') wd.minsize(800, 500) # 最小尺寸 wd.maxsize(800, 500) wd.title('DDTHelper') pic = tk.PhotoImage(file="pic.png") cs.create_image(400,250,image = pic) cs.pack() bt = tk.Button(wd, text='初始化', bg=('white'), font=('微軟雅黑',20), width=155, height=48, command=BT_onCreat) bt.pack() cs.create_window(530,70, width=155, height=48, window=bt) wd.mainloop() def init_control(Znum,name): global v1,v2,v3,tx1,t2,tx2,t3,tx3,txn1,txn2,txn3 if Znum==1: v1=tk.IntVar() tx1=tk.StringVar() #txn1=tk.StringVar() elif Znum==2: v2=tk.IntVar() tx2=tk.StringVar() #txn2=tk.StringVar() elif Znum==3: v3=tk.IntVar() tx3=tk.StringVar() #txn3=tk.StringVar() exec('tx{}.set("未運行")'.format(Znum)) exec('lb{} = tk.Label(wd,text="{}",bg=("#ffffff"),font=("微軟雅黑",20))'.format(Znum,name)) #exec('lbn{} = tk.Label(wd,textvariable=txn{},bg=("#ffffff"),font=("微軟雅黑",10))'.format(Znum,Znum)) exec('cb{} = tk.Checkbutton(wd,textvariable=tx{},bg=("#ffffff"),font=("微軟雅黑",10),variable = v{}, height=5,width = 0,command=BT_onRun{})'.format(Znum,Znum,Znum,Znum)) exec('cb{}.pack()'.format(Znum)) exec('lb{}.pack()'.format(Znum)) #exec('lbn{}.pack()'.format(Znum)) Ytmp=Znum*100 Ytmp=Ytmp+70 exec('cs.create_window(630,{},width=0,height=0,window=lb{})'.format(Ytmp,Znum)) Ytmp=Ytmp+40 #exec('cs.create_window(630,{},width=35,height=25,window=lbn{})'.format(Ytmp,Znum)) exec('cs.create_window(710,{},width=70,height=25,window=cb{})'.format(Ytmp,Znum)) def BT_onCreat(): global Znum,D1,D2,D3,conT Znum = 0 wg.EnumWindows(get_all_hwnd, 0) conT = jc.Manager().Array("i",[3,0,0,0]) for h,t in hwnd_title.items(): if "4399" in t: hwnd = t.split("|")[3] name = t.split("|")[2] print("賬號:" + name + "句柄:" + hwnd) Znum = Znum + 1 hwnd = int(hwnd) init_control(Znum,name) if Znum == 1: D1 = jc.Manager().Array("i",[1,hwnd]) elif Znum == 2: D2 = jc.Manager().Array("i",[2,hwnd]) elif Znum == 3: D3 = jc.Manager().Array("i",[3,hwnd]) def get_all_hwnd(hwnd,mouse): if wg.IsWindow(hwnd) and wg.IsWindowEnabled(hwnd) and wg.IsWindowVisible(hwnd): hwnd_title.update({hwnd:wg.GetWindowText(hwnd)}) def all_run(Znum): while Znum >0: exec('t{}.start()'.format(Znum)) Znum = Znum - 1 #操作類-------------------------------------------------------------------------------------------------------------- def climb(hwnd,jl,fx): if fx==1:#右邊 #適應方向及防止無效 wa.SendMessage(hwnd,wn.WM_KEYDOWN,68,None) wa.SendMessage(hwnd,wn.WM_KEYUP,68,None) #1.3=1屏距 wa.SendMessage(hwnd,wn.WM_KEYDOWN,68,None) time.sleep(jl*1.3) wa.SendMessage(hwnd,wn.WM_KEYUP,68,None) else: #適應方向及防止無效 wa.SendMessage(hwnd,wn.WM_KEYDOWN,65,None) wa.SendMessage(hwnd,wn.WM_KEYUP,65,None) #1.3=1屏距 wa.SendMessage(hwnd,wn.WM_KEYDOWN,65,None) time.sleep(jl*1.3) wa.SendMessage(hwnd,wn.WM_KEYUP,65,None) def doAngle(hwnd,jd): for i in range(jd): time.sleep(0.05) wa.SendMessage(hwnd,wn.WM_KEYDOWN,87,None) wa.SendMessage(hwnd,wn.WM_KEYUP,87,None) def doClick(hwnd,cx,cy): long_position = wa.MAKELONG(cx, cy) wa.SendMessage(hwnd, wn.WM_LBUTTONDOWN, wn.MK_LBUTTON, long_position) wa.SendMessage(hwnd, wn.WM_LBUTTONUP, wn.MK_LBUTTON, long_position) def doFire(hwnd,ld): wa.SendMessage(hwnd,wn.WM_KEYFIRST,66,None)#先摁大 wa.SendMessage(hwnd,wn.WM_KEYFIRST,69,None)#先摁技能 wa.SendMessage(hwnd,wn.WM_KEYFIRST,97,None) wa.SendMessage(hwnd,wn.WM_KEYFIRST,98,None) wa.SendMessage(hwnd,wn.WM_KEYFIRST,97,None)#11大招 wa.SendMessage(hwnd,wn.WM_KEYFIRST,100,None) wa.SendMessage(hwnd,wn.WM_KEYDOWN,32,None) time.sleep(ld * 0.04) wa.SendMessage(hwnd,wn.WM_KEYUP,32,None) #游戲流程處理類--------------------------------------------------------------------------------------------------------- def Chose_FB(hwnd,hdc): doClick(hwnd,600,200)#打開菜單 time.sleep(1) doClick(hwnd,626,188)#單人副本 time.sleep(1) while True: doClick(hwnd,5,5) if str(wg.GetPixel(hdc,244,237))==str(2041582): doClick(hwnd,289,243)#魔石 FBn=1 break elif str(wg.GetPixel(hdc,337,278))==str(13298869): doClick(hwnd,292,299)#技能丹 FBn=2 break time.sleep(1) doClick(hwnd,726,501)#難度 time.sleep(1) doClick(hwnd,504,563)#確定 time.sleep(1) doClick(hwnd,951,491) return(FBn) def FB_MS(hwnd,hdc): time.sleep(24) while str(wg.GetPixel(hdc,497,169))!=str(5418993):#回合檢測 doClick(hwnd,5,5) time.sleep(0.5) while True: doClick(hwnd,5,