配套視頻教程
本章將專門用於給應用程序添加用戶個人資料頁面。用戶個人資料頁面呈現的是關於用戶信息的頁面,通常具有由用戶自己輸入的信息。接下來將展示如何動態生成用戶個人資料頁面,然后添加一個小型個人資料編輯器,用戶可用它來輸入Ta們的信息。
用戶個人資料頁面
要創建一個用戶個人資料頁面,首先編寫一個映射到 /user/<username>URL的新視圖函數。
app/routes.py:用戶個人資料的視圖函數
#...
@app.route('/user/<username>')
@login_required
def user(username):
    user = User.query.filter_by(username=username).first_or_404()
    posts = [
        {'author':user, 'body':'Test post #1'},
        {'author':user, 'body':'Test post #2'}
    ]
    return render_template('user.html', user=user, posts=posts)
這個由@app.route裝飾器下聲明的視圖函數看起來與前面的有點不同。在這個示例下,有一個動態組件,它被作為<username>URL組件 表示,並由 <和>包圍。當路由有動態組件時,Flask將接受URL部分中的任何文本,並將以實際文本作為參數調用視圖函數。例如,如果客戶端瀏覽器請求這個URL /user/susan,則將調用視圖函數並將參數username 設置為susan。這個視圖函數只能由登錄用戶訪問,因此添加了Flask-Login的@login_required裝飾器。
這個視圖函數的實現非常簡單。首先,嘗試用username查詢從數據庫加載用戶。在之前學過,假如想獲得所有結果,可調用all()執行數據庫查詢;假如想獲得第一個結果 或None(0個結果時),可調用first()執行數據庫查詢。在這個視圖函數中,使用了一個叫first_or_404()的first()變體,在有結果的情況下它與first()完全一樣,不過在沒有結果的情況下,會自動將404 error發送回客戶端。以這種方式執行查詢,不用檢查查詢是否返回一個用戶,因為數據庫中不存在username時,函數將不會返回,而是會引發404異常。
如果數據庫查詢沒有觸發404 error,那么表示找到給定username的用戶。接下來, 為用戶初始化一個“假”的帖子列表,最后渲染一個新的user.html模板,將該模板傳遞給用戶對象、帖子列表。
app/templates/user.html:用戶個人資料模板
{% extends "base.html" %}

{% blcok content %}
	<h1>User:{{ user.username }}</h1>
	<hr>
	{% for post in posts %}
		<p>
			{{ post.author.username }} says:<b>{{ post.body }}</b>
		</p>
	{% endfor%}
{% endblock%}
個人資料頁面已完成,但網站的任何位置都沒有指向該頁面的鏈接。為了讓用戶更容易檢查自己的個人資料,將在頂部導航欄添加一個鏈接:
app/templates/base.html:用戶個人資料模板
		<div>Microblog:
			<a href="{{ url_for('index') }}">Home</a>
			{% if current_user.is_anonymous %}
				<a href="{{ url_for('login') }}">Login</a>
			{% else %}
				<a href="{{ url_for('user', username=current_user.username) }}">Profile</a>
				<a href="{{ url_for('logout') }}">Logout</a>
			{% endif %}
		</div>
上述唯一有趣的變化是用於生成個人資料頁面鏈接的url_for()調用。由於用戶個人資料視圖函數采用動態參數,因此url_for()函數接收其值作為關鍵字參數。因為這是指向登錄用戶的個人資料的鏈接,所以使用Flask-Login的current_user生成正確的URL。
運行程序,效果:
(venv) D:\microblog>flask run
 * Serving Flask app "microblog.py"
 * Environment: production
   WARNING: Do not use the development server in a production environment.
   Use a production WSGI server instead.
 * Debug mode: off
 * Running on http://127.0.0.1:5000/ (Press CTRL+C to quit)
127.0.0.1 - - [10/Aug/2018 18:04:30] "GET /user/belen HTTP/1.1" 200 -
127.0.0.1 - - [10/Aug/2018 18:04:38] "GET /user/susan HTTP/1.1" 200 -
當前數據庫里有兩個用戶:susan、belen。改變URL /user/<username>將得到不同的頁面;單擊“Profile”按鈕將轉到登錄用戶的用戶頁面。但鍵入數據庫中沒有的username時,將得404頁面。

用戶頭像
目前為止,建立的個人資料頁面很單調。增加用戶頭像,但不打算在服務器中處理大量上傳的圖像,將使用Gravatar服務未所有用戶提供圖像。
Gravatar服務器使用起來很簡單。要為給定用戶請求圖像,格式為 https://www.gravatar.com/avatar/
john@example.com的用戶的Gravatar URL:
(venv) D:\microblog>python
Python 3.6.3 (v3.6.3:2c5fed8, Oct  3 2017, 18:11:49) [MSC v.1900 64 bit (AMD64)] on win32
Type "help", "copyright", "credits" or "license" for more information.
>>> from hashlib import md5
>>> 'https://www.gravatar.com/avatar/' + md5(b'john@example.com').hexdigest()
'22861789757368.jpg'
瀏覽器輸入上述URL
https://www.gravatar.com/avatar/d4c74594d841139328695756648b6bd6
將顯示

我的實例,Gravatar URL是
https://s.gravatar.com/avatar/9aefdb9ccdb72aa75ccbe1b921f9d9f2?s=80
返回的頭像是:

默認情況下,返回的圖形大小為80x80像素,但可通過向URL的查詢字符串添加 s 參數來請求不同大小的尺寸。例如,要獲取一個128x128像素的圖像,URL為
https://www.gravatar.com/avatar/d4c74594d841139328695756648b6bd6?s=128
另一個有趣的參數是 d,它能確定在服務中沒有頭像注冊的用戶由Gravatar提供圖像。如作者喜歡的“identicon”,它為每個電子郵件返回一個不同的幾何設計。如:

PS:某些Web瀏覽器擴展程序(如 Ghostery會阻止Gravatar圖像)因為它們會認為Automattic(Gravatar服務的所有者)可以根據它們為您的頭像獲取的請求來確定訪問的網站。如果在瀏覽器中沒有看到頭像,可考慮的問題是 可能由於在瀏覽器中安裝了某個擴展程序。
由於頭像與用戶相關聯,因此將生成頭像的URL的邏輯添加到User 用戶模型中是很重要的。
from hashlib import md5
# ...

class User(UserMixin, db.Model):
    # ...
    def avatar(self, size):
        digest = md5(self.email.lower().encode('utf-8')).hexdigest()
        return 'https://www.gravatar.com/avatar/{}?d=identicon&s={}'.format(
            digest, size)
User類的新方法avatar()返回用戶頭像的URL,並縮放到請求的大小(以像素為單位)。對於沒有注冊頭像的用戶,將生成“identicon”圖像。要生成MD5哈希,首先將電子郵件地址轉換為小寫,這是Gravatar服務要求的;然后,因為Python中的MD5支持字節而不是字符串,所以得在字符串傳遞給哈希函數之前,將字符串編碼為字節。
參考:Gravatar服務文檔
接下來,在用戶個人資料模板中插入頭像圖像:
app/templates/user.html:模板中的用戶頭像
{% extends "base.html" %}

{% block content %}
    <table>
        <tr valign="top">
            <td><img src="{{ user.avatar(128) }}"></td>
            <td><h1>User: {{ user.username }}</h1></td>
        </tr>
    </table>
    <hr>
    {% for post in posts %}
    <p>
    {{ post.author.username }} says: <b>{{ post.body }}</b>
    </p>
    {% endfor %}
{% endblock %}
讓User類負責返回頭像URL的好處是:如果將來某些決定不需要Gravatar頭像了,可重寫avatar()方法以返回不同的URL,並且所有模板將開始自動顯示新頭像。
上述代碼完成了在用戶個人資料的頂部有一個大頭像。還可為每個帖子得有個小頭像,而且對於用戶個人資料頁面的所有帖子得是相同的頭像。並且可在主頁上實現相同的功能,然后每個帖子都將用作者的頭像進行裝飾。修改代碼:
app/templates/user.html:帖子中的用戶頭像
{% extends "base.html" %}

{% block content %}
	<table>
		<tr valign="top">
			<td><img src="{{ user.avatar(128) }}"></td>
			<td><h1>User:{{ user.username }}</h1></td>
		</tr>
	</table>

	<hr>
	{% for post in posts %}
		<table>
			<tr valign="top">
				<td><img src="{{ post.author.avatar(36) }}"></td>
				<td>{{ post.author.username }} says:<br>{{ post.body }}</td>
			</tr>
		</table>
	{% endfor%}
{% endblock%}
運行程序,效果:
(venv) D:\microblog>flask run
 * Serving Flask app "microblog.py"
 * Environment: production
   WARNING: Do not use the development server in a production environment.
   Use a production WSGI server instead.
 * Debug mode: off
 * Running on http://127.0.0.1:5000/ (Press CTRL+C to quit)
127.0.0.1 - - [10/Aug/2018 19:34:34] "GET /user/belen HTTP/1.1" 200 -

使用Jinja2子模板
上述設計了用戶個人資料頁面,以便顯示用戶寫的帖子、頭像。如今,希望/index頁面也顯示具有類似布局的帖子。如果復制、粘貼處理帖子渲染的模板部分,這是不理想的,因為今后如果決定對這個布局進行更改,則一定要同時更新這兩個模板。
理想方法:創建一個只渲染一個帖子的子模板,然后從user.html、index.html模板中引用它。首先,創建子模板,只需要一個帖子HTML標記。將此模板命名為app/templates/_post.html,其中_前綴只是個命名約定,用於識別該模板文件是子模板。
app/templates/_post.html:帖子子模板
    <table>
        <tr valign="top">
            <td><img src="{{ post.author.avatar(36) }}"></td>
            <td>{{ post.author.username }} says:<br>{{ post.body }}</td>
        </tr>
    </table>
要從user.html模板調用此子模板,得使用Jinja2include語句:更新代碼
app/templates/user.html:帖子中的用戶頭像
{% extends "base.html" %}

{% block content %}
    <table>
        <tr valign="top">
            <td><img src="{{ user.avatar(128) }}"></td>
            <td><h1>User: {{ user.username }}</h1></td>
        </tr>
    </table>
    <hr>
    {% for post in posts %}
        {% include '_post.html' %}
    {% endfor %}
{% endblock %}
運行程序,效果是一樣的:

PS:目前應用程序的 /index頁面還未真正充實,暫不添加此功能。
更多有趣的個人資料
新用戶個人資料頁面有一個問題是Ta們並沒有真正展現出太多。用戶喜歡在這些頁面上講一些關於Ta們的內容,所以講讓Ta們寫一些關於Ta們自己內容展示在這里。還將跟蹤每個用戶最后一次訪問該網站的時間,並顯示在Ta們的個人資料頁面上顯示。
要做的第一件事是支持所有這些額外信息,即用兩個新字段擴展數據庫中的users表:
app/models.py:在用戶模型中添加新字段
class User(UserMixin, db.Model):
    # ...
    about_me = db.Column(db.String(140))
    last_seen = db.Column(db.DateTime, default=datetime.utcnow)
    #...
每次修改數據庫時,都必須生成數據庫遷移。在第4章,展示了如何設置應用程序以通過遷移腳本跟蹤數據庫更改。上述,有兩個要添加到數據庫的新字段,因此第一步是生成遷移腳本:
C:\Users\Administrator>d:

D:\>cd D:\microblog\venv\Scripts

D:\microblog\venv\Scripts>activate
(venv) D:\microblog\venv\Scripts>cd D:\microblog

(venv) D:\microblog>flask db migrate -m "new fields in user model"
INFO  [alembic.runtime.migration] Context impl SQLiteImpl.
INFO  [alembic.runtime.migration] Will assume non-transactional DDL.
INFO  [alembic.autogenerate.compare] Detected added column 'user.about_me'
INFO  [alembic.autogenerate.compare] Detected added column 'user.last_seen'
Generating D:\microblog\migrations\versions\00cd8a8ea68a_new_fields_in_user_model.py ... done
可注意到一個細節,-m參數的描述內容會自動添加到/versions下的遷移.p文件名中。
migrate命令的打印很友好,如顯示了User類中兩個新字段被檢測到。現在可將這個更改運用於數據庫:
(venv) D:\microblog>flask db upgrade
INFO  [alembic.runtime.migration] Context impl SQLiteImpl.
INFO  [alembic.runtime.migration] Will assume non-transactional DDL.
INFO  [alembic.runtime.migration] Running upgrade c0139b2ef594 -> 00cd8a8ea68a, new fields in user model
使用遷移框架非常有用,數據庫中的任何用戶仍然存在,遷移框架通過“外科手術”運用遷移腳本中的更改而不會破壞任何數據。在CMD下命令行查看數據庫中表結構:
(venv) D:\microblog>sqlite3 app.db #進入數據庫
SQLite version 3.16.2 2017-01-06 16:32:41
Enter ".help" for usage hints.

sqlite> .tables #查看數據庫中的表
alembic_version  post             user

sqlite> .schema user #查看表結構
CREATE TABLE user (
        id INTEGER NOT NULL,
        username VARCHAR(64),
        email VARCHAR(120),
        password_hash VARCHAR(128), about_me VARCHAR(140), last_seen DATETIME,
        PRIMARY KEY (id)
);
CREATE UNIQUE INDEX ix_user_email ON user (email);
CREATE UNIQUE INDEX ix_user_username ON user (username);

sqlite> select * from user;#查看user表數據
1|susan|susan@example.com|pbkdf2:sha256:50000$OONOkVyy$8d008c6647ab95a5793cf60bf57eaa3bb1123d6e5b3135c5cc5e42e02eddae32||
2|belen|belen@example.com|pbkdf2:sha256:50000$PEDt5NxS$cf6c958c97b6ad28d9495d138cb5a310f6f2389534b0cafa3002dd3cec9af9d1||

sqlite> .quit #退出sqlite語句

(venv) D:\microblog>
接着,將這倆個新字段添加到用戶個人資料模板中:
app/templates/user.html:在用戶個人資料模板中顯示用戶信息
{% extends "base.html" %}

{% block content %}
	<table>
		<tr valign="top">
			<td><img src="{{ user.avatar(128) }}"></td>
			<td>
				<h1>User:{{ user.username }}</h1>
				{% if user.about_me %}
					<p>{{ user.about_me }}</p>
				{% endif %}

				{% if user.last_seen %}
					<p>Last seen on:{{ user.last_seen }}</p>
				{% endif %}
			</td>
		</tr>
	</table>

	<hr>
	{% for post in posts %}
		{% include '_post.html' %}
	{% endfor%}
{% endblock%}
注意:這兩個字段包裝在Jinja2的條件中,因為只希望Ta們在設置時可見。此時對於所有用戶,這倆個新字段都是空的,因此,如果現在運行該應用程序,不會看到這些字段。
記錄用戶上次訪問時間
last_seen這個字段相對更容易。現在要做的是:在用戶向服務器發送請求時,為給定用戶寫入此字段的當前時間。
在從瀏覽器請求的每一個可能的視圖函數中,添加登錄去設置這個字段,這明顯是不切實際的。請求分派到視圖函數之前執行一些通用邏輯,這在Web應用程序中是一個常見任務,Flask將它作為一個原生特征提供。解決方案:
app/routes.py:記錄上次訪問的時間
from datetime import datetime
#...

@app.before_request
def before_request():
    if current_user.is_authenticated:
        current_user.last_seen = datetime.utcnow()
        db.session.commit()
#...
Flask的@before_request裝飾器在視圖函數之前注冊將要執行的裝飾函數。這非常有用,因為現在可以在應用程序中的任何視圖函數之前插入想要執行的代碼,並可將它放在一個地方。
實現只是檢查current_user是否已登錄,並在這種情況下將last_seen字段設置為當前時間。
之前有提到,服務器應用程序需要以一致的時間單位工作,標准做法是使用UTC時區。使用系統的本地時間不是一個好辦法,因為數據庫中的內容取決於你的位置。
最后一步是提交數據庫會話,以便將上面所做的更改寫入數據庫。
在提交之前,想知道為什么沒有db.session.add(),得考慮什么時候引用current_user,Flask-Login將調用用戶加載器回調函數,該函數將允許數據庫查詢,將目標用戶置於數據庫會話中。因此,可在此功能中再次添加用戶,但這不是必需的,因為它已經存在了。
如果在做了這個更改后查看某個用戶個人資料頁面,那么將看到“Last seen on”行,其時間非常接近當前時間。而如果離開個人資料頁面,再次返回,將看到時間更新。
實際上,我們將這些時間戳存儲在UTC時區中,使得在個人資料頁面顯示的時間也是UTC。除此以外,時間格式不是所期望的,因為它實際是Python日期時間對象的內部表示。目前,不考慮這些問題,在今后的章節中討論Web應用程序的日期和時間的話題。
運行程序,登錄(用戶名1+密碼:belen,Abc123456;用戶2:susan,cat )這個用戶后,點擊“Profile”,效果:
(venv) D:\microblog>flask run
 * Environment: production
   WARNING: Do not use the development server in a production environment.
   Use a production WSGI server instead.
 * Debug mode: off
 * Running on http://127.0.0.1:5000/ (Press CTRL+C to quit)

個人資料編輯
想用戶提供一個表格,在表格中用戶可輸入一些關於Ta們自己的信息。這個表單允許用戶修改用戶名,並編寫有關自己的內容,以存儲在新about_me字段中。編寫要給表單類:app/forms.py:個人資料編輯表單
#...
from wtforms import StringField, TextAreaField, SubmitField
from wtforms.validators import DataRequired, Length
#...

class EditProfileForm(FlaskForm):
	username = StringField('Username', validators=[DataRequired()])
	about_me = TextAreaField('About_me', validators=[Length(min=0, max=140)])
	submit = SubmitField('Submit')
about_me字段用的是TextAreaField,是一個多行框,用戶可以在這輸入文本。用Length驗證這個字段,確保輸入的文本在0-140個字符之間,這也是為數據庫中相應字段分配的空間。
渲染上述表單的模板:
app/templates/edit_profile.html:個人資料編輯 表單
{% extends "base.html" %}

{% block content %}
	<h1>Edit Profile</h1>
	<form action="", method="post">
		{{ form.hidden_tag() }}
		<p>
			{{ form.username.label }}<br>
			{{ form.username(size=32) }}<br>
			{% for error in form.username.errors %}
				<span style="color:red;">[{{ error }}]</span>
			{% endfor %}
		</p>

		<p>
			{{ form.about_me.label }}<br>
			{{ form.about_me(cols=50, rows=4) }}<br>
			{% for error in form.about_me.errors %}
				<span style="color:red;">[{{ error }}]</span>
			{% endfor %}
		</p>
		<p>
			{{ form.submit() }}
		</p>
	</form>
		}
{% endblock %}
最后,完善視圖函數,它將所有內容聯系在一起:
app/routes.py:編輯個人資料的視圖函數
#...
from app.forms import EditProfileForm
#...
@app.route('/edit_profile',methods=['GET','POST'])
@login_required
def edit_profile():
form = EditProfileForm()
if form.validate_on_submit():
current_user.username = form.username.data
current_user.about_me = form.about_me.data
db.session.commit()
flash('Your changes have been saved.')
return redirect(url_for('edit_profile'))
elif request.method == 'GET':
form.username.data = current_user.username
form.about_me.data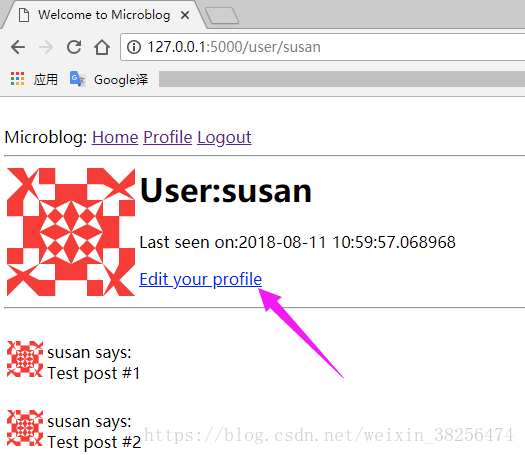 = current_user.about_me
return render_template('edit_profile.html', title='Edit Profile', form=form)
這個視圖函數與處理表單的其他函數略有不同。如果validate_on_submit()返回True,則將表單中的數據復制到用戶對象中,然后將對象寫入數據庫;返回False,可能是由於兩個不同的原因。首先,可能是因為瀏覽器剛發送了一個GET請求,需要通過提供表單模板的初始版本來響應。也可能是當瀏覽器發送帶有表單數據的POST請求時,該數據中的某些內容無效。對於這種形式,需要分別處理這兩種情況。當第一次以GET請求表格時,想用數據庫中已存儲的數據預先填充字段,所以得做與提交情況相反的操作,並將存儲在用戶字段中的數據移動到表單中,因為這將確保這些表單字段具有為用戶存儲的當前數據。但在驗證錯誤的情況下,我們不想在表單字段中寫入任何內容,因為這些已由WTForms填充。為區分這兩種情況,得檢查request.method,對初始化請求這將是GET,並對驗證失敗的提交將是POST。
為方便用戶訪問個人資料編輯頁面,可在Ta們個人資料頁面中添加一個鏈接:
app/templates/user.html:添加個人資料編輯的鏈接
				{% if user.last_seen %}
					<p>Last seen on:{{ user.last_seen }}</p>
				{% endif %}

				{% if user == current_user %}
					<p>
						<a href="{{ url_for('edit_profile') }}">Edit your profile</a>
					</p>
				{% endif %}
上述代碼中加了個判斷:當在查看自己個人資料時,顯示編輯鏈接;在查看其他人資料時,不顯示編輯鏈接。
運行程序 flask run ,效果:

點擊“Edit your profile”鏈接后,可看見 用戶個人資料 編輯頁面:

點擊“Submit”按鈕后,會提示“Your changes have been saved.”,點擊“Profile”鏈接后,效果:

CMD下命令行查看 數據庫中 user表信息,可看到新插入的字段內容:
(venv) D:\microblog>sqlite3 app.db
SQLite version 3.16.2 2017-01-06 16:32:41
Enter ".help" for usage hints.
sqlite> select * from user;
1|susan|susan@example.com|pbkdf2:sha256:50000$OONOkVyy$8d008c6647ab95a5793cf60bf57eaa3bb1123d6e5b3135c5cc5e42e02eddae32||2018-08-11 11:02:54.902074
2|belen|belen@example.com|pbkdf2:sha256:50000$PEDt5NxS$cf6c958c97b6ad28d9495d138cb5a310f6f2389534b0cafa3002dd3cec9af9d1|學習Flask超級教程,Python Web開發學習,堅持!|2018-08-11 11:21:03.778628
目前為止,項目結構
microblog/
    app/
        templates/
	        _post.html
            base.html
            edit_profile.html
            index.html
            login.html
            register.html
            user.html
        __init__.py
        forms.py
        models.py
        routes.py
    migrations/
    venv/
    app.db
    config.py
    microblog.py
參考:
https://blog.miguelgrinberg.com/post/the-flask-mega-tutorial-part-vi-profile-page-and-avatars