Windows從零搭建 Jenkins + SnoarQube (持續集成平台)
此文檔暫時不包含發布相關知識點。
- 持續集成環境:Jenkins
- 所需系統環境: java 8 及以上,配置 java 相關環境變量(此處略過)
- 代碼托管:Git 2.22 或者 gitlab
- 審查工具:SonarQube
- 該工具由兩部分組成,分別是 SonarQube本身(即是審查服務器),和 sonar-scanner(審查服務端)
SonarQube和sonar-scanner的關系就像是 github 官網和我們本地的 git 軟件的關系
- snoar-scanner = sonar-runner 是同一個軟件在不同版本下的名字,網上的教程兩者基本上是通用的
- 該工具由兩部分組成,分別是 SonarQube本身(即是審查服務器),和 sonar-scanner(審查服務端)
資源下載
- Jenkins 提取密碼:acko
- SonarQube v5.6 提取碼:bpg1
- sonar-scanner 提取碼:cy1n
- mysql 5.7.19 提取碼:pwwv
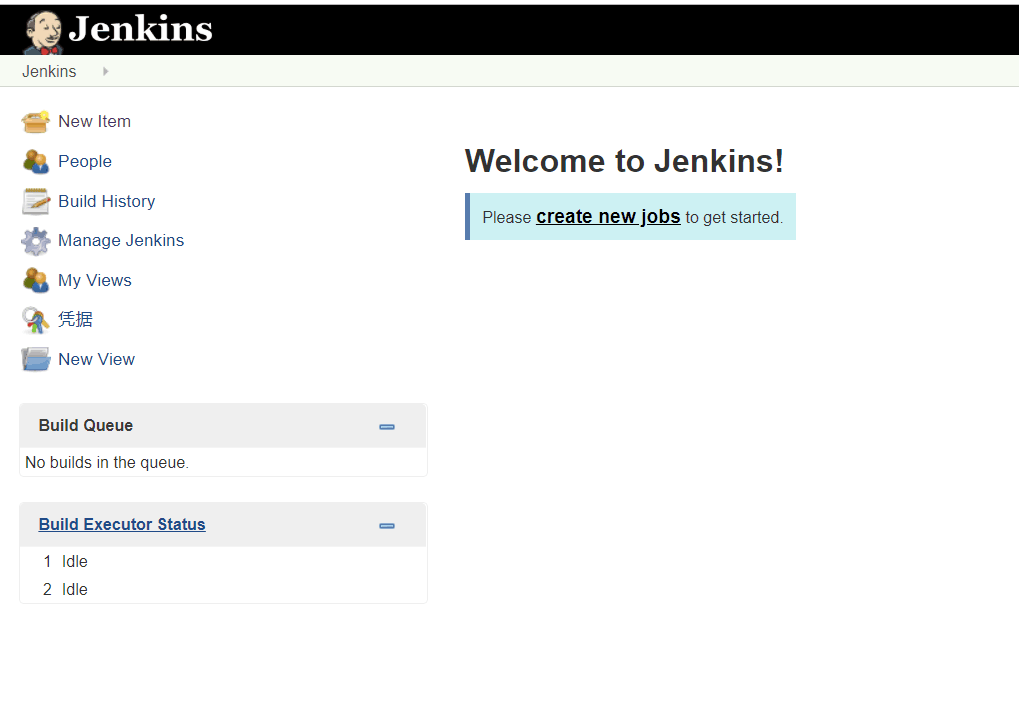
一.啟動 Jenkins
- 1.下載 Jenkins 的 war 包
- 2.在 war 包所在目錄執行
java -jar jenkins.war --httpPort=8089 - 3.打開瀏覽器輸入網址
localhost:8089我們就能發現 Jenkins 已經跑起來了
二.啟動 SonarQube
-
1.首先需要安裝 MySql 數據庫(為了方便可配置mysql相關環境變量,同時第一次進入mysql需要修改密碼,此處都略過,百度一下)
root 登錄 mysql,創建 sonar 數據庫和用戶授權。
CREATE DATABASE sonar CHARACTER SET utf8 COLLATE utf8_general_ci; CREATE USER 'sonar' IDENTIFIED BY 'sonar'; GRANT ALL ON sonar.* TO 'sonar'@'%' IDENTIFIED BY 'sonar'; GRANT ALL ON sonar.* TO 'sonar'@'localhost' IDENTIFIED BY 'sonar'; FLUSH PRIVILEGES; -
2.在路徑下的 conf 文件夾下修改 sonar.properties
sonar.jdbc.url=jdbc:mysql://localhost:3306/sonar?useUnicode=true&characterEncoding=utf8&rewriteBatchedStatements=true&useConfigs=maxPerformance&useSSL=false sonar.jdbc.username=snoar sonar.jdbc.password=snoar sonar.sourceEncoding=UTF-8 -
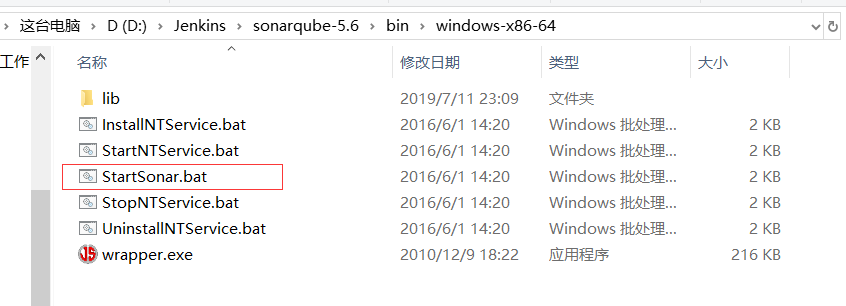
3.之后打開 bin 目錄下對應的 StartSnoar.bat 就可以啟動 Snoar 服務器了。可通過瀏覽器
localhost:9000查看默認的 SnoarQube 賬號密碼為 admin/admin.(附:5.6版本的 SonarQube 漢化需要去找 github 發布的對應 tag 版本手動本地安裝)

三.配置 sonar-scanner(SonarQube和sonar-scanner的關系就像是 github 官網和我們本地的 git 軟件的關系)
-
1.配置 sonar-scanner 目錄下 conf 中的 snoar-scanner.properties
sonar.jdbc.url=jdbc:mysql://172.16.24.12:3306/sonar?useUnicode=true&characterEncoding=utf8&rewriteBatchedStatements=true&useConfigs=maxPerformance sonar.jdbc.username=root sonar.jdbc.password=root -
2.配置環境變量使得 cmd 下任何路徑都可使用 sonar-scanner 命令
cmd 下輸入 snoar-scanner -version 有顯示即為成功

-
3.然后我們去找個我們 git 項目的文件夾里,創建
sonar-project.properties# must be unique in a given SonarQube instance sonar.projectKey=my:project # this is the name displayed in the SonarQube UI sonar.projectName=apiautocore sonar.projectVersion=1.0 # Path is relative to the sonar-project.properties file. Replace "\" by "/" on Windows. # Since SonarQube 4.2, this property is optional if sonar.modules is set. # If not set, SonarQube starts looking for source code from the directory containing # the sonar-project.properties file. sonar.sources=src # Encoding of the source code. Default is default system encoding sonar.sourceEncoding=UTF-8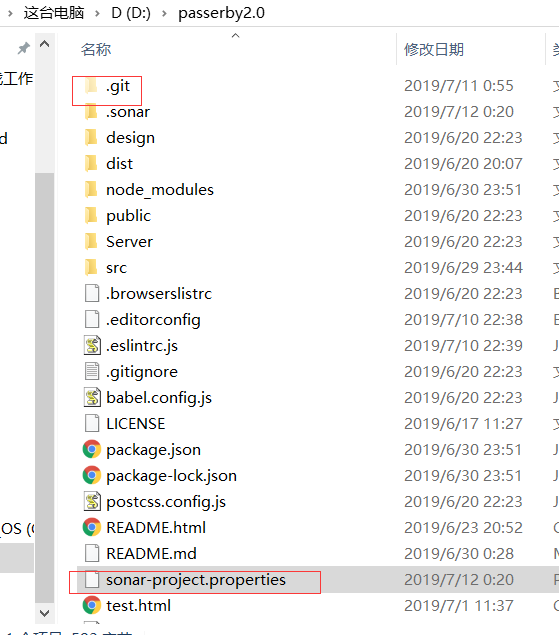
-
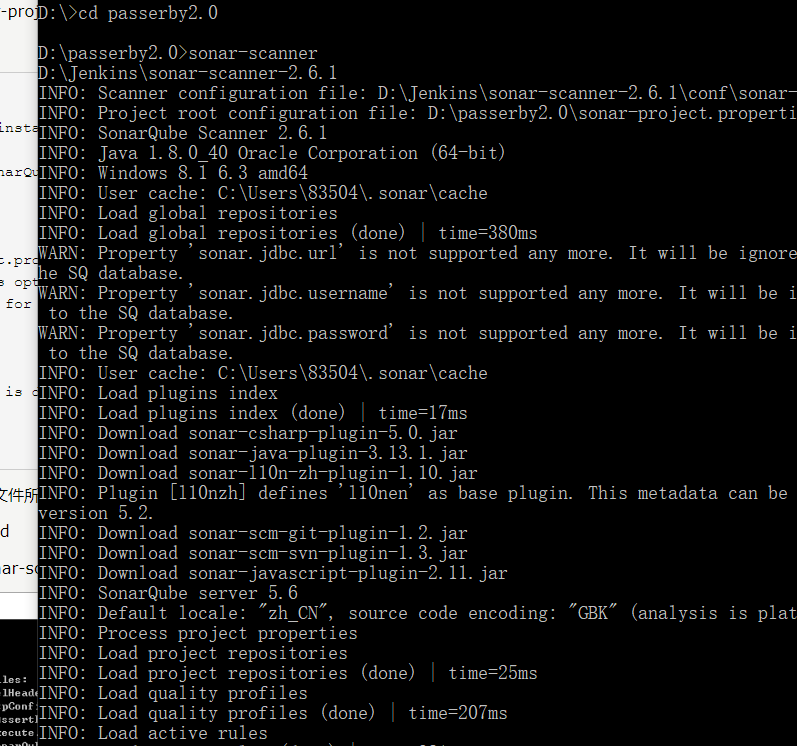
4.因為之前配了環境變量,這邊跑命令即可。
-
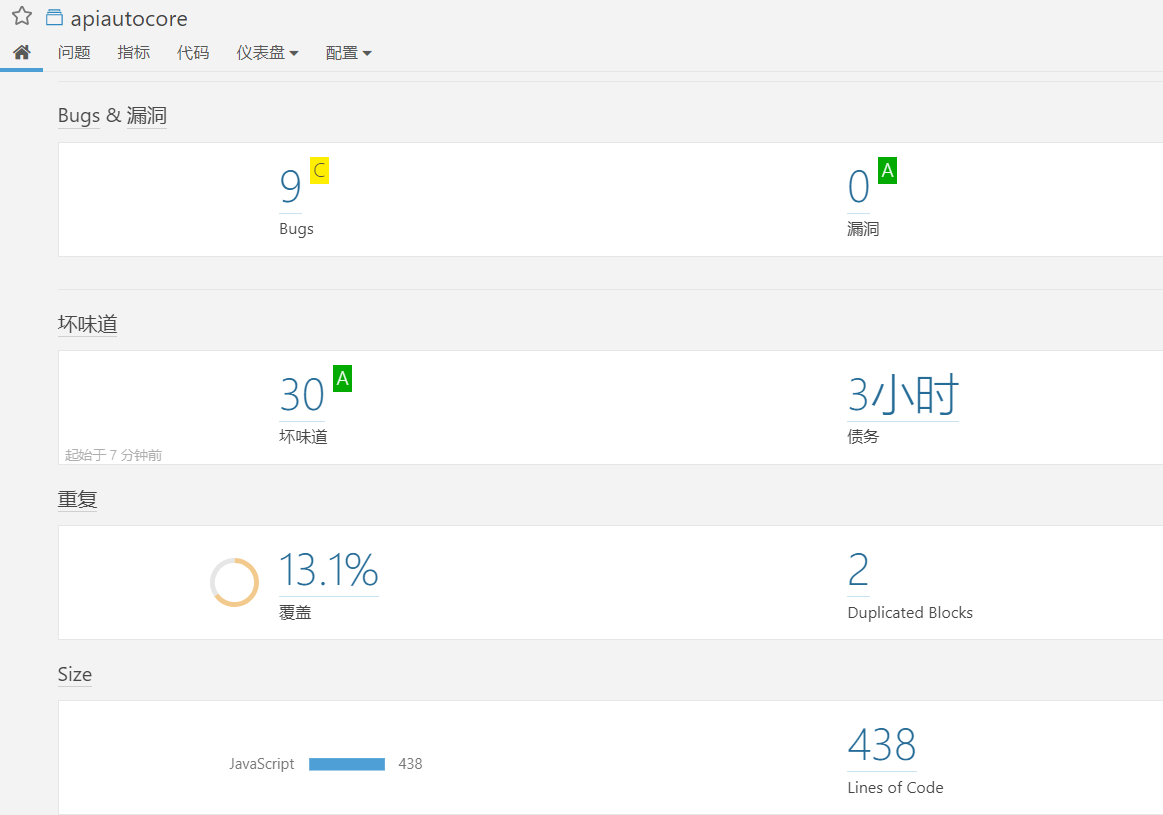
5.然后去我們前面所說的 SonarQube服務器 localhost:9000 驗收結果即可。
這里發現沒有檢測到
.vue文件,原因是插件需要更新,在 SonarQube 服務器端更新下 SonarJS 插件到 3.0 版本以上即可。