前言
看關於這方面的文章基本沒有能涉及到UIGestureRecognizers相關的文章,因此決定寫這樣一篇文章。也是我的第一篇文章,如有什么不對請及時指正。
本文主要通過一些實際測試來便於大家理解。
正文

- IOKit.framework 為系統內核的庫
- SpringBoard.app 相當於手機的桌面
- Source1 主要接收系統的消息
- Source0 - UIApplication - UIWindow
- 從window開始系統會調用
hitTest:withEvent:和pointInside來找到最優響應者,具體過程可參考下圖

- 比如我們在self.view 上依次添加view1、view2、view3(3個view是同級關系),那么系統用
hitTest以及pointInside時會先從view3開始便利,如果pointInside返回YES就繼續遍歷view3的subviews(如果view3沒有子視圖,那么會返回view3),如果pointInside返回NO就開始遍歷view2。反序遍歷,最后一個添加的subview開始。也算是一種算法優化。后面會具體介紹hitTest的內部實現和具體使用場景。
- 比如我們在self.view 上依次添加view1、view2、view3(3個view是同級關系),那么系統用
- UITouch會給gestureRecognizers和最優響應者也就是hitTestView發送消息
- 默認view會走其
touchBegan:withEvent:等方法,當gestureRecognizers找到識別的gestureRecognizer后,將會獨自占有該touch,即會調用其他gestureRecognizer和hitTest view的touchCancelled:withEvent:方法,並且它們不再收到該touche事件,也就不會走響應鏈流程。下面會具體闡述UIContol和UIScrollView和其子類與手勢之間的沖突和關系。
- 默認view會走其
- 當該事件響應完畢,主線程的Runloop開始睡眠,等待下一個事件。
1.hitTest:withEvent:和pointInside
1.1 hitTest:withEvent:和pointInside 演練
-
測試hitTest和pointInside執行過程
GSGrayView *grayView = [[GSGrayView alloc] initWithFrame:CGRectMake(0, kTopHeight, kScreenWidth/2, 400)];
[self.view addSubview:grayView];

GSRedView *redView = [[GSRedView alloc] initWithFrame:CGRectMake(0, 0, grayView.bounds.size.width / 2, grayView.bounds.size.height / 3)];
[grayView addSubview:redView];

GSBlueView *blueView = [[GSBlueView alloc] initWithFrame:CGRectMake(grayView.bounds.size.width/2, grayView.bounds.size.height * 2/3, grayView.bounds.size.width/2, grayView.bounds.size.height/3)];

// blueView.userInteractionEnabled = NO;
// blueView.hidden = YES;
// blueView.alpha = 0.1;//0.0;
[grayView addSubview:blueView];

GSYellowView *yellowView = [[GSYellowView alloc] initWithFrame:CGRectMake(CGRectGetMinX(grayView.frame), CGRectGetMaxY(grayView.frame) + 20, grayView.bounds.size.width, 100)];
[self.view addSubview:yellowView];
點擊redView:
yellowView -> grayView -> blueView -> redView

-
當點擊redView時,因為yellowView和grayView同級,yellowView比grayView后添加,所以先打印yellowView,由於觸摸點不在yellowView中因此打印grayView,然后遍歷grayView的subViews分別打印blueView和redView。
-
當hitTest返回nil時,也不會打印pointInside。因此可以得出pointInside是在hitTest后面執行的。
-
當view的userInteractionEnabled為NO、hidden為YES或alpha<=0.1時,也不會打印pointInside方法。因此可以推斷出在hitTest方法內部會判斷如果這些條件一個成立則會返回nil,也不會調用pointInside方法。
-
如果在grayView的hitTest返回[super hitTest:point event:event],則會執行gery.subviews的遍歷(subviews 的 hitTest 與 pointInside),grayView的pointInside是判斷觸摸點是否在grayView的bounds內,grayView的hitTest是判斷是否需要遍歷他的subviews.
-
pointInside只是在執行hitTest時,會在hitTest內部調用的一個方法。也就是說pointInside是hitTest的輔助方法。
-
hitTest是一個遞歸函數
1.2 hitTest:withEvent:內部實現代碼還原
- (UIView *)hitTest:(CGPoint)point withEvent:(UIEvent *)event {
    NSLog(@"-----%@",self.nextResponder.class);
    if (!self.isUserInteractionEnabled || self.isHidden || self.alpha <= 0.01) return nil;
    //判斷點在不在這個視圖里
    if ([self pointInside:point withEvent:event]) {
        //在這個視圖 遍歷該視圖的子視圖
        for (UIView *subview in [self.subviews reverseObjectEnumerator]) {
            //轉換坐標到子視圖
            CGPoint convertedPoint = [subview convertPoint:point fromView:self];
            //遞歸調用hitTest:withEvent繼續判斷
            UIView *hitTestView = [subview hitTest:convertedPoint withEvent:event];
            if (hitTestView) {
                //在這里打印self.class可以看到遞歸返回的順序。
                return hitTestView;
            }
        }
        //這里就是該視圖沒有子視圖了 點在該視圖中,所以直接返回本身,上面的hitTestView就是這個。
        NSLog(@"命中的view:%@",self.class);
        return self;
    }
    //不在這個視圖直接返回nil
    return nil;
}
1.3 pointInside運用:增大熱區范圍
- 在開發過程中難免會遇到需要增大UIButton等的熱區范圍,假如UIButton的布局不允許修改,那么就需要用到pointInside來增大UIButton的點擊熱區范圍。具體實現代碼如下:
- (BOOL)pointInside:(CGPoint)point withEvent:(UIEvent *)event {

    NSLog(@"%@ -- pointInside",self.class);
    CGRect bounds = self.bounds;
    //若原熱區小於200x200,則放大熱區,否則保持原大小不變
    //一般熱區范圍為40x40 ,此處200是為了便於檢測
    CGFloat widthDelta = MAX(200 - bounds.size.width, 0);
    CGFloat heightDelta = MAX(200 - bounds.size.height, 0);
    bounds = CGRectInset(bounds, -0.5 * widthDelta, -0.5 * heightDelta);
    return CGRectContainsPoint(bounds, point);

}
- 也就是說如果button的size小於200*200,則點擊button相對中心位置上下左右各100的范圍內即使超出button,也可以響應點擊事件
2.響應鏈
2.1 響應鏈的組成

還用上面那個栗子:
點擊redView:
redview -> grayView -> viewController -> ...

因為只實現到controller的touches事件方法因此只打印到Controller。
- 響應鏈是通過nextResponder屬性組成的一個鏈表。
- 點擊的view有 superView,nextResponder就是superView;
- view.nextResponder.nextResponder是viewController 或者是 view.superView. view
- view.nextResponder.nextResponder.nextResponder是 UIWindow (非嚴謹,便於理解)
- view.nextResponder.nextResponder.nextResponder. nextResponder是UIApplication、UIAppdelate、直到nil (非嚴謹,便於理解)
- touch事件就是根據響應鏈的關系來層層調用(我們重寫touch 要記得 super 調用,不然響應鏈會中斷)。
- 比如我們監聽self.view的touch事件,也是因為subviews的touch都在同一個響應鏈里。
2.2 UIControl阻斷響應鏈
把上面栗子中的grayView替換成一個Button:
	GSExpandButton *expandButton = [[GSExpandButton alloc] initWithFrame:CGRectMake(0, kTopHeight, kScreenWidth/2, 400)];
    expandButton.backgroundColor = [UIColor lightGrayColor];
    [expandButton setTitle:@"點我啊" forState:UIControlStateNormal];
    [expandButton addTarget:self action:@selector(expandButtonClick:) forControlEvents:UIControlEventTouchDown];
    [self.view addSubview:expandButton];

    self.redView = [[GSRedView alloc] initWithFrame:CGRectMake(0, 0, expandButton.bounds.size.width / 2, expandButton.bounds.size.height / 3)];
    [expandButton addSubview:self.redView];

    self.blueView = [[GSBlueView alloc] initWithFrame:CGRectMake(expandButton.bounds.size.width/2, expandButton.bounds.size.height * 2/3, expandButton.bounds.size.width/2, expandButton.bounds.size.height/3)];

    //    blueView.userInteractionEnabled = NO;
    //    blueView.hidden = YES;
    //    blueView.alpha = 0.1;//0.0;
    [expandButton addSubview:self.blueView];

    self.yellowView = [[GSYellowView alloc] initWithFrame:CGRectMake(CGRectGetMinX(expandButton.frame), CGRectGetMaxY(expandButton.frame) + 20, expandButton.bounds.size.width, 100)];
    [self.view addSubview:self.yellowView];
點擊redView:
redview -> expandButton

- 雖然點擊redView,雖然button的touches事件方法也走了但是依然不會響應button的target的action方法,只是會傳遞到button而已,因為最佳響應着依然是redView。
- 從上面測試結果可以看出,UIControl會阻斷響應鏈的傳遞,也就是說在響應UIContol的touches事件時並不會調用nextResponder的對應的方法。
- 通過在Button子類中重寫touches的方法,發現如果不調用super的touches對應的方法則不會響應點擊事件。由此可以大致推斷出UIControl其子類響應點擊原理大致為:根據添加target:action:時設置的UIControlEvents,在touches的合適方法調用target的action方法。
2.3UIScrollView阻斷響應鏈
self.grayView = [[GSGrayView alloc] initWithFrame:CGRectMake(0, kTopHeight, kScreenWidth, kScreenHeight * 3 / 4)];
    [self.view addSubview:self.grayView];

    self.tableView = [[GSTableView alloc] initWithFrame:CGRectMake(0, 20, kScreenWidth, self.grayView.bounds.size.height / 2)];
    self.tableView.dataSource = self;
    self.tableView.backgroundColor = [UIColor darkGrayColor];
    self.tableView.delegate = self;
    [self.grayView addSubview:self.tableView];

    self.redView = [[GSRedView alloc] initWithFrame:CGRectMake(0, 0, kScreenWidth/2, self.tableView.bounds.size.height/2)];
    [self.tableView addSubview:self.redView];

點擊redview
redview -> tableView

- 從上面測試結果可以得出,UIScrollView也會阻斷響應鏈,也就是說在響應UIScrollView自身對touch的處理方式並不會調用nextResponder對應的方法。
- 通過重寫tableView子類的touches方法,發現如果不調用super的touches對應的方法則不會走tableview:didSelectRowAtIndexPath:方法。由此可以大致推斷出UIScrollView其子類是在其touches方法中處理點擊事件的。
3.手勢
3.1手勢的探索以及和touch事件的關系
在上面栗子中的view增加gestureRecognizer:
- (void)addGesture {
    GSGrayGestureRecognizer *grayGesture = [[GSGrayGestureRecognizer alloc] initWithTarget:self action:@selector(grayViewClick:)];
    [self.grayView addGestureRecognizer:grayGesture];

    GSRedGestureRecognizer *redGesture = [[GSRedGestureRecognizer alloc] initWithTarget:self action:@selector(redViewClick:)];
    [self.redView addGestureRecognizer:redGesture];

    GSBlueGestureRecognizer *blueGesture = [[GSBlueGestureRecognizer alloc] initWithTarget:self action:@selector(blueViewClick:)];
    [self.blueView addGestureRecognizer:blueGesture];
}
點擊redView
打印結果如下圖所示:

- 當通過hitTest和pointInside找到最優響應者后,會給gestureRecognizers和相應的view同時發送touchBegin消息,如果找到合適gestureRecognizer則會獨有該touches,即調用view的touheCancel消息,接着有gestreRecognizer來響應事件。
- 上面為默認情況下手勢和touches之間的關系,其實我們可以通過gestureRecognizer的屬性來控制它們之間的一些關系。
// default is YES. causes touchesCancelled:withEvent: or pressesCancelled:withEvent: to be sent to the view for all touches or presses recognized as part of this gesture immediately before the action method is called.
@property(nonatomic) BOOL cancelsTouchesInView;

// default is NO.  causes all touch or press events to be delivered to the target view only after this gesture has failed recognition. set to YES to prevent views from processing any touches or presses that may be recognized as part of this gesture
@property(nonatomic) BOOL delaysTouchesBegan;

 // default is YES. causes touchesEnded or pressesEnded events to be delivered to the target view only after this gesture has failed recognition. this ensures that a touch or press that is part of the gesture can be cancelled if the gesture is recognized
@property(nonatomic) BOOL delaysTouchesEnded;
cancelsTouchesInView:默認為YES。表示當手勢識別成功后,取消最佳響應者對象對於事件的響應,並不再向最佳響應者發送事件。若設置為No,則表示在手勢識別器識別成功后仍然向最佳響應者發送事件,最佳響應者仍響應事件。delaysTouchesBegan:默認為NO,即在手勢識別器識別手勢期間,觸摸對象狀態發生變化時,都會發送給最佳響應者,若設置成yes,則在識別手勢期間,觸摸狀態發生變化時不會發送給最佳響應者。delaysTouchesEnded:默認為NO。默認情況下當手勢識別器未能識別手勢時,若此時觸摸已經結束,則會立即通知Application發送狀態為end的touch事件給最佳響應者以調用 touchesEnded:withEvent: 結束事件響應;若設置為YES,則會在手勢識別失敗時,延遲一小段時間(0.15s)再調用響應者的 touchesEnded:withEvent:。
3.2手勢和UIControl的關系
- 上面已經說了UIContol會阻斷響應鏈。那么我們再來進一步探索UIControl的阻斷和手勢之間的關系。
// button在上面
self.grayView = [[GSGrayView alloc] initWithFrame:CGRectMake(0, kTopHeight, kScreenWidth/2, 400)];
GSGrayGestureRecognizer *graygesture = [[GSGrayGestureRecognizer alloc] initWithTarget:self action:@selector(grayViewClick:)];
[self.grayView addGestureRecognizer:graygesture];
[self.view addSubview:self.grayView];
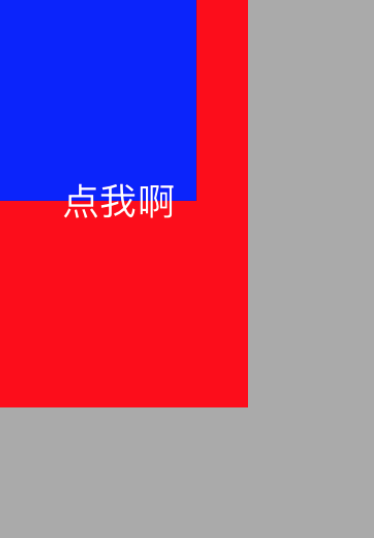
GSExpandButton *expandButton = [[GSExpandButton alloc] initWithFrame:CGRectMake(30, kTopHeight, 100, 100)];
expandButton.backgroundColor = [UIColor redColor];
[expandButton setTitle:@"點我啊" forState:UIControlStateNormal];
[expandButton addTarget:self action:@selector(expandButtonClick:) forControlEvents:UIControlEventTouchUpInside];
[self.grayView addSubview:expandButton];

點擊button

-
從該栗子中可以看出即使下層view添加收拾依然會響應按鈕的點擊事件。
-
由此可以猜測原因:
- UIControl及其子類會阻斷響應鏈。(后面驗證是錯誤的)
- UIControl及其子類為最優響應者時會優先處理它們的事件。(后面驗證成功)
- 驗證猜測一:
- 有手勢的view上增加一個阻斷響應鏈的view
self.grayView = [[GSGrayView alloc] initWithFrame:CGRectMake(0, kTopHeight, kScreenWidth/2, 400)];
GSGrayGestureRecognizer *graygesture = [[GSGrayGestureRecognizer alloc] initWithTarget:self action:@selector(grayViewClick:)];
[self.grayView addGestureRecognizer:graygesture];
[self.view addSubview:self.grayView];
GSCancelledTouchView *cancelTouchView = [[GSCancelledTouchView alloc] initWithFrame:CGRectMake(30, kTopHeight, 100, 100)];
[self.grayView addSubview:cancelTouchView];

點擊greenView

- greenView是一個阻斷響應鏈的view(即重新超類touches方法沒用調用超類方法),但是依然響應gestureRecognizer的target:action:方法,並且調用touches事件的toucesCancelled的方法。因此猜測1是錯誤的。
- 驗證猜測二:
- 有收拾的view上增加一個button,button上增加一個view
```
// 驗證不取消button的touches事件猜測二
self.grayView = [[GSGrayView alloc] initWithFrame:CGRectMake(0, kTopHeight, kScreenWidth/2, 400)];
GSGrayGestureRecognizer *graygesture = [[GSGrayGestureRecognizer alloc] initWithTarget:self action:@selector(grayViewClick:)];
[self.grayView addGestureRecognizer:graygesture];
[self.view addSubview:self.grayView];
GSExpandButton *expandButton = [[GSExpandButton alloc] initWithFrame:CGRectMake(0, 0, kScreenWidth/3, 200)];
expandButton.backgroundColor = [UIColor redColor];
[expandButton setTitle:@"點我啊" forState:UIControlStateNormal];
[expandButton addTarget:self action:@selector(expandButtonClick:) forControlEvents:UIControlEventTouchUpInside];
[self.grayView addSubview:expandButton];
self.blueView = [[GSBlueView alloc] initWithFrame:CGRectMake(0, 0, 100, 100)];
[expandButton addSubview:self.blueView];
```
點擊blueView
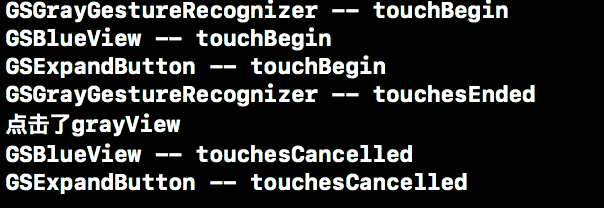
- 點擊blueview雖然expandButton會阻斷響應鏈但是依然會執行在grayview上的手勢方法並且會調用touchesCancelled方法,因此可以驗證猜想二是正確的。
- 把grayview上的gestureRecognizer去掉,依然不會響應expandButton上的點擊事件,因為最優響應者不是expandButton。
- UIControl及其子類能夠執行點擊事件而不是走底層的手勢的原因為:在識別到相應的gestureRecognizer后如果當前的最優響應者是UIControl及其子類並且當前的gestureRecognizer不是UIContol上的手勢,則會響應UIControl的target:action:的方法。否則則會響應gestureRecognizer的target:action:的方法。
3.3 手勢和UIScrollView的關系
- UITableView是UIScroll子類的常用類,因此拿UITableView來舉栗子。
self.grayView = [[GSGrayView alloc] initWithFrame:CGRectMake(0, kTopHeight, kScreenWidth, kScreenHeight * 3 / 4)];
    GSGrayGestureRecognizer *grayGesture = [[GSGrayGestureRecognizer alloc] initWithTarget:self action:@selector(grayViewClick:)];
    //    grayGesture.delaysTouchesBegan = YES;
    //    grayGesture.cancelsTouchesInView = NO;
    //    grayGesture.delaysTouchesEnded = YES;
    [self.grayView addGestureRecognizer:grayGesture];
    [self.view addSubview:self.grayView];

    self.tableView = [[GSTableView alloc] initWithFrame:CGRectMake(0, 20, kScreenWidth, self.grayView.bounds.size.height / 2)];
    self.tableView.dataSource = self;
    self.tableView.backgroundColor = [UIColor darkGrayColor];
    self.tableView.delegate = self;
    [self.grayView addSubview:self.tableView];

點擊tableView
當父控件沒有手勢時

當父控件有手勢時

- 由上面的例子可以得出當UIScrollView為最優響應者並且父控件沒有手勢時UIScrollView才可以自己處理點擊事件。否則被父控件的gestureRecognizer占有。
- 從上面結果看出當父控件有手勢時UIScrollView的touches方法都不執行,類似於設置delaysTouchesBegan為YES。
- 雖然UIScrollView及其子類和UIControl及其子類類似都可以阻斷響應鏈,但是當UIScrollView及其子類為最優響應者時,如果父控件中有gestureRecognizer依然會被其占有。
UIScrollView點擊穿透解決方案
當UIScrollView為最優響應者父控件有手勢時,UIScrollView及其子類的點擊代理方法和touchesBegan方法不響應。
解決方法:三種解決方式,個人認為第二種為最優解決方案
-
可以通過給父控件手勢設置cancelsTouchesInView為NO,則會同時響應gestureRecognizer的事件和UIScrollView及其子類的代理方法和touches事件。
-
給父控件中的手勢的代理方法里面做一下判斷,當touch的view是我們需要觸發的view的時候,return NO ,這樣就不會走手勢方法,而去觸發這個touch.view這個對象的方法了。
- (BOOL)gestureRecognizer:(UIGestureRecognizer *)gestureRecognizer shouldReceiveTouch:(UITouch *)touch {
    if ([NSStringFromClass([touch.view class])    isEqualToString:@"UITableViewCellContentView"]) {
        return NO;
    }
    return YES;
}
- 可以通過給UIScrollView及其子類添加gestureRecognizer,從而來調用需要處理的事情。
文章若有不對地方,歡迎批評指正