安裝
Mac 上最便捷的安裝方式當然是通過 Homebrew:
$ brew install emscripten
安裝好之后講道理就已經自動配置好一切,然后 emcc 命令便可用了。
下面看非 Homebrew 安裝的方式。
通過官方 WebAssembly - Developer’s Guide 提供的安裝配置步驟進行環境相關設置。這里以 macOS 為例。
下載工具鏈
通過 clone emscripten 倉庫到本地進行工具鏈(toolchain)的下載安裝。
$ git clone https://github.com/emscripten-core/emsdk.git
$ cd emsdk
安裝及配置
執行安裝:
$ ./emsdk install latest
激活工具鏈,生成相應環境配置:
$ ./emsdk activate latest
`./emsdk activate latest` 命令的輸出
$ ./emsdk activate latest Writing .emscripten configuration file to user home directory /Users/wayou/ The Emscripten configuration file /Users/wayou/.emscripten has been rewritten with the following contents:import os
LLVM_ROOT = '/Users/wayou/dev/emsdk/fastcomp/fastcomp/bin'
BINARYEN_ROOT = '/Users/wayou/dev/emsdk/fastcomp'
NODE_JS = '/Users/wayou/dev/emsdk/node/8.9.1_64bit/bin/node'
SPIDERMONKEY_ENGINE = ''
V8_ENGINE = ''
TEMP_DIR = '/var/folders/qr/dlqjq3zj10xgf2xfx3mybn500000gn/T'
COMPILER_ENGINE = NODE_JS
JS_ENGINES = [NODE_JS]To conveniently access the selected set of tools from the command line, consider adding the following directories to PATH, or call 'source ./emsdk_env.sh' to do this for you.
/Users/wayou/dev/emsdk:/Users/wayou/dev/emsdk/fastcomp/emscripten:/Users/wayou/dev/emsdk/node/8.9.1_64bit/bin
Set the following tools as active:
releases-fastcomp-3b8cff670e9233a6623563add831647e8689a86b-64bit
node-8.9.1-64bit
小貼士:其中 install 過程會從 https://chromium.googlesource.com,https://storage.googleapis.com 及 https://s3.amazonaws.com 域下載東西,所以最好在命令行配置科學 上網,否則安裝會失敗。
環境變量
通過執行以下命令添加相應命令及目錄到環境變量以方便調用:
$ source ./emsdk_env.sh --build=Release
如果進行到這一步發生如下錯誤:
$ source ./emsdk_env.sh --build=Release
./emsdk_env.sh (line 19): Missing end to balance this if statement
if [ "$SRC" = "" ]; then
^
from sourcing file ./emsdk_env.sh
	called on standard input
source: Error while reading file './emsdk_env.sh'
這多半是因為你用的 shell 是 fish 語法不兼容的原因。
兩個解決辦法:
- 可通過來自emscripten-core/emsdk issue#111 中提供的方法,執行下面的命令來繞開:
$ bash ./emsdk_env.sh
- 因為其也提供了對應的
.fish腳本,所以,也可以直接選擇運行該 fish 腳本來解決上面語法報錯的問題:
$ source ./emsdk_env.fish
執行成功的輸出:
$ source ./emsdk_env.fish
Adding directories to PATH:
PATH += /Users/wayou/dev/emsdk
Setting environment variables:

EMSDK = /Users/wayou/dev/emsdk

EM_CONFIG = /Users/wayou/.emscripten
檢查安裝
完成上面步驟后,可通過運行 emcc --version 命令查看是否安裝成功:
$ emcc --version
`emcc --version` 命令的輸出
$ emcc --version
cache:INFO: generating system asset: is_vanilla.txt... (this will be cached in "/Users/wayou/.emscripten_cache/is_vanilla.txt" for subsequent builds)
cache:INFO:  - ok
emcc (Emscripten gcc/clang-like replacement) 1.38.33 (commit 0490c5f7aaf0e61aafd3b4cfe22cc56b803026b1)
Copyright (C) 2014 the Emscripten authors (see AUTHORS.txt)
This is free and open source software under the MIT license.
There is NO warranty; not even for MERCHANTABILITY or FITNESS FOR A PARTICULAR PURPOSE.
如果執行 emcc 時報如下錯誤:
$ emcc --version
emscripten requires python 2.7.12 or above
大概率是 macOS 自帶的是老版本的 Python2,而 emcc 需要 Python3。解決辦法有很多,這里說一個。
嘗試過在命令的配置文件中添加 alias 配置 aliast python=python3,是不生效的,但可以將 emcc 命令配置 alias 顯式指定使用 python3 來啟動。將如下配置添加到相應 shell 的配置文件中,以 fish 為例其配置文件為 ~/.config/fish/config.fish:
alias emcc="python3 /Users/wayou/Documents/dev/github/emsdk/fastcomp/emscripten/emcc"
alias em++="python3 /Users/wayou/Documents/dev/github/emsdk/fastcomp/emscripten/em++"
alias emrun="python3 /Users/wayou/Documents/dev/github/emsdk/fastcomp/emscripten/emrun"
根據官方文檔的描述:
use em++ to force compilation as C++
--Emscripten Tutorial
em++ 用於編譯 c++ 代碼,所以這里將 em++ 也添加上了。
這里同時也將 emrun 添加上了別名,方便后面使用它來啟動本地服務以調試。
小貼士:新開命令行窗口或重啟命令行后,需要重新執行 source 命令,可將其添加到你所使用的命令行的配置文件中,.bash_profile,.zshrc,或 .
以 fish 為例:
~/.config/fish/config.fish.fish
source "/Users/wayou/dev/emsdk/emsdk_env.fish";
這樣每次啟動命令行后 emcc 都是可用狀態。
編譯及運行
安裝配置完成后,便可以嘗試編譯並運行一個簡單的 demo 程序了。
一些注意點:
- 運行
emcc時需要指定-s WASM=1參數,否則默認情況下其輸出為asm.js。 - 除了生成 Wasm 二進制文件及對應的 JavaScript 封裝,如果還想要生成一個可直接查看的 HTML 頁面,可在輸出時指定一個后綴為
.html的文件。 - 實際運行時不能直接打開這個生成的 HTML 文件,因為
file:///協議不支持跨域,所以需要本地啟一個服務器來查看。
編寫 Hello World
創建 hello.c 文件並輸出以下內容:
hello.c
#include <stdio.h>
int main(int argc, char ** argv) {
  printf("Hello, world!\n");
}
編譯
執行以下命令進行編譯:
$ emcc hello.c -s WASM=1 -o hello.html
運行
通過工具鏈中提供的 smrun 來開啟一個本地服務器以查看剛剛生成的程序:
$ emrun --no_browser --port 8080 .
當然,使用其他任意 server 也是可以的,比如 Python 的:
$ python -m http.server 8080
啟動成功后瀏覽器訪問 http://localhost:8080/hello.html。不出意外你會看到頁面中 Emscripten 的控制台展示了 Hello, world!。
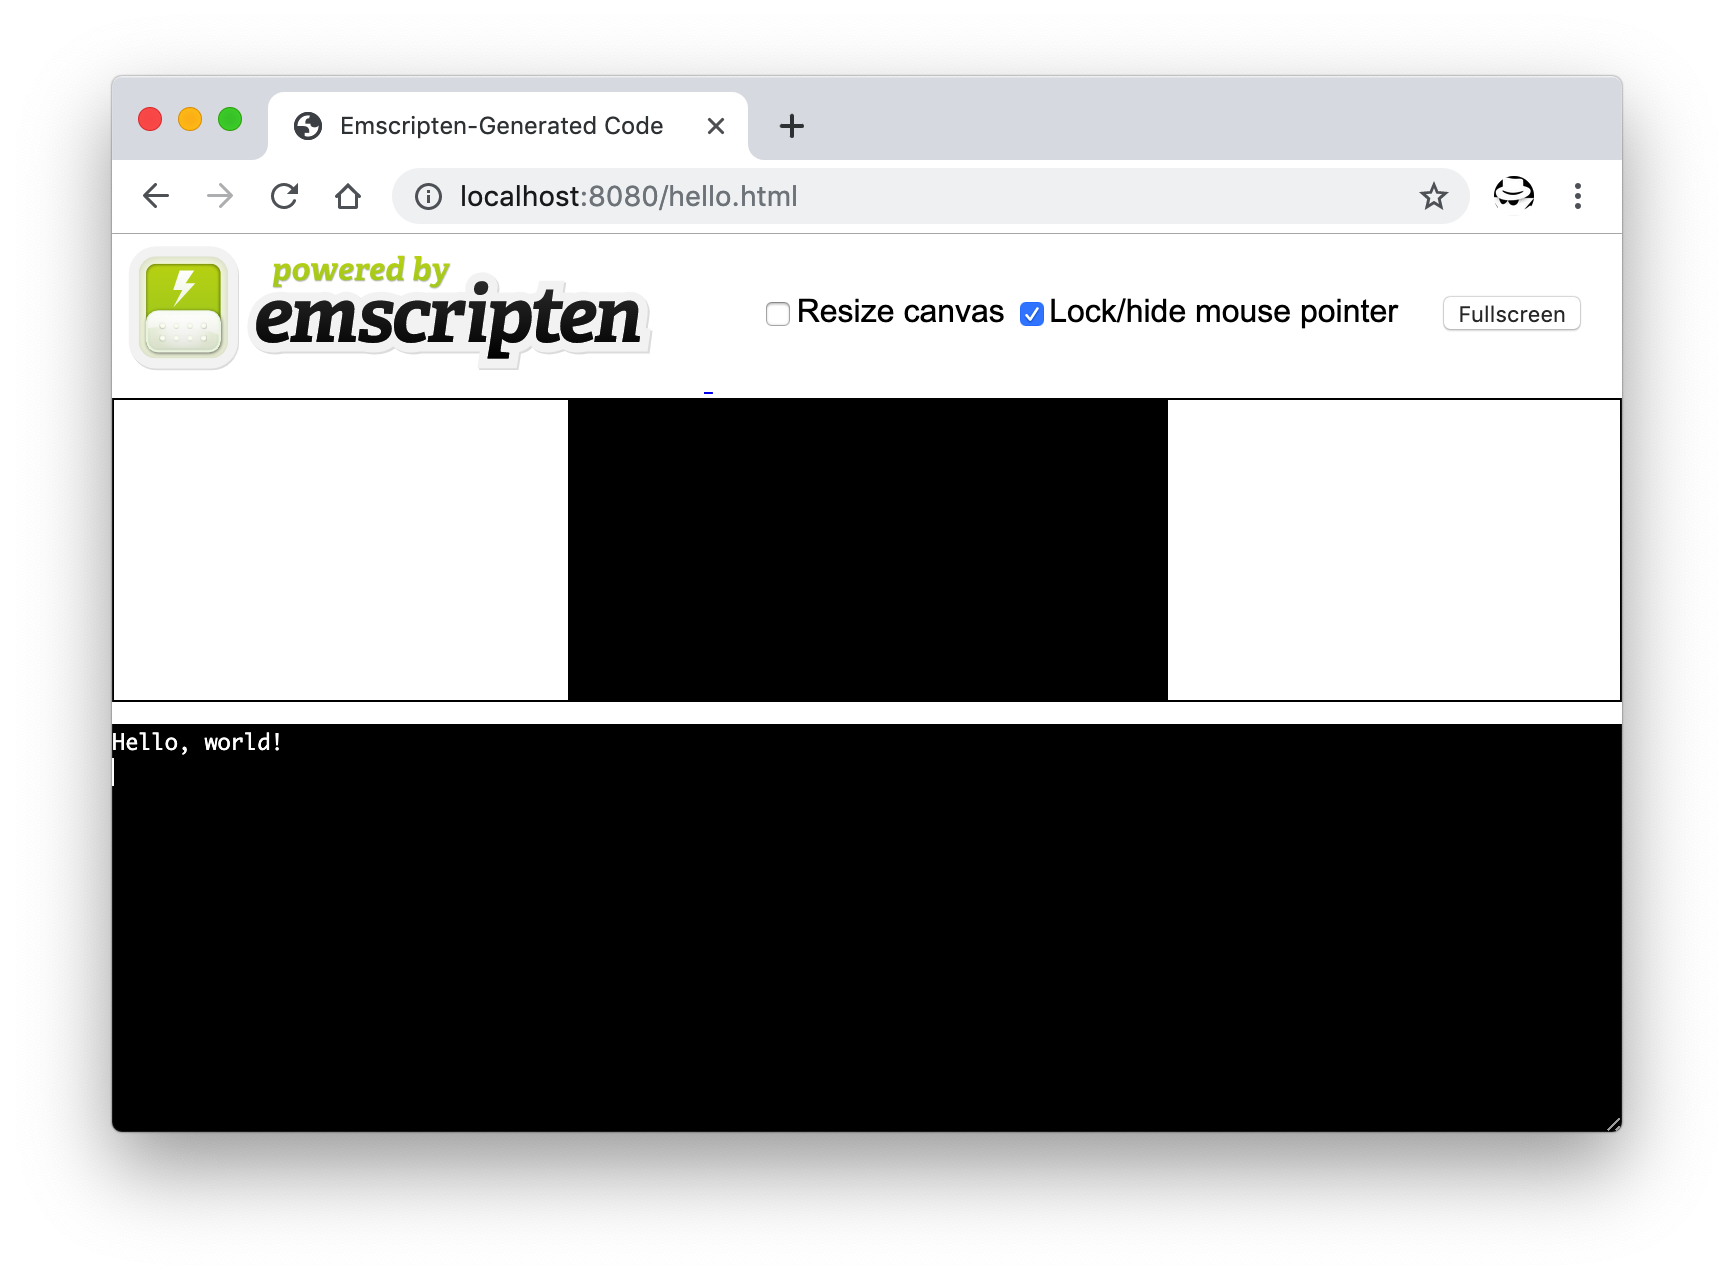
WebAssembly Hello Wrold 運行效果
但用 emrun 的好處在於它已經處理好了 .wasm 文件的返回類型為 Content-type: application/wasm,而其他 server 可能需要額外的配置,否則默認情況下 .wasm 文件返回到瀏覽器時其 Content-Type 不對會報錯。
調用 C++ 中的方法
下面來看如何在 JavaScript 中調用 C++ 定義的方法。
默認情況下,Emscripten 編譯后的代碼只包含 main 方法相關的調用,其他無關的代碼將會在編譯時去掉。可通過在方法名前加 EMSCRIPTEN_KEEPALIVE 來防止需要導出的方法被去掉。
將以下代碼放入 hello.c 並保存。
#include <stdio.h>
#include <emscripten/emscripten.h>
int main(int argc, char ** argv) {

printf("Hello World\n");

}
ifdef __cplusplus
extern "C" {
endif
void EMSCRIPTEN_KEEPALIVE myFunction(int argc, char ** argv) {

printf("MyFunction Called\n");

}
ifdef __cplusplus
}
endif
此時編譯需要加上 NO_EXIT_RUNTIME 參數,否則默認情況下 C++ 模塊中 main 方法返回后程序就結束了。
執行以下命令編譯代碼:
$ emcc -o hello3.html hello3.c -O3 -s WASM=1 -s NO_EXIT_RUNTIME=1 -s "EXTRA_EXPORTED_RUNTIME_METHODS=['ccall']"
打開在發生的 hello.html,在第一個 <script> 標簽開始前加上一個按鈕:
<button class="mybutton">Run myFunction</button>
添加以下點擊調用邏輯到第一個 <script> 代碼塊的末尾:
document.querySelector(".mybutton").addEventListener("click", function() {
  alert("check console");
  var result = Module.ccall(
    "myFunction", // name of C function
    null, // return type
    null, // argument types
    null // arguments
  );
});
再次啟動服務器運行后,點擊頁面中按鈕在控制台觀察輸出。
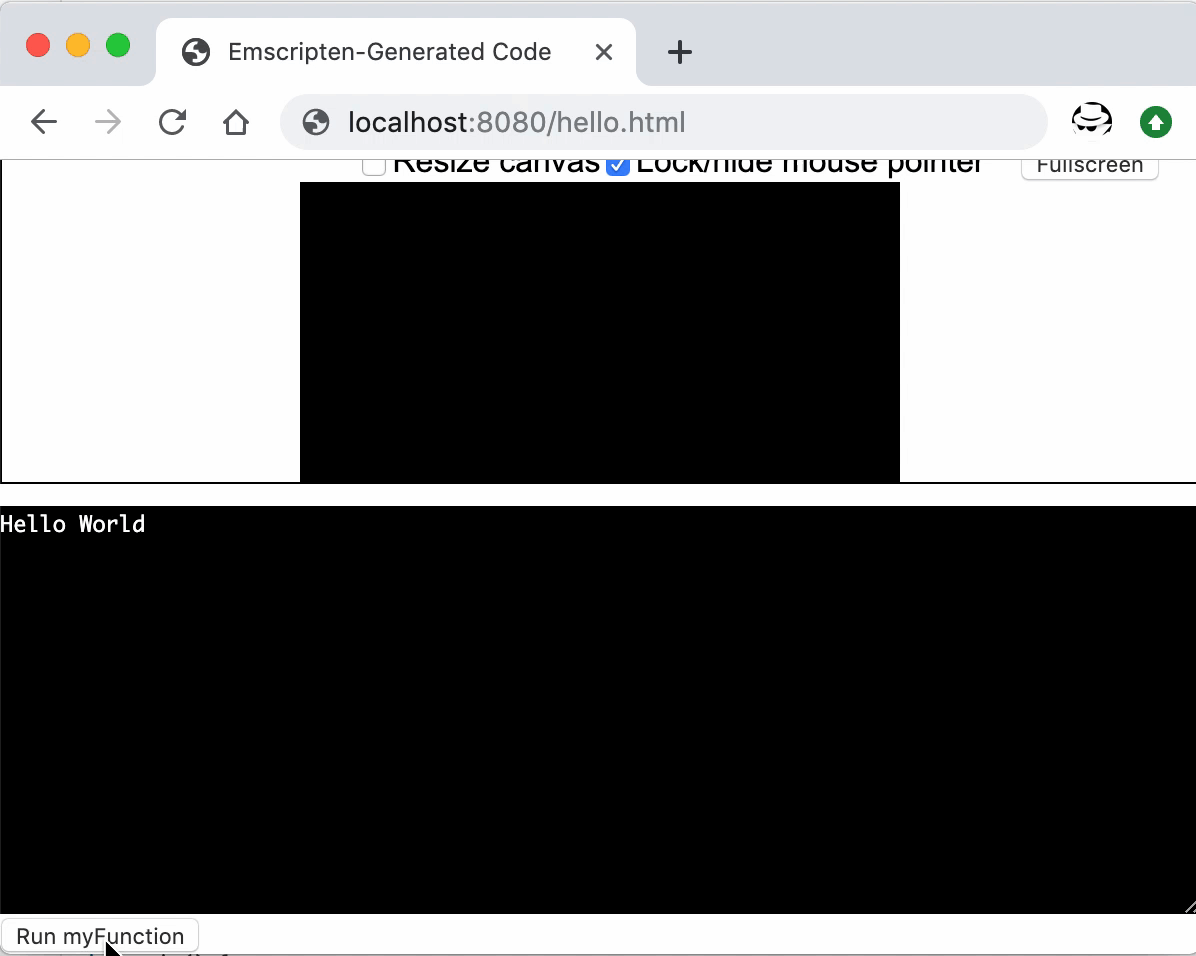
JavaScript 中調用 C++ 方法的示例