1、創建Demo項目
創建一個Gradle Module 2、修改build.gradle
build.gradle 需要添加以下依賴(PS:網上關於這塊的帖子實在太少了,調試過程中各種報錯,本人走了不少彎路才總結出來的,目前最新版的spring至少要以下5種依賴) ``` plugins { id 'java' }group 'org.springframework'
version '5.2.0.BUILD-SNAPSHOT'
sourceCompatibility = 1.8
repositories {
mavenCentral()
}
dependencies {
compile(project(":spring-beans"))
compile(project(":spring-core"))
compile(project(":spring-expression"))
compile(project(":spring-context"))
compile(project(":spring-instrument"))
testCompile group: 'junit', name: 'junit', version: '4.12'
}
創建一個service類
package com.springsource;
public class LoginService {
public String login(String username){
	System.out.println(username + "登錄...");
	return "success";
}
}
applicationContext.xml
<bean id="loginService" class="com.springsource.LoginService"/>
import org.springframework.context.ApplicationContext;
import org.springframework.context.support.ClassPathXmlApplicationContext;
public class Test {
public static void main(String[] args) {
ApplicationContext context = new ClassPathXmlApplicationContext("applicationContext.xml");
LoginService service = (LoginService)context.getBean("loginService");
service.login("admin");
}
}
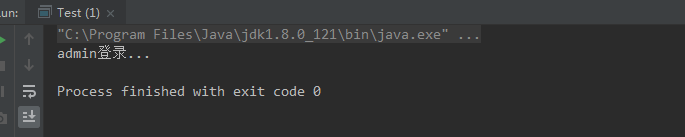
<h1>3、運行</h1>
運行測試類,成功!
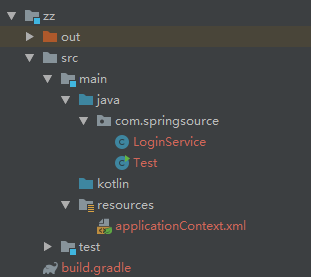
最終的項目結構如下: