前言
之前有講過TabLayout的一些知識,
TabLayout實現頂部導航(一)
TabLayout基本屬性全解
但是對於TabLayout實現的導航欄仍是有諸多限制,例如不能任意設置text的文字大小,若導航中涉及到圖片的話,圖片只能簡單的設計到文字上方,所以布局方面仍是很受限制,為了解決這種情況,這篇文章就介紹TabLayout自定義tab,讓你導航欄隨心所欲的布局。
此篇文章將介紹以下內容:
- TabLayout庫的導入
- TabLayout自定義導航的實現
- 需要注意的點
- 項目截圖和效果圖
一.TabLayout庫的導入
TabLayout屬於android的Design庫中的控件,所以需要在使用之前在項目的app對應的buildle.gradle中導入該庫
    //TabLayout
    implementation 'com.android.support:design:27.1.1'
    implementation 'com.android.support:support-v4:27.1.1'
二.TabLayout自定義導航的實現
2.1 mainActivity對應的xml布局
<?xml version="1.0" encoding="utf-8"?>
<android.support.constraint.ConstraintLayout xmlns:android="http://schemas.android.com/apk/res/android"
    xmlns:app="http://schemas.android.com/apk/res-auto"
    xmlns:tools="http://schemas.android.com/tools"
    android:layout_width="match_parent"
    android:layout_height="match_parent"
    tools:context="com.android.testdemo.main.MainActivity">

    <android.support.design.widget.TabLayout
        android:id="@+id/tablayout"
        android:layout_width="0dp"
        android:layout_height="@dimen/dp_80"
        app:tabMode="scrollable"
        app:layout_constraintEnd_toEndOf="parent"
        app:layout_constraintStart_toStartOf="parent">
    </android.support.design.widget.TabLayout>

    <android.support.v4.view.ViewPager
        android:id="@+id/viewPager"
        android:layout_width="0dp"
        android:layout_height="0dp"
        android:layout_marginTop="5dp"
        app:layout_constraintBottom_toBottomOf="parent"
        app:layout_constraintEnd_toEndOf="parent"
        app:layout_constraintStart_toStartOf="parent"
        app:layout_constraintTop_toBottomOf="@+id/tablayout" />
</android.support.constraint.ConstraintLayout>
2.2 需要加載的Fragment的代碼
TabLayout和ViewPager實現的導航欄,肯定涉及到Fragment了,下面給出MyFragment.java代碼:
public class MyFragment extends AppFragment {

    @BindView(R.id.tv_name)
    TextView mTvName;

    private String mName;

    @Override
    public void onCreate(@Nullable Bundle bundle) {
        super.onCreate(bundle);
        if(getArguments()!=null){
            mName = getArguments().getString("text");
        }
    }

    @Override
    public int getContentViewId() {
        return R.layout.fragment_my;
    }

    @Override
    public void initData() {
        mTvName.setText(mName);
    }

    @Override
    public void setListener() {

    }

    @Override
    protected void onVisible(boolean isFirstTimeLoad) {

    }

    @Override
    protected void onInvisible() {

    }
}
2.3 MyFragment對應的fragment_my.xml代碼
<?xml version="1.0" encoding="utf-8"?>
<android.support.constraint.ConstraintLayout xmlns:android="http://schemas.android.com/apk/res/android"
    xmlns:app="http://schemas.android.com/apk/res-auto"
    xmlns:tools="http://schemas.android.com/tools"
    android:layout_width="match_parent"
    android:layout_height="match_parent"
    tools:context="com.android.testdemo.main.MainActivity">

    <TextView
        android:id="@+id/tv_name"
        android:layout_width="wrap_content"
        android:layout_height="wrap_content"
        android:layout_marginTop="50dp"
        app:layout_constraintEnd_toEndOf="parent"
        app:layout_constraintStart_toStartOf="parent"
        app:layout_constraintTop_toTopOf="parent" />
</android.support.constraint.ConstraintLayout>
2.4 ViewPager對應的TabFragmentAdapter中需要注意的點
TabLayout和ViewPager結合做的導航欄,肯定少不了adapter的使用,TabFragmentAdapter代碼很簡單,在demo中也有詳盡的介紹,這里就主要講需要注意的地方。
TabFragmentAdapter 相對之前寫過的adapter多了一個自定義tab布局的方法
getTabView(int position)
這個方法中涉及到一個涉及到布局的 item_header.xml文件,你可以在這個xml中自定義你想要的tab布局,下面給出item_header.xml代碼:
<?xml version="1.0" encoding="utf-8"?>
<LinearLayout xmlns:android="http://schemas.android.com/apk/res/android"
    xmlns:app="http://schemas.android.com/apk/res-auto"
    xmlns:tools="http://schemas.android.com/tools"
    android:layout_width="match_parent"
    android:layout_height="match_parent"
    android:gravity="center"
    android:orientation="horizontal"
    tools:context="com.android.testdemo.main.MainActivity">

    <ImageView
        android:id="@+id/imageView"
        android:layout_width="wrap_content"
        android:layout_height="wrap_content"
        android:scaleType="fitCenter"
        android:src="@mipmap/ic_launcher"/>

    <TextView
        android:id="@+id/tv_header"
        android:layout_width="wrap_content"
        android:layout_height="wrap_content"
        android:layout_marginLeft="@dimen/dp_5"
        android:textColor="@color/blue"
        android:textSize="@dimen/sp_12"
        android:gravity="center"/>
</LinearLayout>
2.5 MainActivity中的主要代碼
聲明:
    @BindView(R.id.tablayout)
    TabLayout mTabLayout;
    @BindView(R.id.viewPager)
    ViewPager mViewPager;

    private String mTitles[] = {
            "上海", "頭條推薦", "生活", "娛樂八卦", "體育",
            "段子", "美食", "電影", "科技", "搞笑",
            "社會", "財經", "時尚", "汽車", "軍事",
            "小說", "育兒", "職場", "萌寵", "游戲",
            "健康", "動漫", "互聯網"};

    private List<Fragment> mFragments;
    private TabFragmentAdapter mTabFragmentAdapter;
在oncreate中初始化要做的事
        mFragments = new ArrayList<>();

        for (int i = 0; i < mTitles.length; i++) {
            Fragment fragment = new MyFragment();
            Bundle bundle = new Bundle();
            bundle.putString("text", mTitles[i]);
            fragment.setArguments(bundle);
            mFragments.add(fragment);
        }

        mTabFragmentAdapter = new TabFragmentAdapter(mFragments, mTitles, getSupportFragmentManager(), mContext);
//        mViewPager.setOffscreenPageLimit(mFragments.size());// 設置預加載Fragment個數
        mViewPager.setOffscreenPageLimit(6);// 設置預加載Fragment個數
        mViewPager.setAdapter(mTabFragmentAdapter);
        mViewPager.setCurrentItem(0);// 設置當前顯示標簽頁為第一頁

        // 將ViewPager和TabLayout綁定
        mTabLayout.setupWithViewPager(mViewPager);
        //設置自定義tab
        setTab();
        //設置第一頁為選中狀態時的tab文字顏色為紅色
        setCurrentTab(0);
三.需要注意的點
- 在MainActivity中,
mTabLayout.setupWithViewPager(mViewPager);
必須在
setTab();
之前執行,不然自定義布局不起效果。
2. mainActivity對應的xml中TabLayout控件的高度必須用一個固定值,不能用wrap_content,不然會不起效果
3. ```
mViewPager.setCurrentItem(0);// 設置當前顯示標簽頁為第一頁
設置的初始項要和
    //設置第一頁為選中狀態時的tab文字顏色為紅色
    setCurrentTab(0);
設置的初始項保持一致
4. 在 mTabLayout.addOnTabSelectedListener方法中要記得設置導航文字的選中和未選中文字顏色,當然在item_header.xml中要給text設置一個初始textcolor。
####四.項目截圖和效果圖
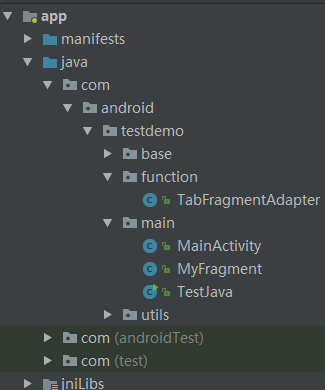
項目結構圖
效果圖
TabLayout自定義tab,實現多樣導航欄
> 代碼地址如下:<br>http://www.demodashi.com/demo/14660.html
> 注:本文著作權歸作者,由demo大師代發,拒絕轉載,轉載需要作者授權