iTerm2 + Oh My Zsh 打造舒適終端體驗
寫在前面
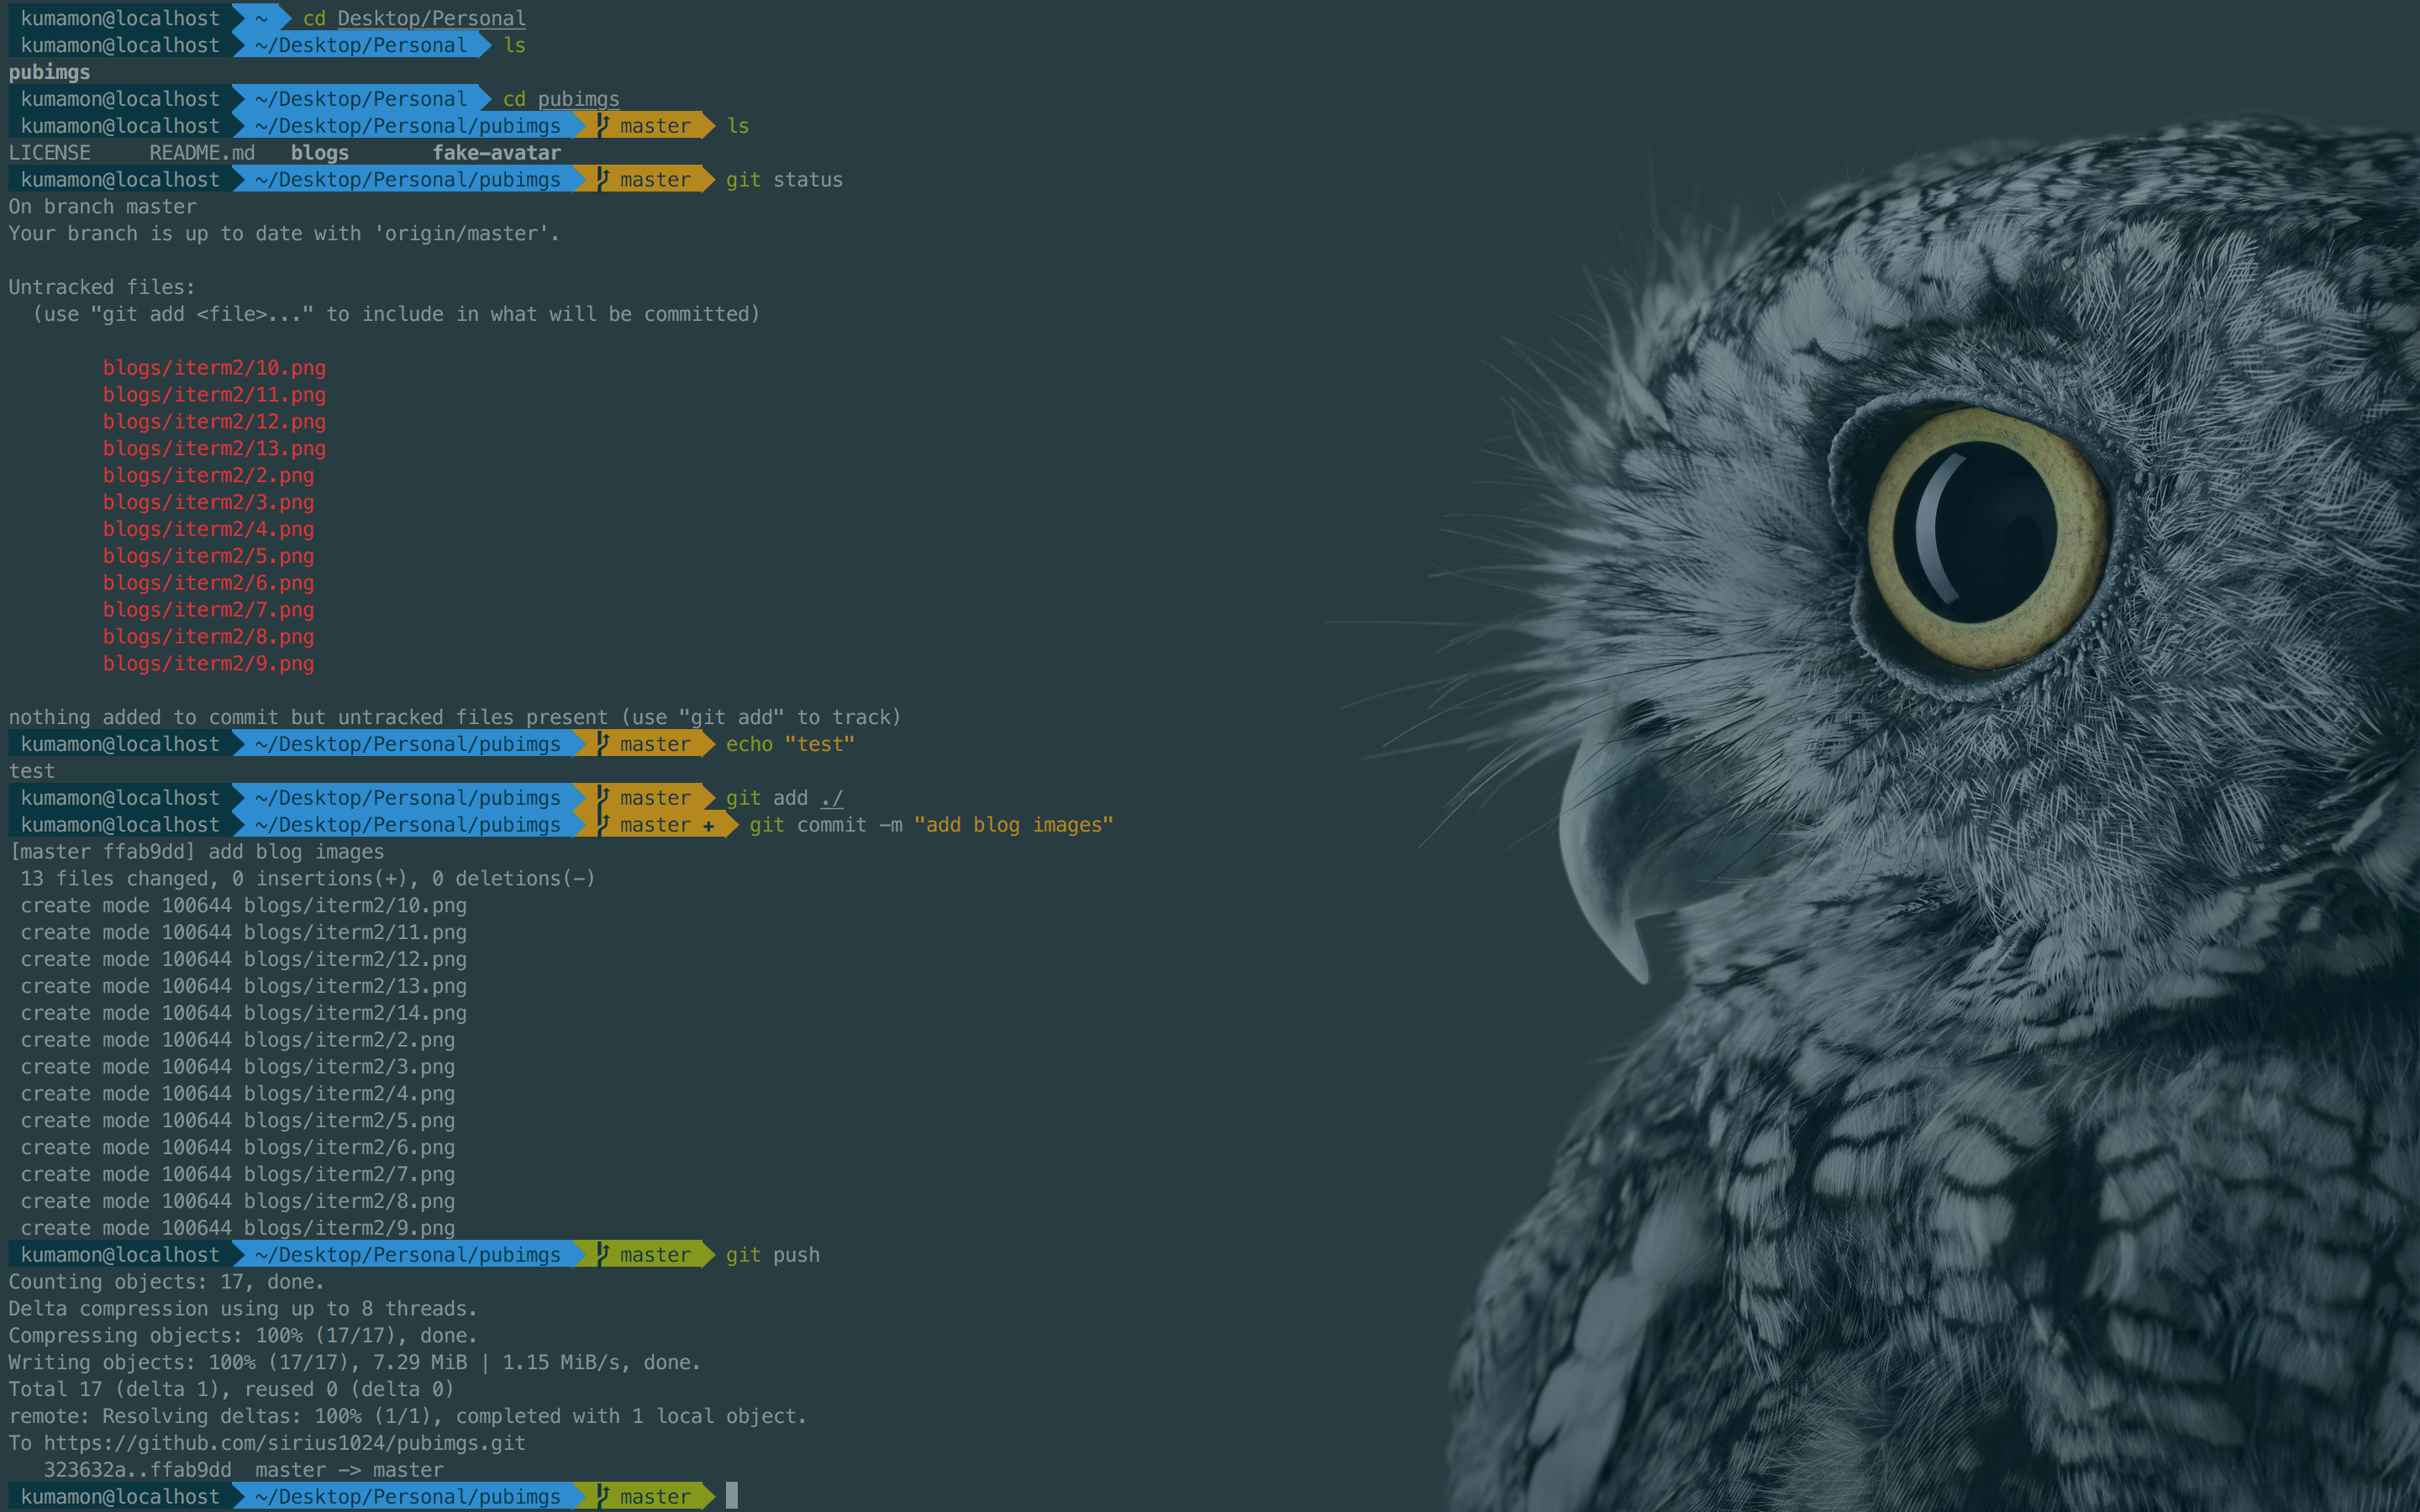
最終效果圖:
因為powerline以及homebrew均需要安裝command line tool,網絡條件優越的同學在執行本文下面內容之前,可以先安裝XCode並打開運行一次(會初始化安裝components),省去以后在iterm2中的等待時間。
另外,git也是必要的,各位可以自行下載安裝,除了網絡沒有任何坑:
介於此,本文默認各位同學已經安裝了git環境和xcode(command line tools),遇到提示找不到git命令或需要安裝command line tool的地方,文中不再贅述了。
下載iTerm2
可以直接去官網下載:https://www.iterm2.com/
安裝完成后,在/bin目錄下會多出一個zsh的文件。
Mac系統默認使用dash作為終端,可以使用命令修改默認使用zsh:
chsh -s /bin/zsh
如果想修改回默認dash,同樣使用chsh命令即可:
chsh -s /bin/bash
OK,這就是iTerm2初始的樣子,下面我們來美化它,讓它變得更好用!
安裝Oh my zsh
安裝方法有兩種,可以使用curl或wget,看自己環境或喜好:
# curl 安裝方式
/bin/zsh -c "$(curl -fsSL https://raw.githubusercontent.com/robbyrussell/oh-my-zsh/master/tools/install.sh)"
# wget 安裝方式
/bin/zsh -c "$(wget https://raw.githubusercontent.com/robbyrussell/oh-my-zsh/master/tools/install.sh -O -)"
安裝命令和安裝完成后的截圖:
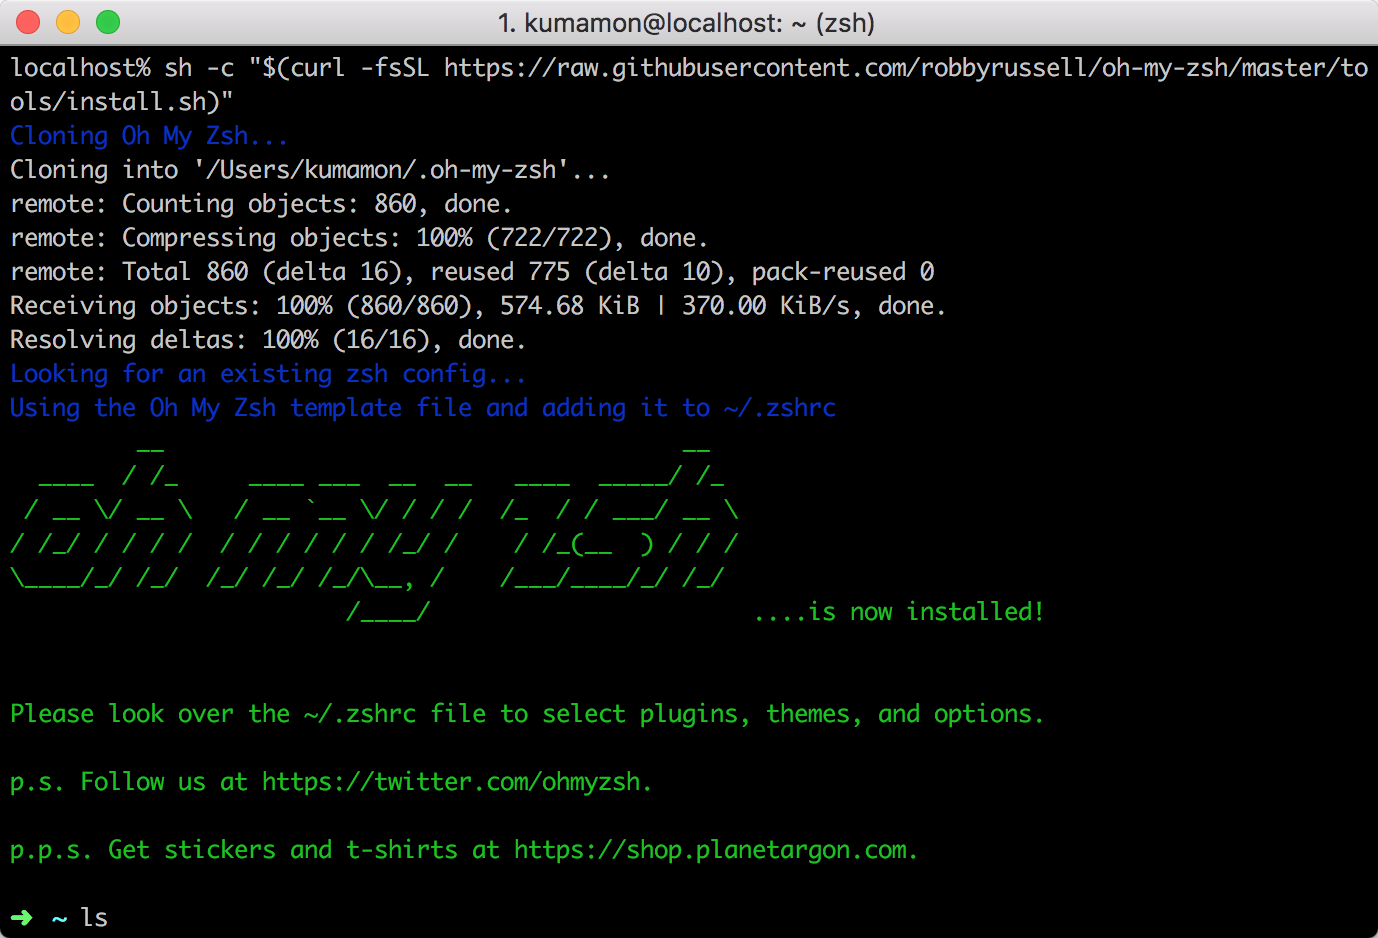
oh-my-zsh開源地址:https://github.com/robbyrussell/oh-my-zsh
安裝PowerLine
powerline官網:http://powerline.readthedocs.io/en/latest/installation.html
安裝powerline的方式依然簡單,也只需要一條命令:
pip install powerline-status --user
沒有安裝pip的同學可能會碰到zsh: command not found: pip。

使用命令安裝pip即可:
sudo easy_install pip
安裝后再次執行安裝powerline的命令即可。

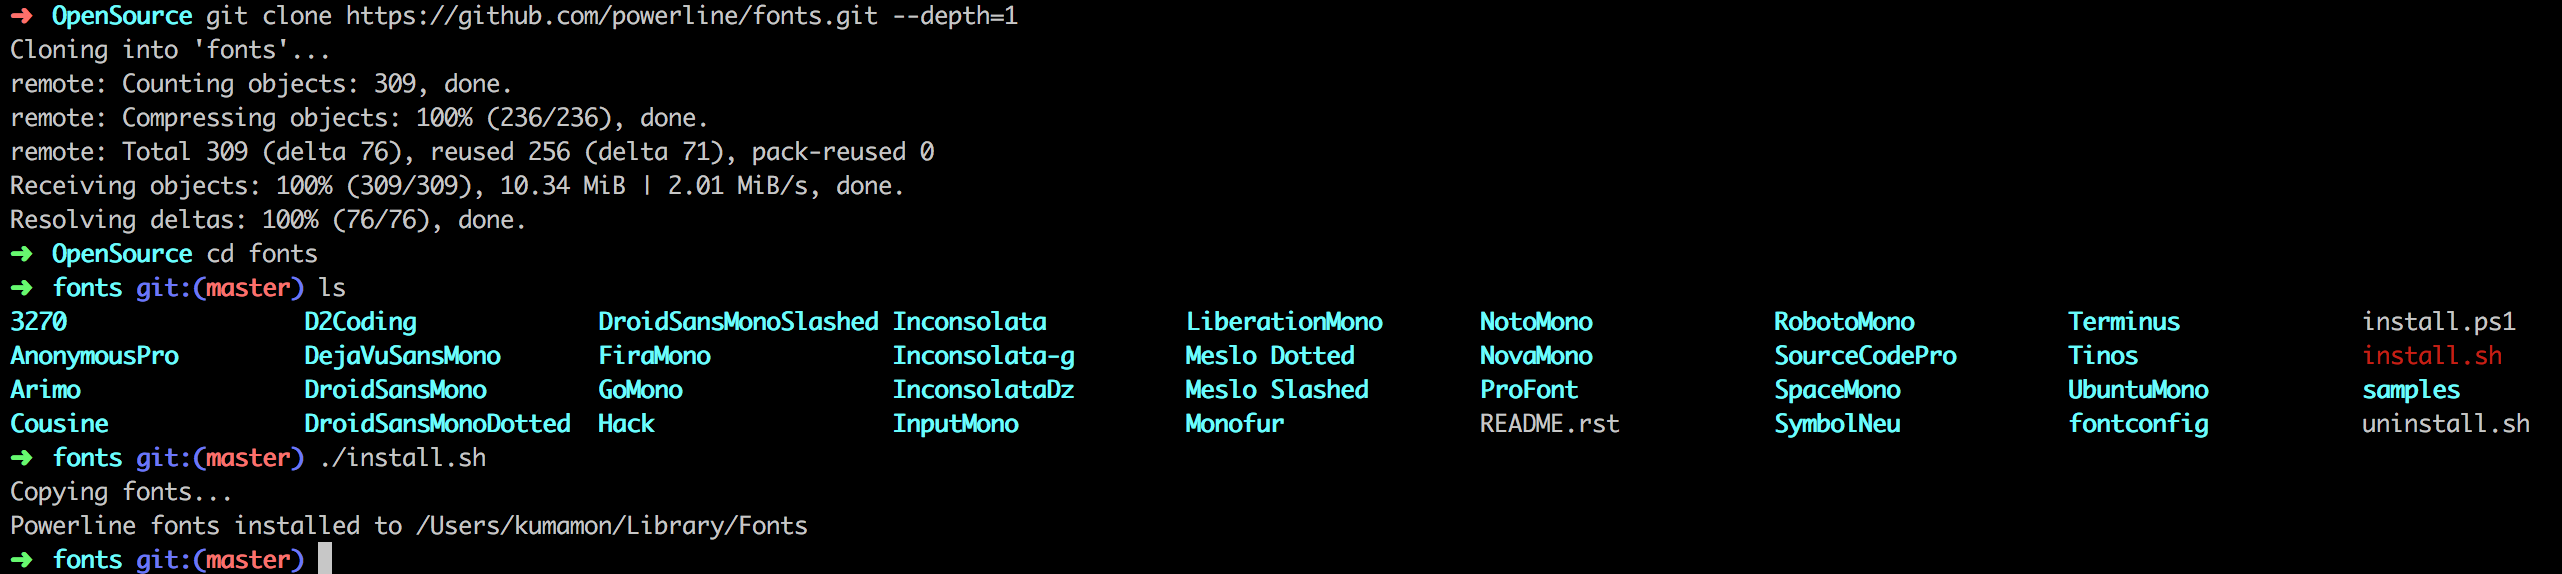
安裝PowerFonts
安裝字體庫需要首先將項目git clone至本地,然后執行源碼中的install.sh。
在你習慣的位置新建一個文件夾,如:~/Desktop/OpenSource/
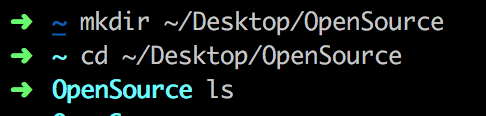
在此文件夾下執行git clone命令:
# git clone
git clone https://github.com/powerline/fonts.git --depth=1
# cd to folder
cd fonts
# run install shell
./install.sh
執行結果如下:
安裝好字體庫之后,我們來設置iTerm2的字體,具體的操作是iTerm2 -> Preferences -> Profiles -> Text,在Font區域選中Change Font,然后找到Meslo LG字體。有L、M、S可選,看個人喜好:

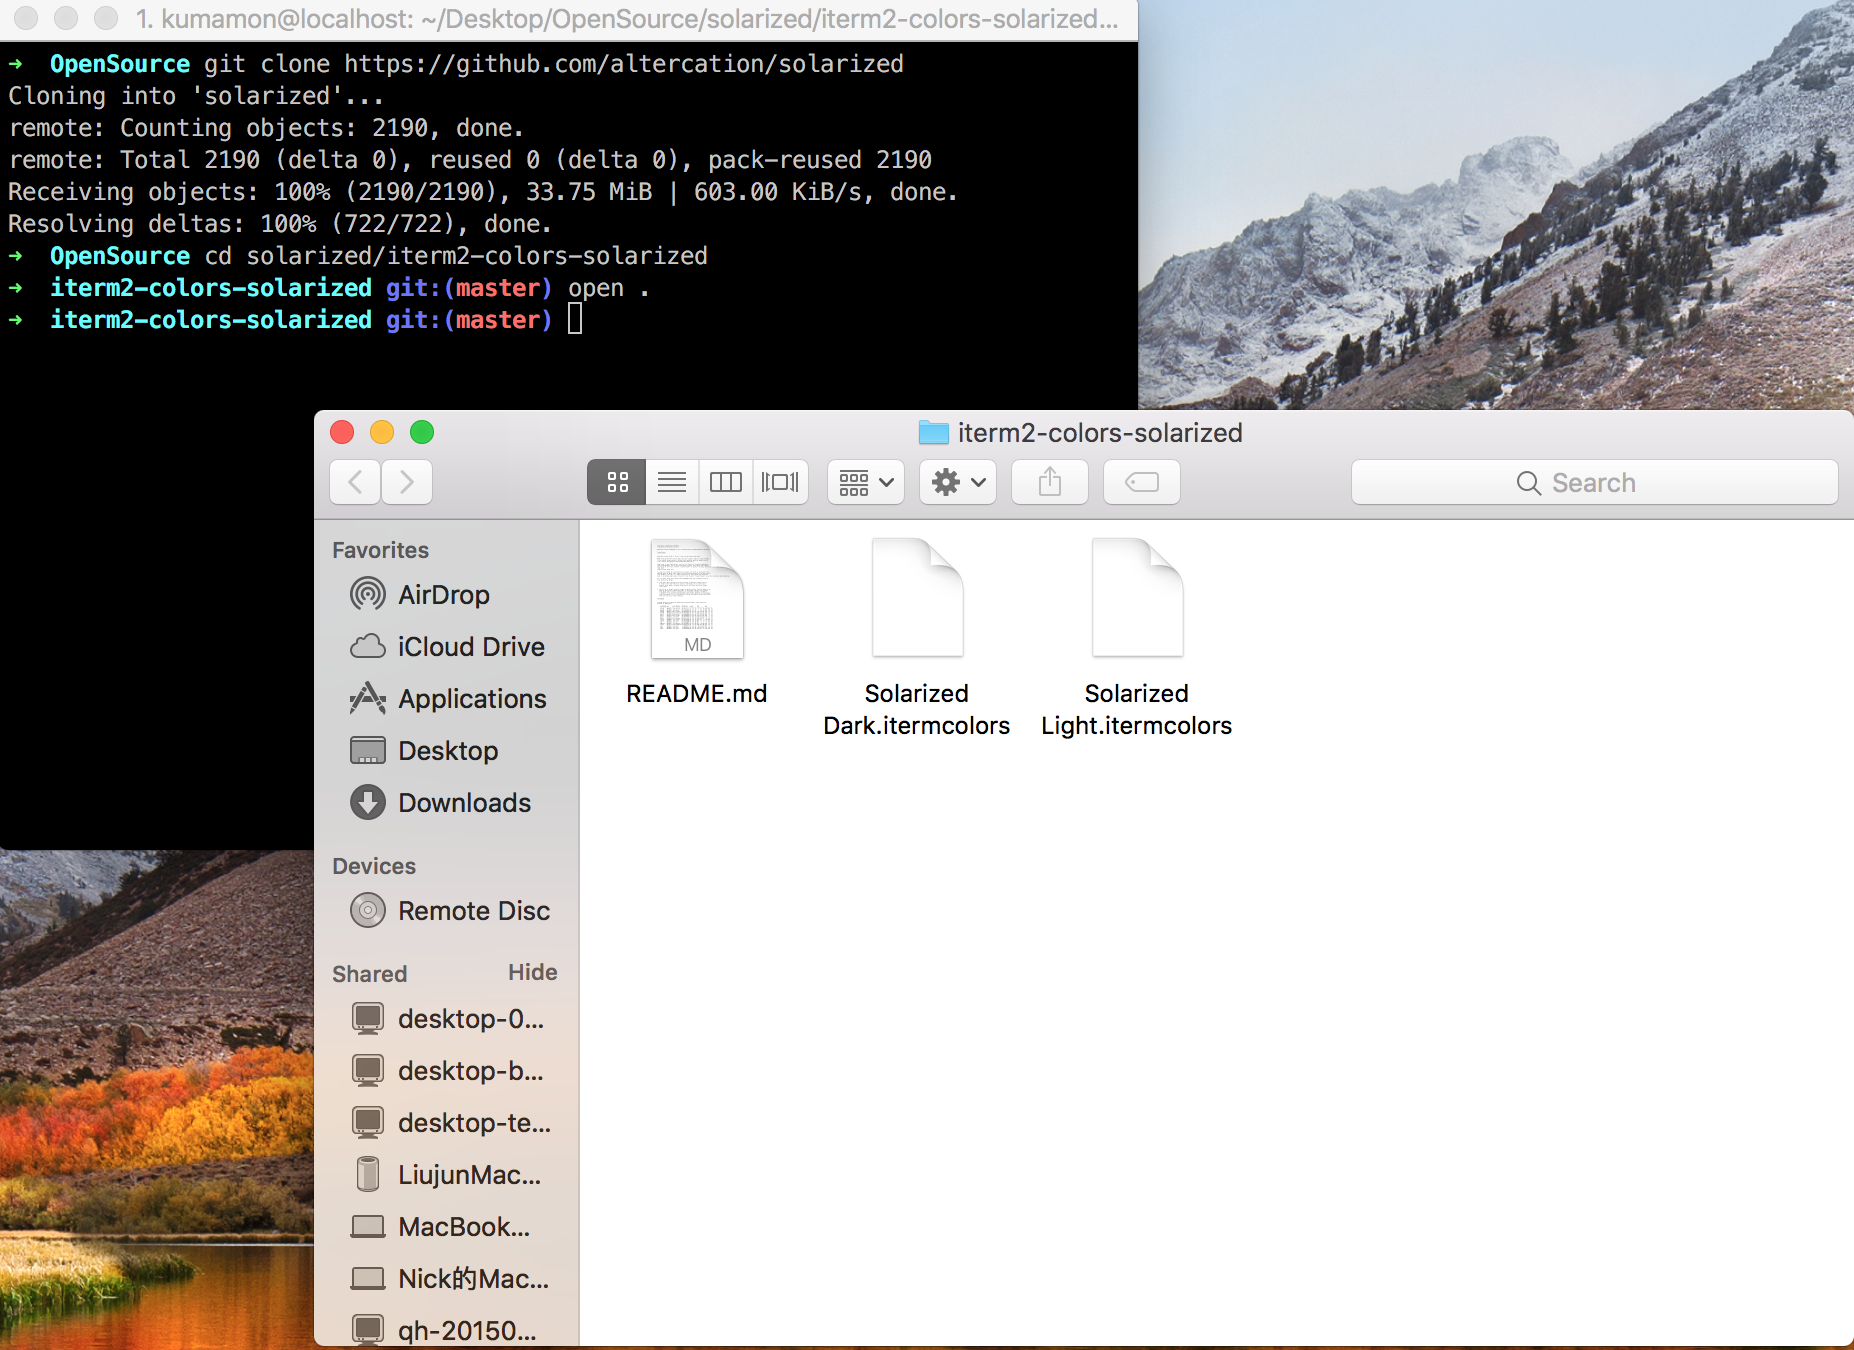
安裝配色方案
配色方案在使用VIM或Colorful Log時會變得非常有用,同時界面也不會一片黑綠一樣死板。
同樣使用git clone的方式下載源碼進行安裝:
cd ~/Desktop/OpenSource
git clone https://github.com/altercation/solarized
cd solarized/iterm2-colors-solarized/
open .
在打開的finder窗口中,雙擊Solarized Dark.itermcolors和Solarized Light.itermcolors即可安裝明暗兩種配色:
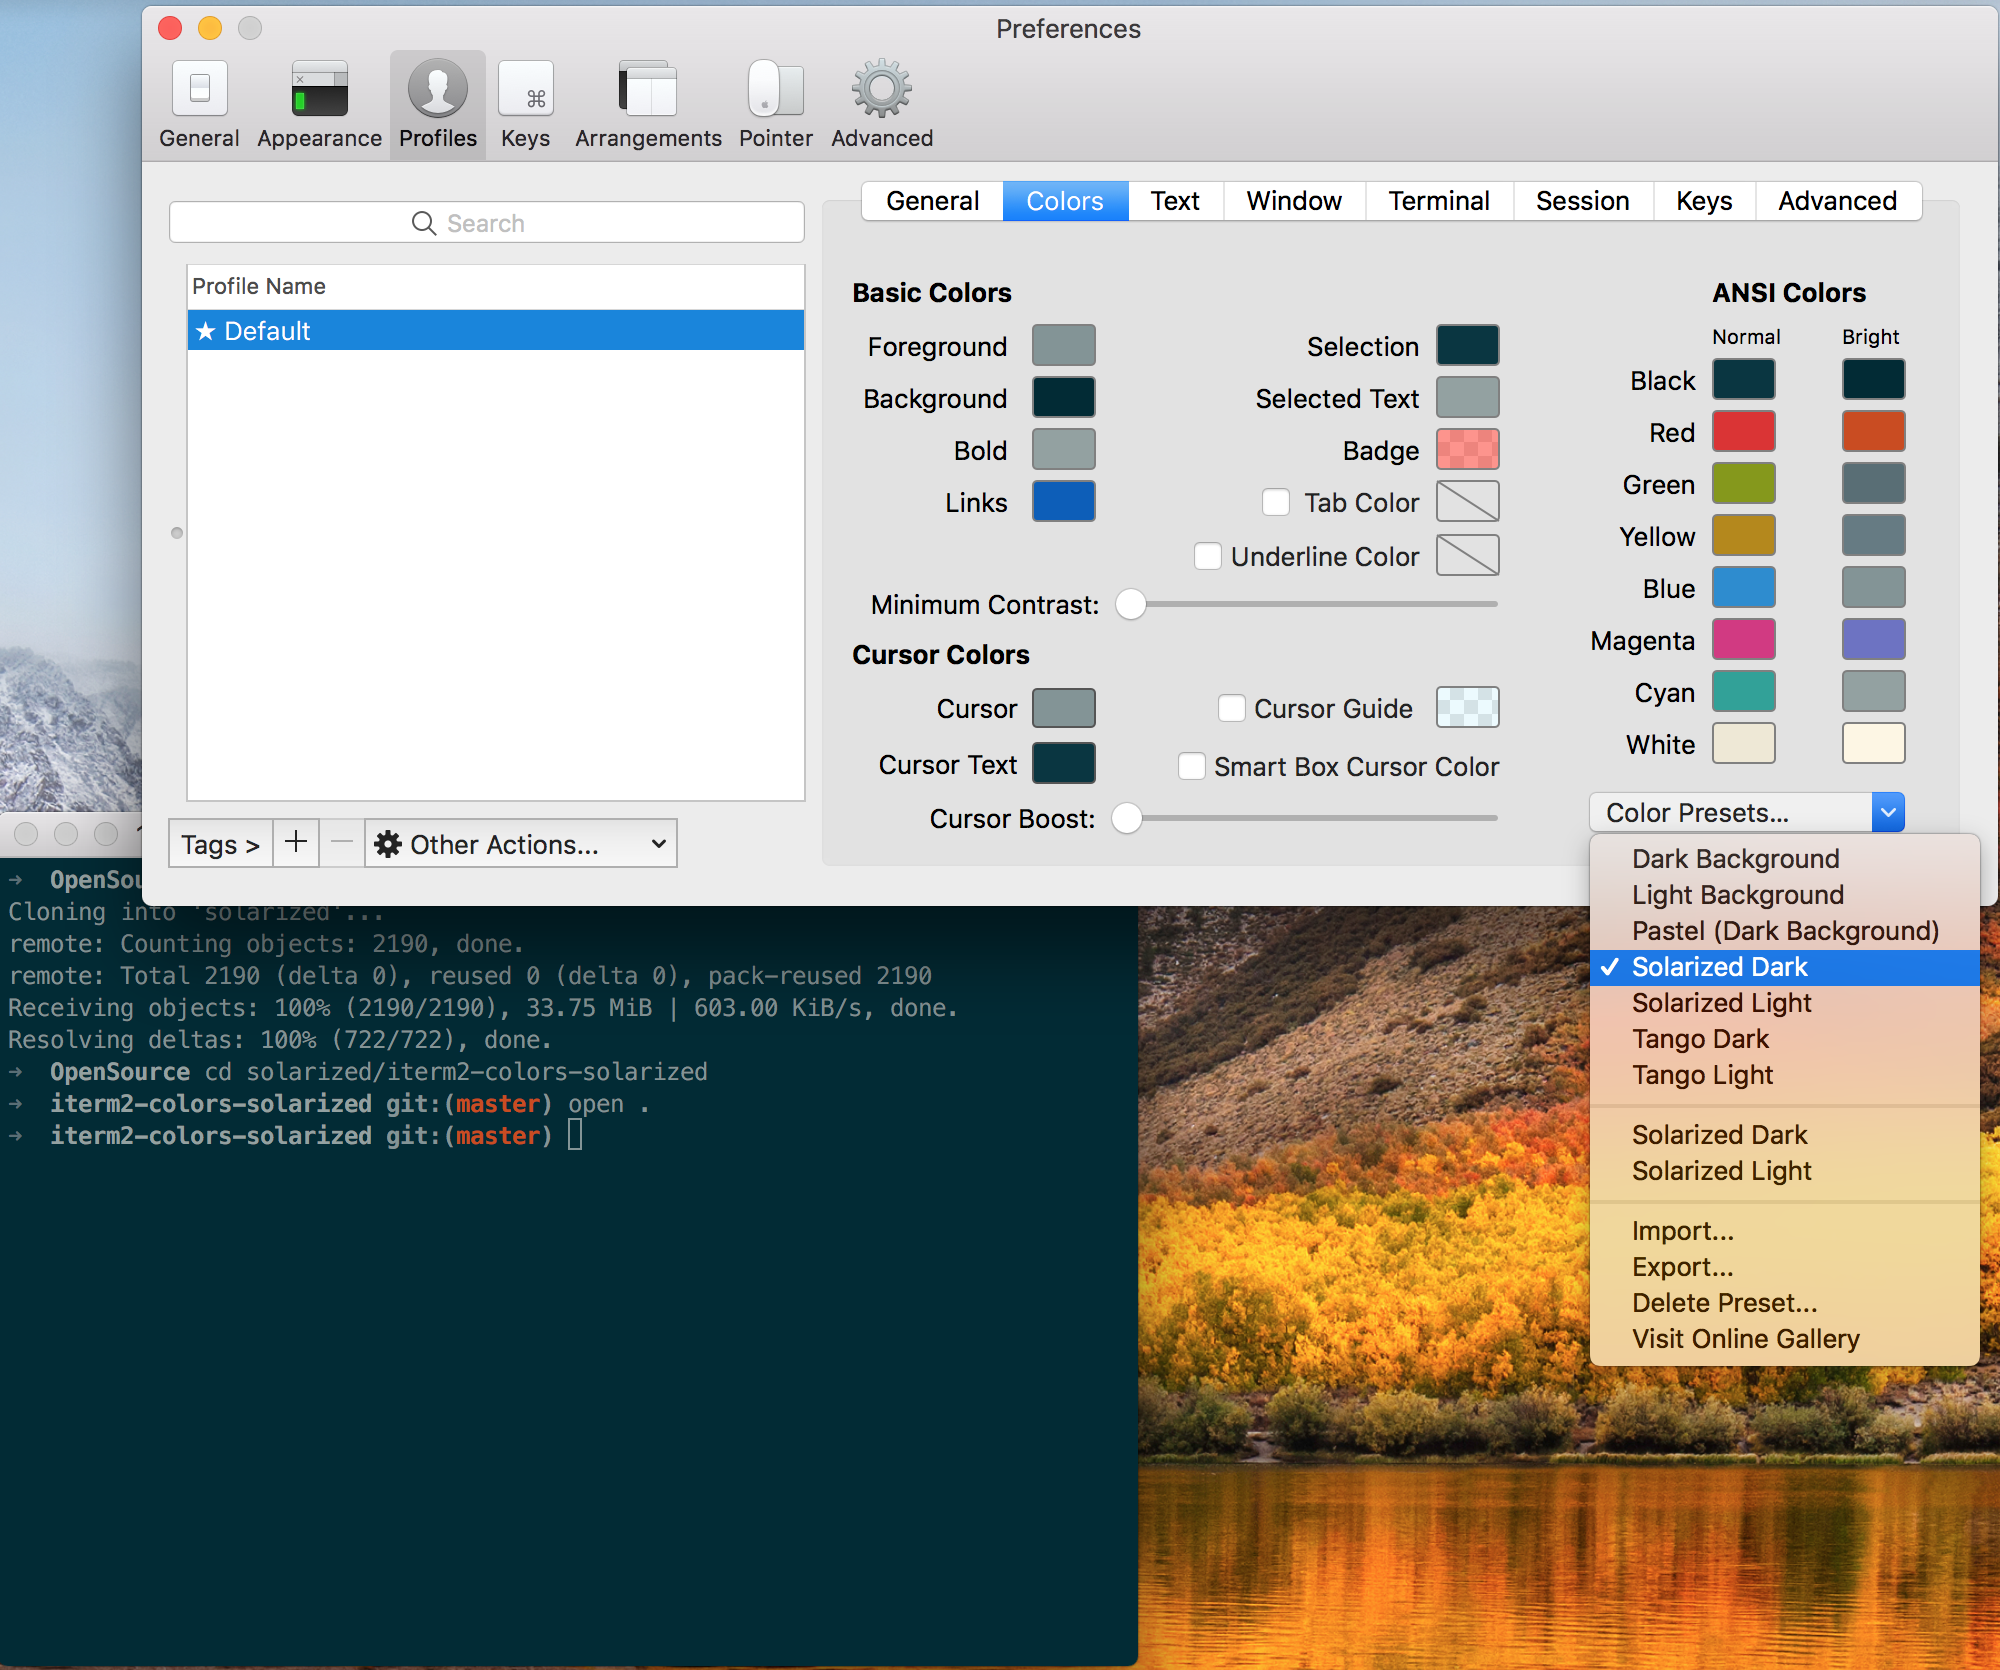
再次進入iTerm2 -> Preferences -> Profiles -> Colors -> Color Presets中根據個人喜好選擇這兩種配色中的一種即可:
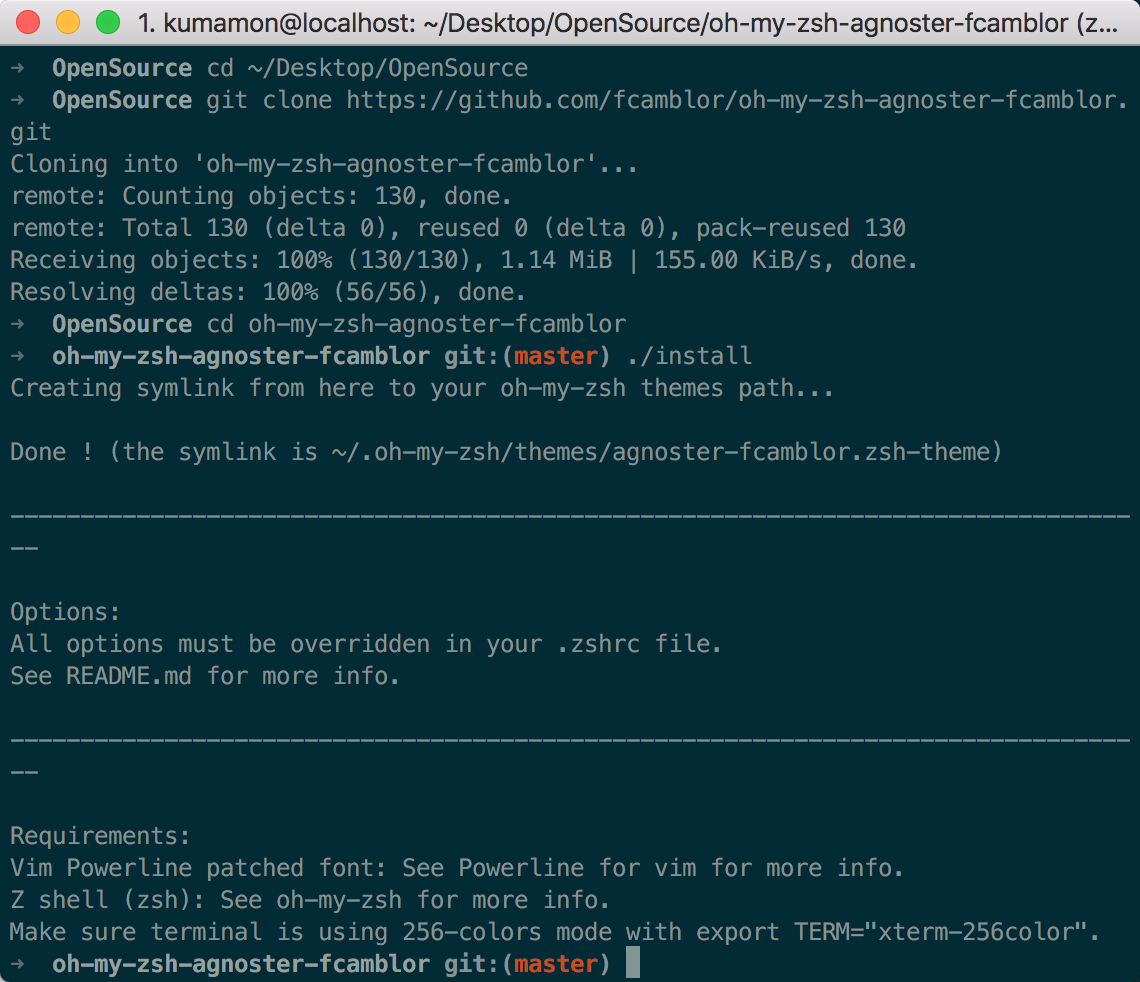
安裝主題
下載agnoster主題,執行腳本安裝:
cd ~/Desktop/OpenSource
git clone https://github.com/fcamblor/oh-my-zsh-agnoster-fcamblor.git
cd oh-my-zsh-agnoster-fcamblor/
./install
執行上面的命令會將主題拷貝到oh my zsh的themes中:
拷貝完成后,執行命令打開zshrc配置文件,將ZSH_THEME后面的字段改為agnoster。
vi ~/.zshrc
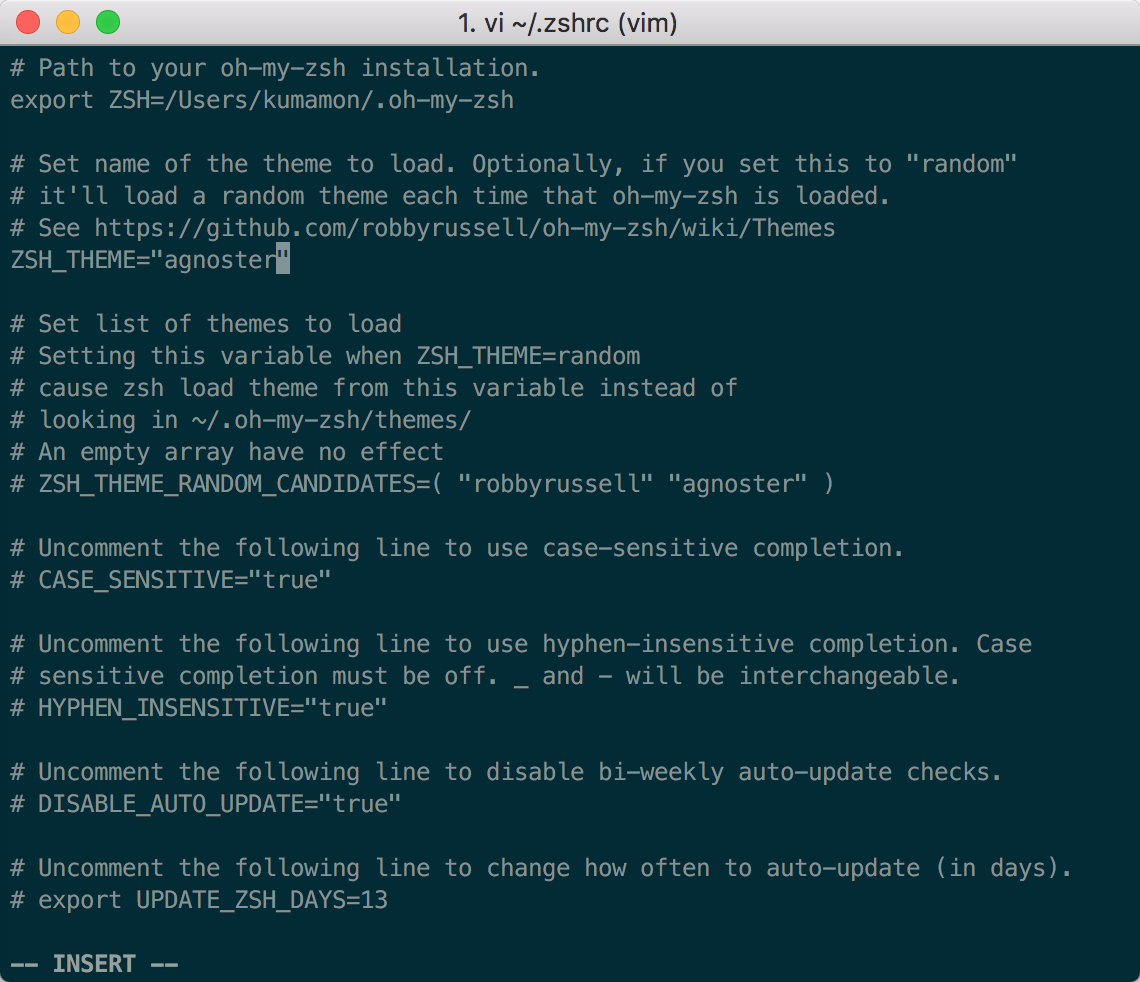
修改完成后按一下esc調出vi命令,輸入:wq保存並退出vi模式。
此時command+Q或source配置文件后,iTerm2變了模樣:
安裝高亮插件
這是oh my zsh的一個插件,安裝方式與theme大同小異:
cd ~/.oh-my-zsh/custom/plugins/
git clone https://github.com/zsh-users/zsh-syntax-highlighting.git
vi ~/.zshrc
這時我們再次打開zshrc文件進行編輯。找到plugins,此時plugins中應該已經有了git,我們需要把高亮插件也加上:
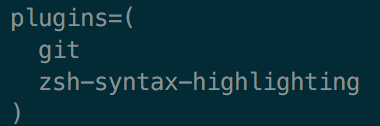
請務必保證插件順序,zsh-syntax-highlighting必須在最后一個。
然后在文件的最后一行添加:source ~/.oh-my-zsh/custom/plugins/zsh-syntax-highlighting/zsh-syntax-highlighting.zsh
按一下esc調出vi命令,輸入:wq保存並退出vi模式。
執行命令使剛才的修改生效:
source ~/.zshrc
至此大功告成,請看最終效果圖:
背景圖片取自微軟Surface Studio的4K壁紙(將近12MB大小),非常漂亮,需要的可以自取:
https://pan.baidu.com/s/18jNrULbr05npD0Z_ht28Kg
更換背景圖片方式:iTerm2 -> Preferences -> Profiles -> Window -> BackGround Image勾選圖片即可。
可選擇、命令補全
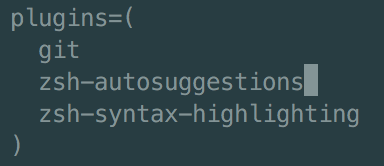
跟代碼高亮的安裝方式一樣,這也是一個zsh的插件,叫做zsh-autosuggestion,用於命令建議和補全。
cd ~/.oh-my-zsh/custom/plugins/
git clone https://github.com/zsh-users/zsh-autosuggestions
vi ~/.zshrc
找到plugins,加上這個插件即可:
插件效果:
