2.1、@EnableOAuth2Sso
這個注解是為了開啟OAuth2.0的sso功能,如果我們配置了WebSecurityConfigurerAdapter,它通過添加身份驗證過濾器和身份驗證(entryPoint)來增強對應的配置。如果沒有的話,我們所有的請求都會被保護,也就是說我們的所有請求都必須經過授權認證才可以,該注解的源代碼如下:
    @Target(ElementType.TYPE)
    @Retention(RetentionPolicy.RUNTIME)
    @Documented
    @EnableOAuth2Client
    @EnableConfigurationProperties(OAuth2SsoProperties.class)
    @Import({ OAuth2SsoDefaultConfiguration.class, OAuth2SsoCustomConfiguration.class,
    		ResourceServerTokenServicesConfiguration.class })
    public @interface EnableOAuth2Sso {

    }
我們可以看到,這個注解包含了@EnableOAuth2Client的注解,因此它也是OAuth2.0的客戶端。同時分別導入了OAuth2SsoDefaultConfiguration,OAuth2SsoCustomConfiguration ,ResourceServerTokenServicesConfiguration
- OAuth2SsoDefaultConfiguration 這個類配置了權限認證的相關信息,它默認會攔截所有的請求,我們可以看一下相關代碼:
    package org.springframework.boot.autoconfigure.security.oauth2.client;

    /**
     * Configuration for OAuth2 Single Sign On (SSO). If the user only has
     * {@code @EnableOAuth2Sso} but not on a {@code WebSecurityConfigurerAdapter} then one is
     * added with all paths secured.
     *
     * @author Dave Syer
     * @since 1.3.0
     */
    @Configuration
    @Conditional(NeedsWebSecurityCondition.class)
    public class OAuth2SsoDefaultConfiguration extends WebSecurityConfigurerAdapter {

    	private final ApplicationContext applicationContext;

    	public OAuth2SsoDefaultConfiguration(ApplicationContext applicationContext) {
    		this.applicationContext = applicationContext;
    	}

    	@Override
    	protected void configure(HttpSecurity http) throws Exception {
            //攔截所有請求路徑
    		http.antMatcher("/**").authorizeRequests().anyRequest().authenticated();
    		new SsoSecurityConfigurer(this.applicationContext).configure(http);
    	}

    	protected static class NeedsWebSecurityCondition extends EnableOAuth2SsoCondition {

    		@Override
    		public ConditionOutcome getMatchOutcome(ConditionContext context,
    				AnnotatedTypeMetadata metadata) {
    			return ConditionOutcome.inverse(super.getMatchOutcome(context, metadata));
    		}

    	}

    }
- OAuth2SsoCustomConfiguration這個類主要是利用代理對已配置的WebSecurityConfigurerAdapter進行增強處理。
    /**
     * Configuration for OAuth2 Single Sign On (SSO) when there is an existing
     * {@link WebSecurityConfigurerAdapter} provided by the user and annotated with
     * {@code @EnableOAuth2Sso}. The user-provided configuration is enhanced by adding an
     * authentication filter and an authentication entry point.
     *
     * @author Dave Syer
     */
    @Configuration
    @Conditional(EnableOAuth2SsoCondition.class)
    public class OAuth2SsoCustomConfiguration
    		implements ImportAware, BeanPostProcessor, ApplicationContextAware {

    	private Class<?> configType;

    	private ApplicationContext applicationContext;

    	@Override
    	public void setApplicationContext(ApplicationContext applicationContext) {
    		this.applicationContext = applicationContext;
    	}

    	@Override
    	public void setImportMetadata(AnnotationMetadata importMetadata) {
    		this.configType = ClassUtils.resolveClassName(importMetadata.getClassName(),
    				null);

    	}

    	@Override
    	public Object postProcessBeforeInitialization(Object bean, String beanName)
    			throws BeansException {
    		return bean;
    	}

    	@Override
    	public Object postProcessAfterInitialization(Object bean, String beanName)
    			throws BeansException {
    		if (this.configType.isAssignableFrom(bean.getClass())
    				&& bean instanceof WebSecurityConfigurerAdapter) {
    			ProxyFactory factory = new ProxyFactory();
    			factory.setTarget(bean);
    			factory.addAdvice(new SsoSecurityAdapter(this.applicationContext));
    			bean = factory.getProxy();
    		}
    		return bean;
    	}

    	private static class SsoSecurityAdapter implements MethodInterceptor {

    		private SsoSecurityConfigurer configurer;

    		SsoSecurityAdapter(ApplicationContext applicationContext) {
    			this.configurer = new SsoSecurityConfigurer(applicationContext);
    		}

    		@Override
    		public Object invoke(MethodInvocation invocation) throws Throwable {
    			if (invocation.getMethod().getName().equals("init")) {
    				Method method = ReflectionUtils
    						.findMethod(WebSecurityConfigurerAdapter.class, "getHttp");
    				ReflectionUtils.makeAccessible(method);
    				HttpSecurity http = (HttpSecurity) ReflectionUtils.invokeMethod(method,
    						invocation.getThis());
    				this.configurer.configure(http);
    			}
    			return invocation.proceed();
    		}

    	}

    }
- ResourceServerTokenServicesConfiguration這個主要配置了請求資源服務器的核心配置,比如說在創建比較重要的UserInfoRestTemplateFactory(該類通過OAuth2RestTemplate請求配置資源),UserInfoTokenServices(根據token來請求用戶信息的類)等
2.2、application.yml
在屬性文件中有幾個關鍵點,我需要在這里說明一下,配置文件例子:
    server:
      port: 8081
      servlet:
        session:
          cookie:
            name: OAUTH2SESSION
    spring:
      application:
        name: sport-service
    security:
      oauth2:
        client:
          clientId: root
          clientSecret: root
          accessTokenUri: http://localhost:8080/oauth/token
          userAuthorizationUri: http://localhost:8080/oauth/authorize
          pre-established-redirect-uri: http://localhost:8081/prom
        resource:
          userInfoUri: http://localhost:8080/user
          preferTokenInfo: false
        sso:
          login-path: /login
- 如果我們既在本地部署服務端又部署客戶端,那么
server.servlet.session.cookie.name必須配置,否則會報org.springframework.security.oauth2.common.exceptions.InvalidRequestException, Possible CSRF detected - state parameter was required but no state could be found的錯誤,具體可以參考:地址 - 幾個必須配置項accessTokenUri(獲取koken的地址),userAuthorizationUri(授權的驗證地址),userInfoUri(其中userInfoUri是)配置獲取認證用戶的地址,該地址返回的數據必須為json格式。注意userInfoUri這里可以參考類
OAuth2ClientAuthenticationProcessingFilter,這個類為資源服務器獲取user信息的認證過濾器,源代碼如下:
@Override
	public Authentication attemptAuthentication(HttpServletRequest request, HttpServletResponse response)
			throws AuthenticationException, IOException, ServletException {

		OAuth2AccessToken accessToken;
		try {
                        //拿到token 如果當前環境沒有存token則去accessTokenUri地址獲取
			accessToken = restTemplate.getAccessToken();
		} catch (OAuth2Exception e) {
			BadCredentialsException bad = new BadCredentialsException("Could not obtain access token", e);
			publish(new OAuth2AuthenticationFailureEvent(bad));
			throw bad;
		}
		try {
                         //根據token加載用戶資源
			OAuth2Authentication result = tokenServices.loadAuthentication(accessToken.getValue());
			if (authenticationDetailsSource!=null) {
				request.setAttribute(OAuth2AuthenticationDetails.ACCESS_TOKEN_VALUE, accessToken.getValue());
				request.setAttribute(OAuth2AuthenticationDetails.ACCESS_TOKEN_TYPE, accessToken.getTokenType());
				result.setDetails(authenticationDetailsSource.buildDetails(request));
			}
			publish(new AuthenticationSuccessEvent(result));
			return result;
		}
		catch (InvalidTokenException e) {
			BadCredentialsException bad = new BadCredentialsException("Could not obtain user details from token", e);
			publish(new OAuth2AuthenticationFailureEvent(bad));
			throw bad;
		}

	}
這里面一定注意的是,如果資源服務器和認證服務器分開的話,請確保認證服務器的地址一定允許匿名訪問
2.3、完整示例
2.3.1、定制化授權頁面
說句實話,spring提供那一套白花花的登錄與授權頁面我想我們大家也不會去用吧,那么根據官網的提示我們可以自己配置授權頁面與登錄頁,官網說明說下:
Most of the Authorization Server endpoints are used primarily by machines, but there are a couple of resource that need a UI and those are the GET for /oauth/confirm_access and the HTML response from /oauth/error. They are provided using whitelabel implementations in the framework, so most real-world instances of the Authorization Server will want to provide their own so they can control the styling and content. All you need to do is provide a Spring MVC controller with @RequestMappings for those endpoints, and the framework defaults will take a lower priority in the dispatcher. In the /oauth/confirm_access endpoint you can expect an AuthorizationRequest bound to the session carrying all the data needed to seek approval from the user (the default implementation is WhitelabelApprovalEndpoint so look there for a starting point to copy). You can grab all the data from that request and render it however you like, and then all the user needs to do is POST back to /oauth/authorize with information about approving or denying the grant. The request parameters are passed directly to a UserApprovalHandler in the AuthorizationEndpoint so you can interpret the data more or less as you please.
歸納總結一下,這里給我們的信息:
/oauth/confirm_access這個端點用於跳轉至授權頁的,我們需要提供一個SpringMVC的Controller並使用@RequestMapping注解標注,同時會將AuthorizationRequest請求綁定到Session當中來用戶授權時所需的信息/oauth/error這個端點是用於配置時的錯誤頁面- 對於scope是否允許授權,我們可以使用true或者false,其默認請求參數格式為:
scpoe.<scopename>,具體可以參考org.springframework.security.oauth2.provider.approval.ApprovalStoreUserApprovalHandler類的updateAfterApproval的方法 - 另外如果配置了CSRF的保護,我們一定不要忘記添加對應的隱藏表單域
在這里我們看看源代碼就好理解了,AuthorizationEndpoint源代碼如下:
    @FrameworkEndpoint
    @SessionAttributes("authorizationRequest")
    public class AuthorizationEndpoint extends AbstractEndpoint {
       //.....

    	private String userApprovalPage = "forward:/oauth/confirm_access";

    	private String errorPage = "forward:/oauth/error";
    	//.... 省略其他代碼

        @RequestMapping(value = "/oauth/authorize")
    	public ModelAndView authorize(Map<String, Object> model, @RequestParam Map<String, String> parameters,
    			SessionStatus sessionStatus, Principal principal) {

           		 //....省略其他代碼

            	// Place auth request into the model so that it is stored in the session
    			// for approveOrDeny to use. That way we make sure that auth request comes from the session,
    			// so any auth request parameters passed to approveOrDeny will be ignored and retrieved from the session.
    			model.put("authorizationRequest", authorizationRequest);

    			return getUserApprovalPageResponse(model, authorizationRequest, (Authentication) principal);
        }

        // We need explicit approval from the user.
    	private ModelAndView getUserApprovalPageResponse(Map<String, Object> model,
    			AuthorizationRequest authorizationRequest, Authentication principal) {
    		logger.debug("Loading user approval page: " + userApprovalPage);
    		model.putAll(userApprovalHandler.getUserApprovalRequest(authorizationRequest, principal));
    		return new ModelAndView(userApprovalPage, model);
    	}

        //.....省略其他代碼
    }
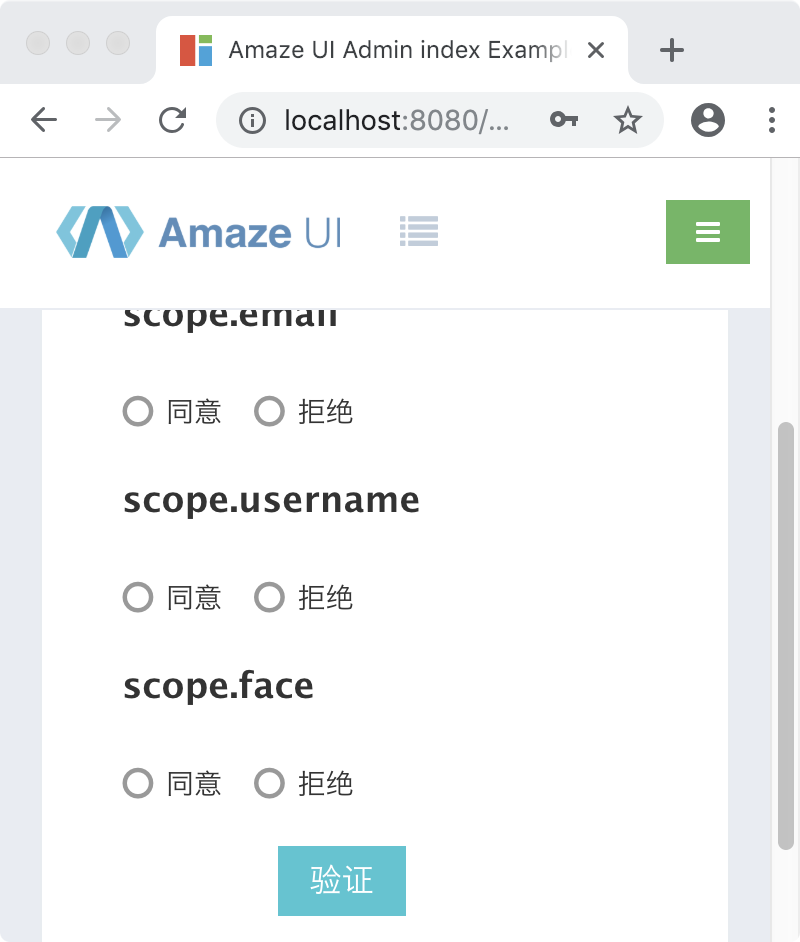
在這里我貼出一個具體示例,可供大家參考:
      <form class="am-form tpl-form-line-form" action="/oauth/authorize" method="post">
                                <#list scopes as scope>
                                <div class="am-form-group">
                                    <h3>${scope}</h3>
                                    <label class="am-radio-inline">
                                        <!-- name必須為scope.<scopename>,比如scope.email -->
                                        <input type="radio" name="${scope}" value="true" data-am-ucheck> 同意
                                    </label>
                                    <label class="am-radio-inline">
                                        <input type="radio" name="${scope}" value="false" data-am-ucheck> 拒絕
                                    </label>
                                </div>
                                </#list>
                                <div class="am-form-group">
                                    <div class="am-u-sm-9 am-u-sm-push-3">
                                        <input type="submit" class="am-btn am-btn-primary tpl-btn-bg-color-success " value="驗證"/>
                                    </div>
                                </div>
                                <#--<input type="hidden" name="_csrf" value="${_csrf??.token}">-->
          <!-- 此隱藏表單域必須添加-->
                                <input name='user_oauth_approval' value='true' type='hidden'/>
                            </form>
不過大家也可以參考SpringSecruity提供的授權頁面源代碼來定制化自己的頁面元素
2.3.2、定義測試類
    @Controller
    @EnableOAuth2Sso
    public class IndexService {


        @ResponseBody
        @GetMapping("/prom")
        public String prometheus() {
            ThreadLocalRandom random = ThreadLocalRandom.current();
            return "java_test_monitor{value=\"test\",} " + random.nextDouble();
        }

        @ResponseBody
        @GetMapping("/user")
        public Authentication user() {
            return SecurityContextHolder.getContext().getAuthentication();
        }

    }
2.3.3、啟動服務端認證
首先我們開啟服務端,那么在先前的例子作如下更改
    @SpringBootApplication
    @EnableAuthorizationServer
    @Controller
    public class AuthorizationServer {


        @GetMapping("/order")
        public ResponseEntity<String> order() {
            ResponseEntity<String> responseEntity = new ResponseEntity("order", HttpStatus.OK);
            return responseEntity;
        }

        @GetMapping("/free/test")
        public ResponseEntity<String> test() {
            ResponseEntity<String> responseEntity = new ResponseEntity("free", HttpStatus.OK);
            return responseEntity;
        }

        @GetMapping("/login")
        public String login() {
            return "login";
        }

        @ResponseBody
        @GetMapping("/user")
        public Map<String, Object> userInfo() {
            OAuth2Authentication
                    authentication = (OAuth2Authentication) SecurityContextHolder.getContext().getAuthentication();

            Map<String, Object> map = new HashMap<>();
            map.put("auth", authentication);
            return map;
        }

        @GetMapping("/oauth/confirm_access")
        public String confirmAccess(HttpSession session, Map<String, Object> model, HttpServletRequest request) {
            //在這里推薦使用AuthorizationRequest來獲取scope
           AuthorizationRequest authorizationRequest = (AuthorizationRequest) session.getAttribute("authorizationRequest");

            Authentication authentication = SecurityContextHolder.getContext().getAuthentication();
            model.put("auth", authentication);
            LinkedHashMap<String, String> linkedHashMap = (LinkedHashMap<String, String>) request.getAttribute("scopes");
            model.put("scopes", linkedHashMap.keySet());
            return "confirm_access";
        }


        public static void main(String[] args) {
            SpringApplication.run(AuthorizationServer.class, args);
        }
    }
在原有的基礎之上添加confirmAccess,userInfo,login的方法分別用於跳轉授權頁,獲取用戶信息,及登錄頁的方法
Resource的資源配置類:
```java
@Configuration
@EnableResourceServer
public class ResourceConfigure extends ResourceServerConfigurerAdapter {

    @Override
    public void configure(HttpSecurity http) throws Exception {
        http.csrf().disable().sessionManagement().sessionCreationPolicy(SessionCreationPolicy.IF_REQUIRED)
                .and().authorizeRequests().antMatchers("/free/**").permitAll()
            	//靜態資源過濾
                .and().authorizeRequests().antMatchers("/assets/**").permitAll()
                .and().authorizeRequests().anyRequest().authenticated()
                .and().formLogin().loginPage("/login").permitAll();//必須認證過后才可以訪問
    }
}
```
這里的變動主要是針對於靜態資源的過濾,同時配置了登錄頁也允許直接訪問,同時權限頁的配置相較之前沒有太多變化。
@Configuration
public class WebSecurityConfig extends WebSecurityConfigurerAdapter {
@Override
protected void configure(HttpSecurity http) throws Exception {
http.csrf().disable().requestMatchers().anyRequest().
and().authorizeRequests().antMatchers("/oauth/*").authenticated().
and().formLogin().loginPage("/login").permitAll();
}
}
```
##2.3.4、演示示例
當啟動好服務端后,再啟動客戶端,兩個服務啟動完畢后。我們根據上述例子,訪問http://localhost:8081/prom ,然后它會跳轉至服務端的登錄頁進行授權。
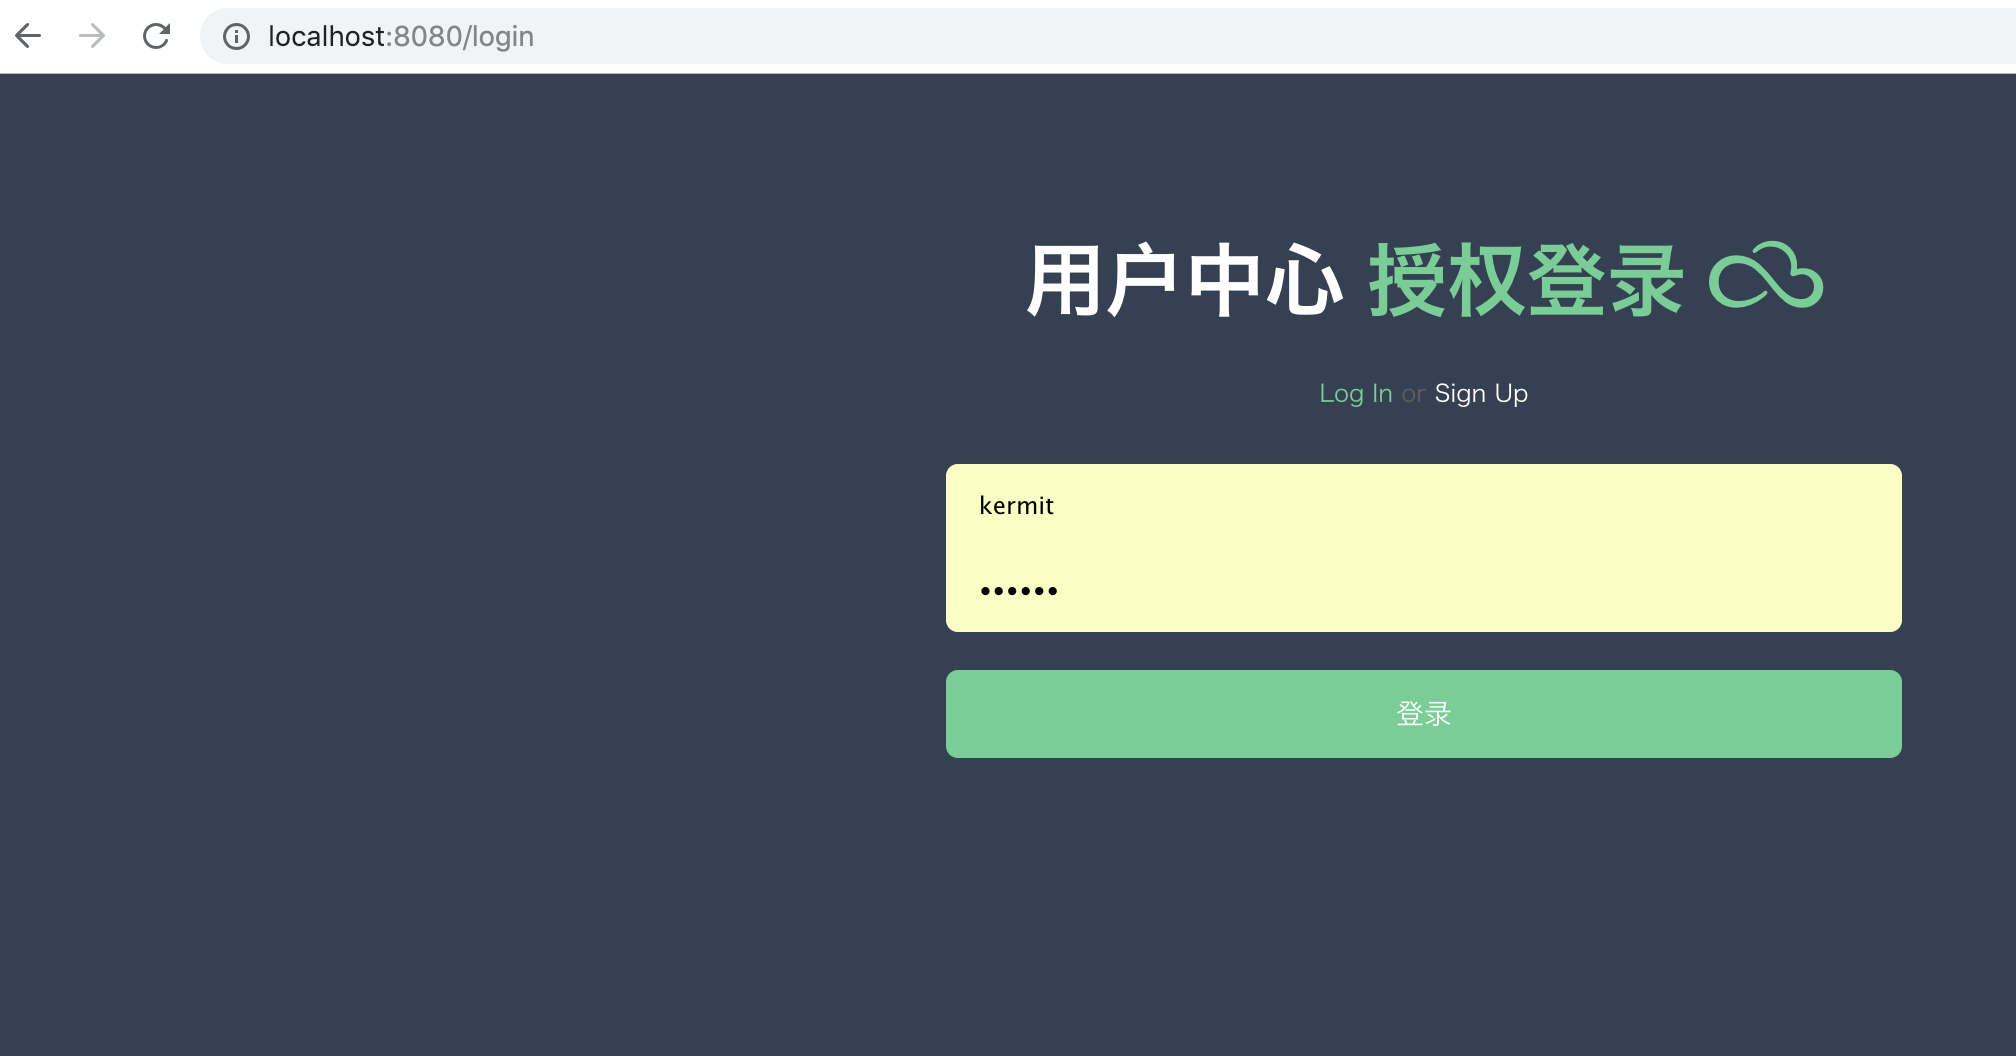
登錄過后,會跳轉到授權頁
當通過授權后,會跳轉到登錄頁進行token的獲取,登錄成功后我們可以訪問到我們的目標地址:
