Augmentor和imgaug——python圖像數據增強庫
Tags: ComputerVision Python
介紹兩個圖像增強庫:Augmentor和imgaug,Augmentor使用比較簡單,只有一些簡單的操作。 imgaug實現的功能更多,可以對keypoint, bounding box同步處理,比如你現在由一些標記好的數據,只有同時對原始圖片和標記信息同步處理,才能有更多的標記數據進行訓練。我在segmentation和detection任務經常使用imgaug這個庫。
Augmentor
http://augmentor.readthedocs.io/en/master/index.html
Augmentor 是管道化的圖像增強庫,每一個增強操作都是逐步疊加在圖像上。此外對於輸入的圖像,可以選擇按照一定的概率進行增強,比如只隨機對一半圖像進行旋轉。
rotate(probability=0.5, max_left_rotation=5, max_right_rotation=10)
可以實現的操作有, rotate, crop, perspective skew(視角傾斜), elastic distortions(彈性變換), sheering(坐標軸傾斜), mirroring(鏡像)
可以使用Augumentor.Pipeline()創建一個實例,調用各種方法向pipeline添加方法, status()可以顯示當前pipeline的狀態,在status中每個操作都有一個對應的index, remove_operation(index)移除一個操作, 最后調用sample(nums)得到nums個augument后的圖像。
import Augmentor
p = Augmentor.Pipeline("/path/to/images/")
p.status()
p.remove_operation(0)
rotate
- rotate() 旋轉,非90度旋轉會帶來padding或者裁剪
- rotate90()
- rotate180()
- rotate270()
- rotate_random_90() 隨機旋轉,90, 180, 270
resize
crop
- crop_centre()
- crop_by_size()
- crop_random()
sheer
+ sheer()
mirroring
- flip_left_right()
- flip_top_bottom()
- flip_random()
elastic distortion
- random_distortion()
Before

After
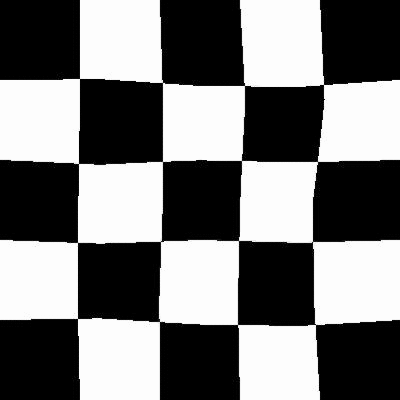
彈性變換是在計算機視覺任務中經常使用的一種變換,比較有名的Segmentation Model U-Net就使用了elastic deformation來對自己的數據做Augmentation.最后取得了較好的效果.
imgaug
http://imgaug.readthedocs.io/en/latest/index.html
安裝
依賴
- numpy
- scipy
- scikit-image (pip install -U + scikit-image)
- six (pip install -U six)
- OpenCV (i.e. cv2 must be available in python). The library is mainly tested in OpenCV 2, but seems to also work in OpenCV 3.
pip install git+https://github.com/aleju/imgaug
或者
pip install imgaug
前者安裝github最新版本,后者安裝pypi版本。
basic
Keypoint

Bounding Boxes
這個部分做object detection的人應該經常用到。
imgaug支持:
- 將bounding boxes作為對象表示
- 增強boundiing boxes
- 在圖像上畫bounding boxes
- boxing boxes移動, 映射, 計算IoU
Before

After

由於VOC_PASCAL是在分割和檢測領域常見的數據集,這里給出一個使用VOC_PASCAL標記格式進行數據增強的例子。
標記格式:
<?xml version="1.0" ?>
<annotation>
<folder>Pictures</folder>
<filename>bndbox.jpg</filename>
<path>/home/redtea/Pictures/bndbox.jpg</path>
<source>
    <database>Unknown</database>
</source>
<size>
    <width>1200</width>
    <height>1200</height>
    <depth>3</depth>
</size>

<segmented>0</segmented>
    <object>
    <name>cat</name>
    <pose>Unspecified</pose>
    <truncated>0</truncated>
    <difficult>0</difficult>
    <bndbox>
        <xmin>49</xmin>
        <ymin>647</ymin>
        <xmax>599</xmax>
        <ymax>1125</ymax>
    </bndbox>
</object>
    <object>
    <name>dog</name>
    <pose>Unspecified</pose>
    <truncated>0</truncated>
    <difficult>0</difficult>
    <bndbox>
        <xmin>678</xmin>
        <ymin>547</ymin>
        <xmax>1159</xmax>
        <ymax>1159</ymax>
    </bndbox>
</object>
</annotation>
import xml.etree.ElementTree as ET
import pickle
import  os
from os import getcwd
import numpy as np
from PIL import Image
import cv2

import imgaug as ia
from imgaug import augmenters as iaa

ia.seed(1)

def read_xml_annotation(root,image_id):
	in_file = open(os.path.join(root,image_id))
	tree = ET.parse(in_file)
	root = tree.getroot()

	bndbox = root.find('object').find('bndbox')

	xmin = int(bndbox.find('xmin').text)
	xmax = int(bndbox.find('xmax').text)
	ymin = int(bndbox.find('ymin').text)
	ymax = int(bndbox.find('ymax').text)

	return (xmin, ymin, xmax, ymax)

def change_xml_annotation(root, image_id, new_target):

	new_xmin = new_target[0]
	new_ymin = new_target[1]
	new_xmax = new_target[2]
	new_ymax = new_target[3]

	in_file = open(os.path.join(root, str(image_id)+'.xml')) #這里root分別由兩個意思
	tree = ET.parse(in_file)
	xmlroot = tree.getroot()
	object = xmlroot.find('object')
	bndbox = object.find('bndbox')
	xmin = bndbox.find('xmin')
	xmin.text = str(new_xmin)
	ymin = bndbox.find('ymin')
	ymin.text = str(new_ymin)
	xmax = bndbox.find('xmax')
	xmax.text = str(new_xmax)
	ymax = bndbox.find('ymax')
	ymax.text = str(new_ymax)
	tree.write(os.path.join(root,str(image_id)+"_aug"+'.xml'))


if __name__ == "__main__":

	cmd = os.getcwd()
	image_id = "bndbox"
	img = Image.open(os.path.join(cmd, str(image_id)+'.jpg'))
	img = np.array(img)

	bndbox = read_xml_annotation(cmd, str(image_id)+'.xml')

	bbs = ia.BoundingBoxesOnImage([
	   ia.BoundingBox(x1=bndbox[0], y1=bndbox[1], x2=bndbox[2], y2=bndbox[3])
	], shape=img.shape)
	seq = iaa.Sequential([
	iaa.Flipud(0.5), # vertically flip 20% of all images
	   iaa.Multiply((1.2, 1.5)), # change brightness, doesn't affect BBs
	   iaa.Affine(
	       translate_px={"x": 10, "y": 10},
	       scale=(0.8, 0.95),
	       rotate=(-10,10)
	    ) # translate by 40/60px on x/y axis, and scale to 50-70%, affects BBs
	])
	seq_det = seq.to_deterministic() # 保持坐標和圖像同步改變,而不是隨機
	image_aug = seq_det.augment_images([img])[0]
	bbs_aug = seq_det.augment_bounding_boxes([bbs])[0]

	before  = bbs.bounding_boxes[0]
	after = bbs_aug.bounding_boxes[0]
	print("BB : (%.4f, %.4f, %.4f, %.4f) -> (%.4f, %.4f, %.4f, %.4f)" % (
        before.x1, before.y1, before.x2, before.y2,
        after.x1, after.y1, after.x2, after.y2)
    )

	image_before = bbs.draw_on_image(img, thickness=2)
	image_after = bbs_aug.draw_on_image(image_aug, thickness=2)
	Image.fromarray(image_before).save("before.jpg")
	Image.fromarray(image_after).save('after.jpg')

	new_bndbox = []
	new_bndbox.append(int(bbs_aug.bounding_boxes[0].x1))
	new_bndbox.append(int(bbs_aug.bounding_boxes[0].y1))
	new_bndbox.append(int(bbs_aug.bounding_boxes[0].x2))
	new_bndbox.append(int(bbs_aug.bounding_boxes[0].y2))

	# 修改xml tree 並保存
	change_xml_annotation(cmd, image_id, new_bndbox)


這個包好像不能畫出傾斜的bounding box, 我的read xml程序只能讀取第一個bounding box,懶得修改了。
總之我覺得如果你Augmentor不能滿足你就可以使用imgaug,但是有一點需要注意!imgaug中一些變換會給邊緣區域帶來黑色填充塊,如果這些黑色填充塊對你的模型有影響的話,就需要特殊處理!!