最近在用postman測試postman接口,對於springmvc傳值這一塊,測試了幾種常用方式,總結一下。對於postman這個工具的使用也增加了了解。postman測試很棒,有了工具,測試接口,事倍功半。
一、單個參數傳遞
1.@RequestBody注解
- <span style="font-family:'KaiTi_GB2312';font-size:18px;"> /**
- * 測試單個參數@RequestBody
- */
- @CrossOrigin
- @RequestMapping(value = {"/insertTestParamsRequest"}, method = RequestMethod.GET)
- @ResponseBody
- public void insertTestParamsRequest(@RequestBody String name, @RequestBody String age) {
- System.out.println("name=====" + name);
- System.out.println("age=====" + age);
- }
- </span>
測試請求路徑
2.@RequestParam
常用來處理簡單類型的綁定,通過Request.getParameter() 獲取的String可直接轉換為簡單類型的情況( ;
該注解有兩個屬性: value、required; value用來指定要傳入值的id名稱,required用來指示參數是否必須綁定;
- <span style="font-family:'KaiTi_GB2312';font-size:18px;"> /**
- * 測試單個參數@RequestParam
- */
- @CrossOrigin
- @RequestMapping(value = {"/insertTestParams"}, method = RequestMethod.GET)
- @ResponseBody
- public void insertTestParams(HttpServletRequest request, @RequestParam String name, @RequestParam String age) {
- System.out.println("name=====" + name);
- System.out.println("age=====" + age);
- }</span>
請求路徑:

3.@PathVariable注解
路徑為resultful風格,將參數當做請求路徑。
當使用@RequestMapping URI template 樣式映射時, 即 Url/{paramId}, 這時的paramId可通過 @Pathvariable注解綁定它傳過來的值到方法的參數上。
- <span style="font-family:'KaiTi_GB2312';font-size:18px;"> /**
- * 測試單個參數@PathVariable
- */
- @CrossOrigin
- @RequestMapping(value = {"/insertTest/{name}/{age}"}, method = RequestMethod.GET)
- @ResponseBody
- public void insertTestPathVeriable(HttpServletRequest request, @PathVariable("name") String name, @PathVariable String age) {
- System.out.println("name=====" + name);
- System.out.println("age=====" + age);
- }</span>
上面代碼把URI template 中變量 name的值和age的值,綁定到方法的參數上。若方法參數名稱和需要綁定的uri template中變量名稱不一致,需要在@PathVariable("name")指定uri template中的名稱。
二、傳遞pojo對象
1.@RequestBody注解
- <span style="font-family:'KaiTi_GB2312';font-size:18px;"> /*測試添加實體*/
- @CrossOrigin
- @RequestMapping(value = {"/insertEntityTest"}, method = RequestMethod.POST)
- @ResponseBody
- public void insertEntityTest(@RequestBody CurriculumScheduleEntity curriculumScheduleEntity) {
- System.out.println("name=====" + curriculumScheduleEntity.getClassId());
- System.out.println("age=====" + curriculumScheduleEntity.getTeachclassId());
- }</span>
postman通過json格式測試

2.直接寫實體
- <span style="font-family:'KaiTi_GB2312';font-size:18px;"> /*測試添加實體*/
- @CrossOrigin
- @RequestMapping(value = {"/insertTest"}, method = RequestMethod.POST)
- @ResponseBody
- public void insertTest(CurriculumScheduleEntity curriculumScheduleEntity) {
- System.out.println("name=====" + curriculumScheduleEntity.getClassId());
- System.out.println("age=====" + curriculumScheduleEntity.getWeekId());
- }</span>
form表單測試
- <span style="font-family:'KaiTi_GB2312';font-size:18px;"><div>
- <form action="/curriculumSchedule/insertTest" method="post">
- classId :<input name="classId"><br>
- teachClassId:<input name="weekId"><br>
- <input type="submit" value="提交">
- </form>
- </div></span>
postman測試格式

三、postman測試List類型參數
以List<string>為例,測試批量刪除方法,參數為List<String>。寫這個其實沒有什么技術,但是中午在測試List接口的時候,用postman測試,格式一致寫錯,不知道用postman該怎么測試了。所以花費了一點時間,記錄下來,思考這個工具的執行過程。

Controller方法

3.參考連接
http://www.cnblogs.com/sandyliu1999/p/4802706.html
2018_05_24更新(6.0版本)
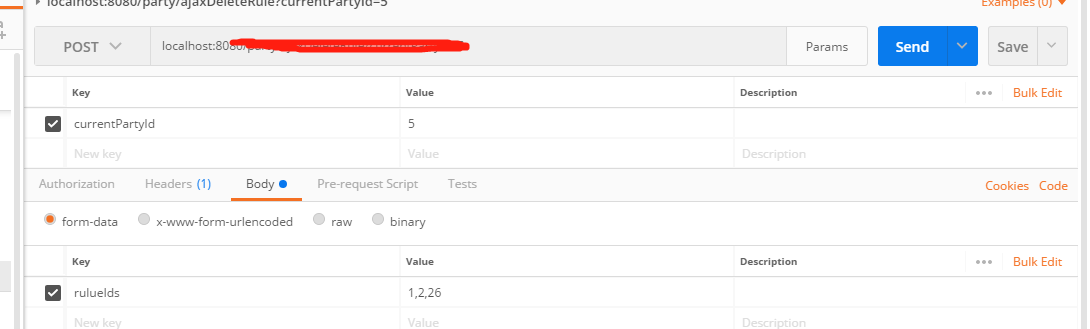
1、如果要傳遞多個參數其中一個Long類型的數組,另外一個是Long類型的數據,還有一個實體,那么后者可以直接傳,前者的話用Body中的formData來進行傳遞就好了,具體如下圖:
2、在上面提到傳遞實體接收的方式,我試了不行不過可以直接將實體屬性按照表單那樣去寫就可以獲取到了,如下圖所示:
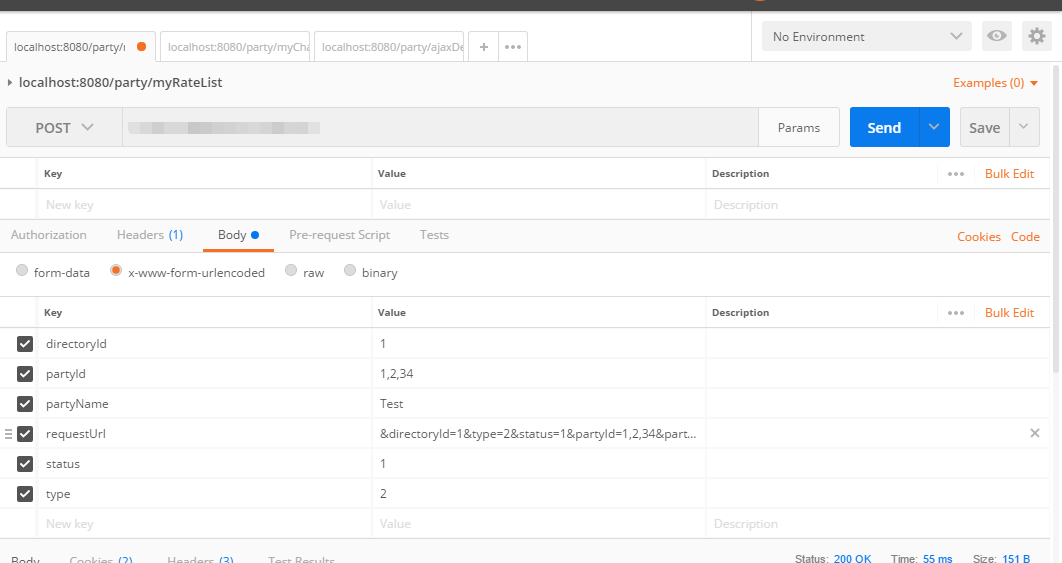 小技巧:可以直接復制JSON中的選項,然后將光標點擊在“x-www-form-ulencoded”第一項最后Ctrl+V就可以直接粘貼了非常方便。