原文出自Rui Figueiredo的博客,原文鏈接《ASP.NET Identity Core From Scratch》
譯者注:這篇博文發布時正值Asp.Net Core 1.1 時期,原博主使用的是 vs code+ yeoman+ node.js。現在(2017年12月22日)已經到了Asp.Net Core 2.0時代了, 文中的代碼發生了變化,yeoman上也找不到最新2.0的模板,所以在此譯文中,博主對其作了改動,開發工具由 vs code+yeoman+node.js 替換為vs code+dotnet cli,.net core sdk 從1.x升級到2.x,這篇文章有些內容和原文不一樣的,但是整體思路沒變。動手做本文中的例子請准備好上述條件,鑒於上述的工具及軟件,你可以在windows linux osX進行編碼。如果你在windows上使用visual studio 2017 開發,那么參照本文章完全沒問題
摘要:本文主要介紹了,在不使用visual studio模板的情況下,如何一步一步的將 Asp.Net Core Identity引入到你的項目中,在這些步驟中,你將知道 使用Identity的必要步驟,以及依賴,學習一個框架,沒什么比從0開始做一遍更好的了。
能夠讓用戶在你的網站上創建帳戶往往是創建網站的第一步。
雖然這是一個看起來很平凡的任務,但它涉及到很多工作,而且很容易出錯。
雖然你可以使用Visual Studio附帶的模板(如果你不使用Windows,也可以使用yeoman模板譯者注:在譯文中使用的dotnet cli),但是模板只會給你一個不完整的解決方案,你必須自己設置電子郵件確認。
這些模板往往會隱藏許多的細節,所以如果出現問題,而且你不了解這些細節,那么你將很難找到問題的根源。
這篇博客是一個從零(我們會從 empty web application 模板開始)配置Identity的step by step指導。這篇博客實現用戶創建賬戶,郵件確認,以及密碼重置。你可以在這里找到最終的項目代碼。
你可以使用 git克隆這個檔案庫:
git clone https://github.com/ruidfigueiredo/AspNetIdentityFromScratch
本指南假定你使用的是Visual Studio Code,以便可以在Windows,Mac或Linux中操作。如果你正在使用Visual Studio的完整版本,那么也是沒問題的。
我們假設你已經安裝了.Net Core 運行時及 Sdk。
1 . 創建一個空的Web應用程序
首先打開cmd然后移動到某個你要創建項目的目錄,注意目錄的最后一級是將要創建項目的名稱,稍后將使用 dotnet cli在這里創建項目,它看起來可能是這樣的:
D:\IdentityFromScratch
然后在cmd中輸入
dotnet new web
得到的結果類似下面這樣:
已成功創建模板“ASP.NET Core Empty”。
此模板包含非 Microsoft 的各方的技術,有關詳細信息,請參閱 https://aka.ms/template-3pn。

正在處理創建后操作...
正在 D:\IdentityFromScratch\IdentityFromScratch.csproj 上運行 "dotnet restore"...
  Restoring packages for D:\IdentityFromScratch\IdentityFromScratch.csproj...
  Generating MSBuild file D:\IdentityFromScratch\obj\IdentityFromScratch.csproj.nuget.g.props.
  Generating MSBuild file D:\IdentityFromScratch\obj\IdentityFromScratch.csproj.nuget.g.targets.
  Restore completed in 3.04 sec for D:\IdentityFromScratch\IdentityFromScratch.csproj.

還原成功。
使用vs code 打開項目所在的文件夾(在本文中是D:\IdentityFromScratch\),vs code 將提示 Required assets to build and debug are missing from 'IdentityFromScratch'. Add them?,vs code 在詢問你是否添加調試資源,選擇yes,vs code將會向目錄中添加 .vscode文件夾,里面含有調試相關的配置文件。
打開Startup.cs並添加使用MVC所需的Ioc配置。
public void ConfigureServices(IServiceCollection services)
{
    services.AddMvc();
}
另外,更新Configure方法,以便將MVC中間件添加到管道,這里使用默認路由。
public void Configure(IApplicationBuilder app, IHostingEnvironment env)
{
    if (env.IsDevelopment())
    {
        app.UseDeveloperExceptionPage();
    }

    app.UseStaticFiles();
    app.UseMvcWithDefaultRoute();
}
如果你不熟悉ASP.NET Core中的中間件和IoC,那么中間件文檔和依賴注入文檔能幫助你快速了解他們。
因為我們使用的是默認路由,所以如果對我們網站的根目錄進行http請求,那么要調用的控制器就是HomeController。控制器的action將是Index,所以讓我們創建這些必要的東西。
首先在vs code中根目錄(IdentityFromScratch)下創建一個名為Controllers的文件夾(空模板里沒有)。
然后創建HomeController.cs文件,
文件內容如下:
using System;
using System.Collections.Generic;
using System.Linq;
using System.Threading.Tasks;
using Microsoft.AspNetCore.Identity;
using Microsoft.AspNetCore.Mvc;

namespace AspNetIdentityFromScratch.Controllers
{
    public class HomeController : Controller
    {
        public IActionResult Index()
        {
            return View();
        }
    }
}
然后再在跟根目錄下創建Views文件夾,在Views下創建Shared文件夾。
在Shared文件夾下創建 _Layout.cshtml 文件,文件的內容很簡單:
<!DOCTYPE html>

<html>
<head>
    <meta name="viewport" content="width=device-width" />
    <title>@ViewBag.Title</title>
</head>
<body>
    @RenderBody()
</body>
</html>
_Layout.cshtml 文件是一個布局文件,里面的@RenderBody()將我們的視圖渲染在此處。
在MVC中,還有一個特殊的文件它會在所有View之前自動加載,它就是 _ViewStart.cshtml,在Views文件夾下創建它,其中的代碼很少,如下:
@{
    Layout = "_Layout";
}
這行代碼將默認布局設置為我們剛剛創建的布局。
此外,因為稍后我們將使用ASP.NET Core的一個名為tag helper的新功能,所以我們將使用另一個文件(它是文件名_ViewImports.cshtml)為所有視圖啟用它們。在Views文件夾下創建_ViewImports.cshtml,其內容如下:
@addTagHelper "*, Microsoft.AspNetCore.Mvc.TagHelpers"
_ViewImports.cshtml允許我們添加@using語句,例如@using System.Collections.Generic,以便在_ViewImports所在的文件夾及其子文件夾中的所有Razor視圖中直接使用ViewImprots文件中引用的命名空間下的類而不必添加@using語句。所以我們在這里添加 tag helper之后,所有的視圖中都可以使用它。
我們仍然需要 Index action的視圖,接下來在Views下創建Home文件夾,然后創建Index.cshtml視圖文件,文件內容如下:
<h1>Home</h1>
@if (User.Identity.IsAuthenticated)
{
    <p>User @User.Identity.Name is signed in. <a href="/Account/Logout">Logout</a> </p>
}
else
{
    <p>No user is signed in.</p>
}
<div>
    <a href="/Account/Login">Login</a>
</div>
<div>
    <a href="/Account/Register">Register</a>
</div>
<div>
    <a href="/Account/ForgotPassword">Forgot Password</a>
</div>
運行該項目,你應該看到一個非常簡單的頁面,提醒你沒有用戶登錄。里面里的鏈接也無法正常工作,因為我們稍后才會處理它們。
譯者注:在vs code 中按下快捷鍵
Ctrl+~來啟動終端,鍵入
dotnet run即可運行項目,如果不行的話先運行dotnet build
ASP.NET Core Identity
ASP.NET Core Identity是ASP.NET Core的成員系統,它提供了管理用戶帳戶所需的功能。通過使用它,我們將能夠創建用戶並生成token以用於電子郵件確認和密碼重置。
你需要添加下面兩個Nuget包:
Microsoft.AspNetCore.Identity
Microsoft.AspNetCore.Identity.EntityFrameworkCore
譯者注:當我們使用dotnet cli創建項目是,默認添加了
Microsoft.AspNetCore.All,這個包中含有所有這篇文章所需的包(除非我標記了不能忽略),所以本文中只做介紹,下文同理。另外你可以打開項目的.csproj文件查看與編輯項目的包,這和1.x版本是不一樣的。
在繼續下一步之前,請注意有關ASP.NET Core Identity如何存儲用戶的信息的。一個用戶將具有(至少)名為IdentityUser的類中包含的所有屬性。你可以創建IdentityUser的子類並添加更多屬性。當我們實際創建數據庫時,這些將出現在用戶的表中。對於本文中的例子,我們將只使用默認的 IdentityUser。
因為我們需要一個數據庫來存儲我們的用戶數據,這里我們將使用SQLite(如果你有興趣使用不同的數據庫,請查看這篇文章:Cross platform database walk-through using ASP.NET MVC and Entity Framework Core)。
Identity使用SqLite存儲數據需要添加Nuget包:
Microsoft.EntityFrameworkCore.Sqlite
然后打開項目的.csproj文件,在 ItemGroup中添加(譯者注:這里不能忽略,這里添加了Ef的命令行工具):
Microsoft.EntityFrameworkCore.Tools.DotNet
Microsoft.EntityFrameworkCore.Tools
最終的代碼看起來是這樣的:
...
<ItemGroup>
<PackageReference Include="Microsoft.AspNetCore.All" Version="2.0.3" />
<PackageReference Include="Microsoft.EntityFrameworkCore.Tools" Version="2.0.1" PrivateAssets="All" />
</ItemGroup>

<ItemGroup>
<DotNetCliToolReference Include="Microsoft.EntityFrameworkCore.Tools.DotNet" Version="2.0.1" />
</ItemGroup>
...
Configuring ASP.NET Core Identity
一般來講,使用Identity 的話我們假定你的用戶類是繼承於IdentityUser的。然后你可以在你的用戶類中添加額外的用戶信息。你應用程序的DbContex也應該繼承與IdentityDbContext,之后你可以在其中指定額外的DbSet。
然后尷尬的事情發生了,有很多理由讓你別去這樣做。首先,ASP.NET Core Identity 不是唯一可用的成員系統,甚至不同版本的Identity也存在着很大的差異。因此,如果你完全將你的用戶類和DbContext與ASP.NET Core Identity綁定,則實際上將它們綁定到特定版本的Identity。
讓所有這些工作無需將你的項目綁定到Identity上是一件額外的工作,接下來我們會做這些事。
首先,我們需要更改Startup.cs並添加必要的IoC配置:
public void ConfigureServices(IServiceCollection services)
{
    services.AddMvc();

    services.AddDbContext<IdentityDbContext>(options =>
    {
        options.UseSqlite(
            "Data Source=users.sqlite",
            builder =>
            {
                builder.MigrationsAssembly("AspNetIdentityFromScratch");
            });
    });

    services.AddIdentity<IdentityUser, IdentityRole>()
        .AddEntityFrameworkStores<IdentityDbContext>()
        .AddDefaultTokenProviders();

    // services.AddTransient<IEmailSender, EmailSender>();

}
我們向Ioc容器中注冊了 IdentityDbContext 並使用Data Source = users.sqlite 作為連接字符串。當我們創建數據庫時,會在項目的輸出目錄中創建一個名為users.sqlite的文件(稍后會詳細介紹)。
請注意UseSqlite擴展方法中使用的第二個參數:
builder =>
{
    builder.MigrationsAssembly("IdentityFromScratch");
});
這段代碼是必需的,因為當我們運行工具(dotnet ef)來創建數據庫遷移時,將執行檢查來驗證IdentityDbContext類是否與你運行工具的項目位於相同的程序集中。如果不是這樣,你可能會得到一個錯誤:
Your target project 'IdentityFromScratch' doesn't match your migrations assembly 'Microsoft.AspNetCore.Identity.EntityFrameworkCore'
...
這就是為什么我們需要使用UseSqlite的第二個參數。 IdentityFromScratch是我用於項目的名稱,你需要將其更新為你用於你項目的名稱。
接下來是注冊Identity:
services.AddIdentity<IdentityUser, IdentityRole>()
    .AddEntityFrameworkStores<IdentityDbContext>()
    .AddDefaultTokenProviders();
這里我們指定了我們想要用於用戶的類IdentityUser和角色IdentityRole。如前所述,你可以指定你自己的IdentityUser的子類,但是如果你這樣做,還需要更改DbContext的注冊方式,例如:
services.AddDbContext<IdentityDbContext<YourCustomUserClass>>(...
services.AddIdentity<YourCustomUserClass, IdentityRole>()
        .AddEntityFrameworkStores<IdentityDbContext<YourCustomUserClass>>(...
你可能注意到我沒有提到關於IdentityRole的任何事情。你可以忽略這個,因為你可以添加角色claim來取代role。這里指定IdentityRole我猜這只是因為在舊成員系統中role的概念非常突出,不過在我們普遍使用claim的今天,role已經不那么重要了。另外,指定一個自定義的IdentityRole會使事情變得更加復雜,我將向你展示如何使用claim將role添加到你的用戶。
接下來:
.AddEntityFrameworkStores<IdentityDbContext>()
這僅僅指定使用哪個DbContext,最后:
.AddDefaultTokenProviders();
TokenProvider是生成確認電子郵件和重置密碼token的組件,稍后我們將用到它們。
現在我們只需要更新管道:
public void Configure(IApplicationBuilder app, IHostingEnvironment env, ILoggerFactory loggerFactory)
{
    //...

    app.UseIdentity();
    app.UseStaticFiles();
    app.UseMvcWithDefaultRoute();
}
使用UseIdentity擴展方法時會發生什么呢?這實際上它會設置cookie中間件,cookie中間件做的是當MVC中的controller action返回401響應時將用戶重定向到登錄頁面,並且在用戶登錄並創建身份驗證cookie后,將其轉換為ClaimsPrincipal和ClaimsIdentity,也就是在你使用Request.User時獲取到的實際對象。
生成存儲用戶數據的數據庫
在使用新版本的EF時,生成數據庫基本上只能使用migrations。接下來我們需要創建一個遷移,然后讓工具生成數據庫。
打開vscode中的終端(上文中有提到過),輸入下面的命令:
dotnet ef migrations add Initial
這將創建名為“Initial”的遷移,使用下面的命令應用它:
dotnet ef database update
該命令所做的是應用所有pending的遷移,在本例情況下,它只會是“Initial”,它將創建ASP.NET Core Identity所必需的表。
現在應該在輸出文件夾中有一個名為users.sqlite的文件。
你當然也可以以編程方式生成數據庫(但你始終需要首先創建遷移)。
這樣,如果你想與其他人分享你的項目,他們將不必運行dotnet ef database update 就能運行該項目。
為實現此目標,在Startup.cs的配置方法中添加:
public void Configure(IApplicationBuilder app, IHostingEnvironment env, ILoggerFactory loggerFactory, IdentityDbContext dbContext)
{
    if (env.IsDevelopment())
    {
        app.UseDeveloperExceptionPage();
        dbContext.Database.Migrate(); // 如果數據庫不存在則會被創建
    }
    //...
}
不過你一定要在設置為“development”的環境中運行。通常情況下,如果你從Visual Studio運行那么就是development,但是如果你決定從命令行運行的話:
dotnet run --environment "Development"
發送確認郵件
為了啟用電子郵件驗證和密碼重置,我們要讓應用程序能夠發送電子郵件。當你正處在開發階段時,最簡單的方法就是把郵件信息存到磁盤文件上。這樣可以節省你在嘗試操作時不得不等待電子郵件的時間。首先我們需要做的是創建一個接口,我們將其命名為IMessageService:
public interface IMessageService
{
    Task Send(string email, string subject, string message);
}
寫郵件到文件的實現類:
public class FileMessageService : IMessageService
{
    Task IMessageService.Send(string email, string subject, string message)
    {
        var emailMessage = $"To: {email}\nSubject: {subject}\nMessage: {message}\n\n";

        File.AppendAllText("emails.txt", emailMessage);

        return Task.FromResult(0);
    }
}
最后一件事是在Startup.cs的ConfigureServices中注冊這個服務:
public void ConfigureServices(IServiceCollection services)
{
    //...

    services.AddTransient<IMessageService, FileMessageService>();
}
用戶注冊頁面
對於這個演示,我們將構建最簡單的Razor視圖,因為我們的目的是展示如何使用ASP.NET Core Identity。
在Controllers文件夾中創建AccountController。
在構造函數中添加UserManager
public class AccountController : Controller
{
    private readonly UserManager<IdentityUser> _userManager;
    private readonly SignInManager<IdentityUser> _signInManager;
    private readonly IMessageService _messageService;

    public AccountController(UserManager<IdentityUser> userManager, SignInManager<IdentityUser> signInManager, IMessageService messageService)
    {
        this._userManager = userManager;
        this._signInManager = signInManager;
        this._messageService = messageService;
    }
    //...
UserManager是用來創建用戶和生成驗證token的類。SignInManager 提供密碼驗證的功能,以及用戶的登錄與注銷(通過處理authentication cookie)。
創建注冊方法:
public IActionResult Register()
{
    return View();
}
以及 Views/Account/Register.cshtml 文件:
<form method="POST">
    <div>
        <label >Email</label>
        <input type="email" name="email"/>
    </div>

    <div>
        <label>Password</label>
        <input type="password" name="password"/>
    </div>

    <div>
        <label>Retype password</label>
        <input type="password" name="repassword"/>
    </div>

    <input type="submit"/>
</form>

<div asp-validation-summary="All"></div>
值得注意的是 asp-validation-summary tag helper,tag helper是ASP.NET Core中的新功能。它們用來替代舊的HtmlHelpers。
validation summary tag helper,設置的值是All,所以它將顯示所有模型錯誤。我們將使用它來顯示創建用戶時檢測到的任何錯誤(例如,用戶名已被占用或密碼不匹配)。
下面是用戶注冊表單接收的實際處理方法:
[HttpPost]
public async Task<IActionResult> Register(string email, string password, string repassword)
{
    if (password != repassword)
    {
        ModelState.AddModelError(string.Empty, "兩次輸入的密碼不一致");
        return View();
    }

    var newUser = new IdentityUser
    {
        UserName = email,
        Email = email
    };

    var userCreationResult = await _userManager.CreateAsync(newUser, password);
    if (!userCreationResult.Succeeded)
    {
        foreach(var error in userCreationResult.Errors)
            ModelState.AddModelError(string.Empty, error.Description);
        return View();
    }

    var emailConfirmationToken = await _userManager.GenerateEmailConfirmationTokenAsync(newUser);
    var tokenVerificationUrl = Url.Action("VerifyEmail", "Account", new {id = newUser.Id, token = emailConfirmationToken}, Request.Scheme);

    await _messageService.Send(email, "驗證電子郵件", $"點 <a href=\"{tokenVerificationUrl}\">我</a> 驗證郵件");

    return Content("請檢查你的郵箱,我們向你發送了郵件。");
}
要創建我們的新用戶,我們首先必須創建IdentityUser的實例。由於我們用email作為用戶名,所以我們為其指定了相同的值。
然后我們調用_userManager.CreateAsync(newUser,password);它的返回值中有一個名為Success的bool值屬性,它代表了用戶是否創建成功。里面的另一個屬性Errors中含有創建失敗的原因(例如:不符合密碼要求,用戶名已被占用等)。
此時,如果userCreatingResult.Success為true,則用戶已經創建。但是,如果你要檢查newUser.EmailConfirmed它將返回false。
因為我們要驗證電子郵件,所以我們可以使用_userManager的GenerateEmailConfirmationTokenAsync生成一個電子郵件確認token。然后,我們使用IMessagingService來“發送”它。
如果你現在運行項目並轉到Account/Register創建一個新用戶,那么在此過程之后,你的項目文件夾中應該有一個名為emails.txt的文件,里面含有確認鏈接。
我們會創建 email confirmation controller action,之后你就可以復制文件中的電子郵件確認網址,然后驗證電子郵件(稍后將做這些)。
將角色添加為Claim
上文提到你不需要過多的關注IdentityRole,因為你可以將角色添加為Claim,以下是如何將“Administrator”角色添加到用戶的示例:
await _userManager.AddClaimAsync(identityUser, new Claim(ClaimTypes.Role, "Administrator"));
然后,你可以像以前一樣在controller action上要求“Administrator”角色:
[Authorize(Roles="Administrator")]
public IActionResult RequiresAdmin()
{
    return Content("OK");
}
郵件驗證
讓我們來創建controller action,當用戶點擊電子郵件中的鏈接時將會調用該操作:
public async Task<IActionResult> VerifyEmail(string id, string token)
{
    var user = await _userManager.FindByIdAsync(id);
    if(user == null)
        throw new InvalidOperationException();

    var emailConfirmationResult = await _userManager.ConfirmEmailAsync(user, token);
    if (!emailConfirmationResult.Succeeded)
        return Content(emailConfirmationResult.Errors.Select(error => error.Description).Aggregate((allErrors, error) => allErrors += ", " + error));

    return Content("Email confirmed, you can now log in");
}
我們需要使用用戶的ID來加載IdentityUser。有了這個和電子郵件確認token,我們可以調用userManager的ConfirmEmailAsync方法。如果token是正確的,則用戶數據庫表中的EmailConfirmed屬性將被更新以指示用戶的電子郵件已經確認。
出於簡化示例的目的,我們使用了Content方法。你可以創建一個新視圖,然后加一個跳轉到登錄頁面的連接。有一件事你不應該做的就是在確認之后自動登錄用戶。
這是因為如果用戶多次點擊確認鏈接,都不會引發任何錯誤。
如果你想在確認電子郵件后自動登錄用戶,則該鏈接本質上將成為登錄的一種方式,而且不需要使用密碼,又能多次使用。
登錄頁面
首先在AccountController中創建一個Login方法來處理GET請求:
public IActionResult Login()
{
    return View();
}
以及它的視圖 Views/Account/Login.cstml:
<form method="POST">
    <div>
        <label>Email</label>
        <input type="email" name="email"/>
    </div>

    <div>
        <label>Password</label>
        <input type="password" name="password"/>
    </div>

    <input type="submit"/>
</form>

<div asp-validation-summary="All"></div>
控制器處理POST請求的操作:
[HttpPost]
public async Task<IActionResult> Login(string email, string password, bool rememberMe)
{
    var user = await _userManager.FindByEmailAsync(email);
    if (user == null)
    {
        ModelState.AddModelError(string.Empty, "Invalid login");
        return View();
    }
    if (!user.EmailConfirmed)
    {
        ModelState.AddModelError(string.Empty, "Confirm your email first");
        return View();
    }

    var passwordSignInResult = await _signInManager.PasswordSignInAsync(user, password, isPersistent: rememberMe, lockoutOnFailure: false);
    if (!passwordSignInResult.Succeeded)
    {
        ModelState.AddModelError(string.Empty, "Invalid login");
        return View();
    }

    return Redirect("~/");
}
這里我們使用UserManager通過電子郵件(FindByEmailAsync)來檢索用戶。如果電子郵件未被確認,我們不允許用戶登錄,在這種情況下你還提供重新發送驗證郵件的選項。
我們將使用SignInManager將用戶登錄。它的PasswordSignInAsync方法需要IdentityUser,正確的密碼,標志isPersistent和另一個標志lockoutOnFailure。
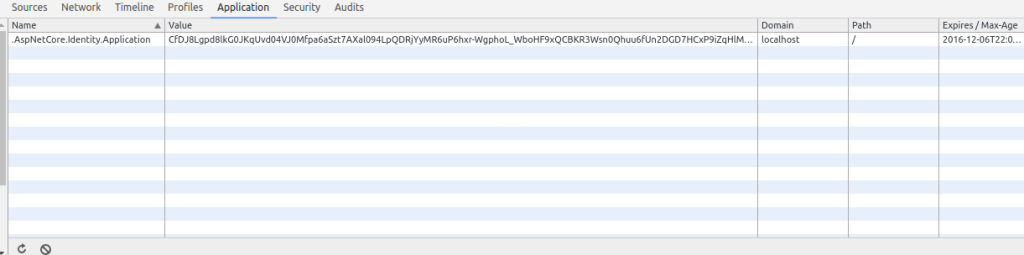
這個方法所做的是發起創建加密cookie,cookie將被發送到用戶的計算機上,cookie中含有該用戶的所有claims。成功登錄后,你可以使用Chrome的開發人員工具檢查此Cookie。
isPersistent參數將決定Cookie的Expires屬性的值。
如果設置為true(截圖中就是這種情況),cookie的過期日期會是幾個月之后(此時間范圍是可配置的,請參閱配置部分)。當設置為false時,cookie將Expires屬性設置為session,這意味着在用戶關閉瀏覽器之后cookie將被刪除。
lockoutOnFailure標志將在用戶多次登錄失敗之后阻止用戶登錄。用戶被鎖定多少次以及多長時間是可配置的(我們將在配置部分提到這一點)。如果你決定使用lockoutOnFailure,請注意,每次用戶登錄失敗時都需要調用_userManager.AccessFailedAsync(user)。
我忽略了一件事情,不過它很簡單,那就是returnUrl。如果你想,你可以添加一個參數到Login方法,這樣當用戶成功登錄時,你可以發送一個重定向到return url。不過你應該檢查url是否是local的(即連接是指向你的應用程序,而不是別人的),為此,在controller action中可以執行以下操作:
if (Url.IsLocalUrl(returnUrl))
{
    return Redirect(returnUrl);
}else
{
    return Redirect("~/");
}
密碼重置
對於密碼重置,我們需要一個頁面。
首先controller action,我們命名為ForgotPassword:
public IActionResult ForgotPassword()
{
    return View();
}
視圖 /Views/Account/ForgotPassword.cshtml:
<form method="POST">
    <div>
        <label>Email</label>
        <input type="email" name="email"/>
    </div>

    <input type="submit"/>
</form>
處理Post請求的方法:
[HttpPost]
public async Task<IActionResult> ForgotPassword(string email)
{
    var user = await _userManager.FindByEmailAsync(email);
    if (user == null)
        return Content("Check your email for a password reset link");

    var passwordResetToken = await _userManager.GeneratePasswordResetTokenAsync(user);
    var passwordResetUrl = Url.Action("ResetPassword", "Account", new {id = user.Id, token = passwordResetToken}, Request.Scheme);

    await _messageService.Send(email, "Password reset", $"Click <a href=\"" + passwordResetUrl + "\">here</a> to reset your password");

    return Content("Check your email for a password reset link");
}
你可能會注意到,無論電子郵件是否屬於一個存在的用戶,用戶都將看到相同的消息。
你應該這樣做,因為如果你不這樣做,則可以使用此功能來發現用戶是否在你的站點中擁有帳戶。
控制器的其余部分只是生成token並發送電子郵件。
我們仍然需要構建ResetPasswordcontroller action來處理我們用電子郵件發送給用戶的鏈接。
[HttpPost]
public async Task<IActionResult> ResetPassword(string id, string token, string password, string repassword)
{
    var user = await _userManager.FindByIdAsync(id);
    if (user == null)
        throw new InvalidOperationException();

    if (password != repassword)
    {
        ModelState.AddModelError(string.Empty, "Passwords do not match");
        return View();
    }

    var resetPasswordResult = await _userManager.ResetPasswordAsync(user, token, password);
    if (!resetPasswordResult.Succeeded)
    {
        foreach(var error in resetPasswordResult.Errors)
            ModelState.AddModelError(string.Empty, error.Description);
        return View();
    }

    return Content("Password updated");
}
如果你想知道為什么我沒有在表單中添加token和用戶ID作為隱藏字段,這是因為MVC model binder會在url參數中找到它們。不過大多數示例(以及來自Visual Studio的個人用戶帳戶的默認模板)都將其添加為隱藏字段。
這個action沒有太多內容,只是使用_userManager.ResetPasswordAsync為用戶設置一個新的密碼。
注銷登陸
注銷一個用戶只需要使用SignInManager並調用SignOutAsync:
[HttpPost]
public async Task<IActionResult> Logout()
{
    await _signInManager.SignOutAsync();
    return Redirect("~/");
}
僅僅允許用戶使用Http Post 方式注銷絕對是個更好的方法。
請注意,為了簡單起見,我在示例中沒有這樣做。所以如果你照着做的話請不要添加[HttpPost](Index頁面有鏈接到/Account/Logout),或者將Index.cshtml中的注銷鏈接更改為發送到/Account/Logout的表單。
配置
你可能想知道,如果我選擇與AccountController不同的名稱,所有這些代碼還能工作嗎?也許你會將登錄action命名為SignIn而不是Login。
如果你這樣做是行不通的。例如,如果你在controller action中使用[Authorize]屬性,並且用戶導航到該操作的URL,則重定向將發送到 /Account/Login。
那么你怎么能改變設置呢?答案就是在Startup.cs的ConfigureServices中注冊Identity服務的時候指定配置。
以下是如何更改默認的登錄頁面:
services.ConfigureApplicationCookie(o =>
{
    o.LoginPath = "/Account/SignIn";
});
設置密碼要求,例如:
services.AddIdentity<IdentityUser, IdentityRole>(
    options =>
    {
        options.Password.RequireDigit = false;
        options.Password.RequiredLength = 6;
        options.Password.RequireLowercase = false;
        options.Password.RequireNonAlphanumeric = false;
        options.Password.RequireUppercase = false;
    }
    )
這將設置密碼限制為最少6個字符。
你還可以要求確認的電子郵件:
services.Configure<IdentityOptions>(options => {
    options.SignIn.RequireConfirmedEmail = true;
});
如果這只了要求電子郵件確認,那么你將不必檢查IdentityUser的EmailConfirmed屬性。當你嘗試使用SignInManager對用戶進行登錄時,會登錄失敗,並且結果將包含名為IsNotAllowed的屬性,而且它的值為true。
還有其他配置選項可供使用,例如帳戶被鎖定之前允許的嘗試次數以及被鎖定多長時間。
使用 SendGrid 真正的發送郵件
如果你真的想發送電子郵件,你可以使用SendGrid。這是一個電子郵件服務,他們有一個免費的Plan,所以你可以試試看。
你需要安裝它的nuget包(譯者注:這個也是不能忽略的):
SendGrid.NetCore
以下是使用SendGrid的IMessageService的實現:
public class SendGridMessageService : IMessageService
{
    public async Task Send(string email, string subject, string message)
    {
        var emailMessage = new SendGrid.SendGridMessage();
        emailMessage.AddTo(email);
        emailMessage.Subject = subject;
        emailMessage.From = new System.Net.Mail.MailAddress("senderEmailAddressHere@senderDomainHere", "info");
        emailMessage.Html = message;
        emailMessage.Text = message;

        var transportWeb = new SendGrid.Web("PUT YOUR SENDGRID KEY HERE");
        try{
            await transportWeb.DeliverAsync(emailMessage);
        }catch(InvalidApiRequestException ex){
            System.Diagnostics.Debug.WriteLine(ex.Errors.ToList().Aggregate((allErrors, error) => allErrors += ", " + error));
        }
    }
}
然后更新ConfigureService:
services.AddTransient<IMessageService, SendGridMessageService>();
全文完